Last updated: March 14, 2026
Kakuni is the Japanese technique for transforming a slab of fatty pork belly into spoon-tender, mahogany-glazed cubes that quiver when you nudge them with a chopstick. The name translates literally to ”square simmered” — kaku means square or cube, and ni means simmered — and that geometric precision is no accident. The technique is built around 5-centimeter blocks of pork belly that are blanched, then braised low and slow in a sweet-savory bath of soy sauce, sake, mirin, ginger and dashi until the connective tissue dissolves into gelatin and the fat melts into silk.
Mastering kakuni at home is one of those rare cooking projects where patience pays back in pure pleasure. Each block should be glossy on the outside, jiggly in the middle, and so tender it gives way to the side of a fork. Done right, it can headline a donburi rice bowl, top a bowl of shoyu ramen as chashu’s richer cousin, or anchor an izakaya-style spread alongside a poached egg and crisp pickles. This guide walks you through equipment, the ten critical steps, the mistakes that doom most first attempts, and the regional variations from Nagasaki to Okinawa that make kakuni one of the most rewarding braises in the Japanese repertoire.
What Is Kakuni and Where Does It Come From?
Kakuni (角煮) is a category of Japanese braised pork belly distinguished by its uniform cube shape, deeply caramelized exterior, and intensely concentrated, sweet-soy braising liquid. Unlike Western pot roasts that are sliced thin or shredded, kakuni is presented in proud, geometric blocks — usually 4 to 5 centimeters per side — that announce the work that went into them. The texture is the headline: the meat itself should be silky enough to break with chopsticks, while the fat layer should be translucent and clean rather than greasy.
The dish traces its origin to Nagasaki, the only Japanese port open to foreign trade during the Edo period (1603–1868). Chinese merchants and Dutch sailors arrived in waves, and Chinese cooks brought with them their own tradition of square-braised pork — dongpo rou from Hangzhou — which used Shaoxing wine, soy and rock sugar. Japanese cooks adapted the technique to local ingredients: sake replaced Shaoxing, mirin replaced rock sugar, and dashi entered the braising liquid to bring oceanic depth. The result became a cornerstone of shippoku ryori, Nagasaki’s hybrid Sino-Japanese banquet cuisine.
From there, kakuni spread across Japan with regional dialects. In Kagoshima, cooks use the area’s signature heavy soy sauce and a heavier hand with sugar. In Okinawa, the dish becomes rafute, simmered in awamori (a distilled rice spirit) and brown sugar with a lighter, redder finish. In Tokyo izakayas, kakuni is often portioned smaller and served alongside karashi hot mustard and a soft-boiled ajitama egg. Each version honors the core principle: long, gentle simmering until the pork can be cut with a chopstick.
The Science Behind the Texture: Why Kakuni Works
Three biochemical transformations happen in parallel during a proper kakuni braise, and understanding them will save you from every common failure. First, collagen converts to gelatin. Pork belly is layered with connective tissue, and that tissue is mostly collagen — a tough, triple-helix protein that stays rubbery below 160°F (71°C). Hold the meat between 180°F and 195°F (82–90°C) for two to three hours and those helices unwind into water-soluble gelatin, which is what gives the finished braising liquid its lip-sticking, almost gravy-like body.
Second, fat renders and clarifies. The fat layer of pork belly is around 50% of the cut’s mass. During a long simmer, fat cells rupture and release their contents into the liquid, where they float to the surface. Skimming this off is what separates clean, refined kakuni from a greasy, heavy braise. Cooks who don’t skim — or who simmer too aggressively, which emulsifies fat back into the liquid — end up with a coat-the-tongue, cloudy sauce.
Third, the Maillard reaction concentrates flavor in the glaze. Once the meat is tender, the final step is to reduce the braising liquid over higher heat. Amino acids from soy sauce react with sugars from mirin and added sugar to create melanoidins — the brown, complex flavor compounds that give kakuni its lacquered mahogany shine. Brushing reduced glaze repeatedly over the blocks during this stage is what produces the dish’s signature glossy finish. Get all three transformations right and the result is greater than the sum of its parts.
Choosing the Right Pork Belly
Kakuni lives or dies by the cut. You need skinless pork belly with at least three distinct, alternating layers of fat and meat — the classic ”five-layer” or samgyeop-style belly. Avoid bellies where one side is almost all fat or where the meat layer is paper-thin; uneven blocks will fall apart during simmering. The ideal slab is between 1.5 and 2 inches (4–5 cm) thick, which lets you cut perfect cubes without trimming away usable meat.
Whenever possible, buy a heritage breed like Berkshire (Kurobuta), Duroc, or Mangalitsa. Commodity industrial pork is bred for leanness, which is the opposite of what kakuni needs — the fat is where the flavor and unctuousness live. If your market sells buta no bara from a Japanese butcher, that’s the gold standard. In the US, Asian grocers often sell pork belly in skinless 2- to 3-pound slabs that are perfect for this dish. For broader guidance on heritage pork techniques, our guide to Cantonese crispy pork belly walks through how to evaluate a belly at the counter.
One critical note on the skin: traditional kakuni is made skinless. The skin will not soften adequately during a soy-sake braise the way it does in Chinese dongpo rou, where rock sugar concentrations are higher. If your belly comes with skin on, slice it off cleanly with a sharp knife before cutting blocks — save the skin for stock or render it crisp in the oven for a snack.
Essential Equipment for Kakuni
Kakuni is forgiving on equipment, but a few tools dramatically improve your odds. The single most important piece is a heavy-bottomed pot with a tight lid, ideally an enameled cast iron Dutch oven, a Japanese donabe clay pot, or a thick-walled stainless steel pot. The thick base distributes heat evenly so the bottom blocks don’t scorch, and the tight lid traps evaporation so you don’t have to top up liquid mid-braise. A 4- to 5-quart pot fits 1.5 to 2 pounds of pork belly comfortably with enough liquid to keep everything submerged.
You’ll also want an otoshibuta, or ”drop lid.” This Japanese kitchen staple is a flat disc — wooden, silicone, or improvised from parchment paper — that sits directly on the surface of the simmering liquid. It does three things at once: it keeps the pork submerged in flavor, it slows evaporation, and it gently presses the blocks so they cook through evenly. If you don’t have one, cut a circle of parchment paper to fit just inside your pot, snip a small hole in the center, and lay it on the liquid.
Round out the kit with a fine-mesh skimmer or ladle for removing scum and fat, a probe thermometer to confirm your braising temperature stays in the 180–195°F window, and a fat separator if you want to defat the finished sauce cleanly. A pressure cooker or Instant Pot is optional but useful for shortcuts — we’ll cover both classic and pressure methods below.
The Kakuni Braising Liquid: A Balanced Formula
The braising liquid is the soul of kakuni, and most home-cook failures come from getting the ratios wrong. The classic Nagasaki-style formula by volume is approximately 4 parts dashi : 2 parts soy sauce : 2 parts sake : 1 part mirin : 1 part sugar (by weight), with aromatics added on top. That ratio produces a liquid that’s salty enough to season deeply, sweet enough to glaze but not cloying, and rich enough in umami from dashi to give the sauce a savory backbone.
For 1.5 pounds (680 g) of pork belly, a reliable starting point is 2 cups dashi, 1 cup soy sauce, 1 cup sake, ½ cup mirin, and ½ cup sugar (granulated or light brown). The dashi can be the classic ichiban dashi from kombu and katsuobushi — our complete dashi guide walks through the technique — or a quick instant dashi powder dissolved in hot water. Use a Japanese soy sauce like Kikkoman or, for a more nuanced finish, a less-salty usukuchi style mixed with a small splash of dark tamari.
Aromatics typically include a 3-inch knob of fresh ginger sliced into coins, two or three crushed garlic cloves (optional but common), and the white parts of two leeks or scallions. Some cooks add a star anise pod for warmth or a small piece of dried kombu that stays in for the entire braise. Avoid bay leaves, peppercorns, or Western herbs — they pull the dish away from its Japanese register. Real mirin (not the corn-syrup ”mirin-style seasoning” found at supermarkets) is non-negotiable for proper glaze.
Step-by-Step: How to Make Kakuni from Scratch
The kakuni method has ten discrete steps, and each one matters. Don’t try to skip stages or compress them — you can stretch the timeline over two days, but you can’t bypass the chemistry. Plan for about 4 hours of cooking time spread over the day, plus an overnight rest in the fridge for the best texture and flavor penetration.
Step 1: Cut the Belly into Uniform Blocks
Lay the belly skin-side down on a cutting board with the long edge facing you. Trim away any obvious silverskin or scraggly edges, but leave the fat layer intact. Cut the slab first into long strips about 2 inches wide, then crosscut into 2-inch cubes. You want blocks that are slightly larger than bite-size — they’ll shrink by roughly 25% during braising. Discard any oddly shaped end pieces or save them for fried rice. Uniform geometry is critical: cubes that vary in size will cook unevenly, with smaller ones falling apart before larger ones tenderize.
Step 2: Blanch to Remove Impurities
Place the cubes in a large pot, cover with cold water by 2 inches, and add a few slices of ginger and a splash of sake. Bring to a hard boil over high heat, then reduce to a steady simmer and cook for 8 to 10 minutes. A grey-brown scum will rise to the surface — this is denatured blood proteins and impurities that would otherwise cloud your braising liquid. Skim aggressively. Don’t skip this step; blanching is what gives the finished sauce its clarity and clean flavor. After blanching, drain the cubes in a colander and rinse them gently under warm running water to wash away any clinging scum.
Step 3: Sear for Color (Optional but Recommended)
This step is debated among kakuni purists. Traditional Nagasaki-style kakuni skips searing entirely; modern Tokyo izakaya cooks usually sear for visual depth. We recommend it for the home cook because it adds a layer of Maillard flavor that no amount of simmering can replicate. Heat a dry, well-seasoned cast iron or carbon steel pan over high heat. Sear the blocks on all four large faces — about 60 seconds per side — until you have a deep brown crust. Don’t worry about the ends. Transfer the seared cubes directly to your braising pot.
Step 4: First Simmer in Water and Sake
Add the cubes to your heavy braising pot along with enough water and sake (about 80% water, 20% sake) to cover by an inch. Toss in your ginger coins and the white parts of one leek. Bring to a gentle simmer over medium-high heat, then drop the heat so the surface barely shimmers — you want around 185°F (85°C). Cover with a parchment otoshibuta and the regular pot lid slightly ajar. Simmer for 90 minutes. This phase tenderizes the meat in a neutral environment so the flavorful seasonings of the second simmer can penetrate without being trapped on the outside by tightened proteins.
Step 5: Cool and Defat
Lift the cubes out gently with a slotted spoon and set them aside on a plate. Strain the simmering liquid through a fine-mesh sieve into a fat separator or a tall, narrow container. Let it sit for 15 minutes, then pour off the clear liquid below the fat layer. Discard the rendered fat (or save it for frying — pork fat is fantastic for fried rice). You’ll be left with about a cup of clear, gelatin-rich first stock that you can either add back to the second braise or save for ramen broth. This defatting step is the difference between elegant, glossy kakuni and greasy, heavy kakuni.
Step 6: Build the Braising Liquid
Return the cubes to the cleaned pot. In a measuring cup, combine 2 cups dashi, 1 cup soy sauce, 1 cup sake, ½ cup mirin, and ½ cup sugar. Whisk until the sugar dissolves, then pour over the pork. The liquid should just barely cover the cubes — if it doesn’t quite reach, top up with a little more dashi. Add fresh ginger coins, a smashed garlic clove if using, and a small piece of kombu. Place a fresh parchment otoshibuta on top.
Step 7: The Main Braise
Bring everything to a bare simmer — small bubbles breaking the surface, never a rolling boil. Drop the heat to its lowest setting and let the pot whisper for 90 to 120 minutes. A probe thermometer should read between 185°F and 195°F (85–90°C). If your stove can’t go that low, set the pot on a diffuser, or move it to a 250°F (120°C) oven with the lid on. Check at the 90-minute mark: the cubes should yield easily to a chopstick poked into the meat side. If they resist, give them another 30 minutes. The fat should look translucent and pearlescent, the meat should be the color of polished mahogany.
Step 8: Rest Overnight (Highly Recommended)
This is the single most underrated step in home-kitchen kakuni. Once the cubes are tender, turn off the heat and let the pot cool to room temperature with the lid on — about an hour. Then refrigerate the entire pot, cubes and liquid together, overnight. Two things happen during the rest: flavors equalize and penetrate the center of each block, and the fat re-solidifies on the surface where you can lift it off in a clean disc. The next day, you’ll have firm cubes that hold their shape during reheating and a clear, jellied braising liquid that’s ready to be reduced into glaze.
Step 9: Reduce to a Glossy Glaze
Lift the cooled, jellied braising liquid into a wide saucepan or skillet, leaving the cubes behind for now. Bring the liquid to a steady simmer over medium-high heat and reduce by half to two-thirds. You’re looking for a syrupy consistency that coats the back of a spoon — about 15 to 20 minutes. Slide the cubes back in, lower the heat, and gently spoon the reducing glaze over them every 2 minutes for another 5 to 7 minutes. The cubes should go from matte mahogany to high-gloss lacquer. Don’t reduce so far that the glaze becomes a thick paste — it should still flow.
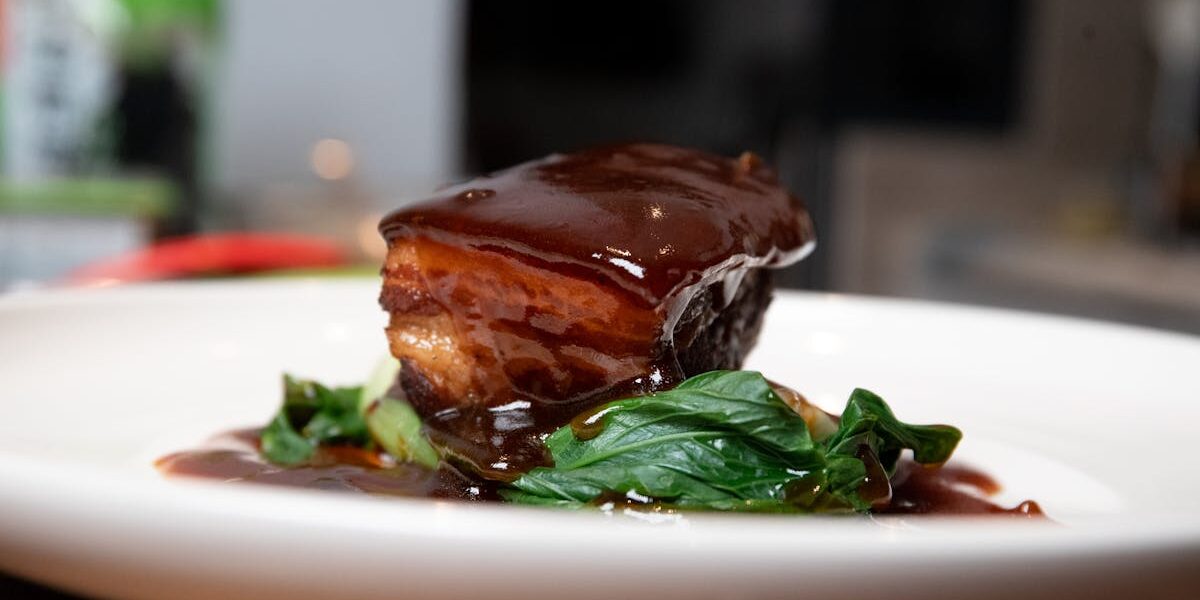
Step 10: Plate and Garnish
Transfer the cubes to a warmed shallow bowl, fat-side up. Spoon a generous amount of glaze over and around them. The classic Japanese garnishes are three: blanched baby komatsuna or spinach (a green counterpoint to the richness), a halved jammy ajitama soft-boiled egg, and a small mound of fresh karashi mustard or freshly grated ginger on the side. Some cooks add thinly sliced negi (Japanese leek) and a sprinkle of shichimi togarashi for a final aromatic lift. Serve immediately with steamed short-grain rice.
Common Mistakes and How to Fix Them
Most kakuni problems are diagnosable from the finished dish. The table below catalogs the most common failure modes, what they look and taste like, why they happened, and how to fix or avoid them next time.
| Problem | What You Notice | Root Cause | How to Fix |
|---|---|---|---|
| Tough, chewy meat | Cubes resist chopsticks; fibers feel stringy | Undercooked; collagen didn’t fully convert to gelatin | Return to simmer for another 30–60 minutes; check temp stays 185–195°F |
| Cubes fell apart | Blocks broke during braising or plating | Simmered too aggressively at rolling boil; meat agitated | Keep heat at bare simmer; use otoshibuta to limit motion |
| Greasy, heavy sauce | Liquid coats lips; visible oil slick | Skipped blanching or skimming; fat re-emulsified | Always blanch first; defat between simmers; chill overnight to skim solid fat |
| Bland, watery flavor | Pork tastes underseasoned despite long braise | Too much liquid; ratio diluted; insufficient reduction | Reduce braising liquid until syrupy before final glaze |
| Overly salty or harsh | Soy flavor dominates; can’t taste pork or sweetness | Too much soy sauce or used dark soy as base | Use Japanese light soy (Kikkoman); balance with mirin and sugar |
| Cloudy, murky braising liquid | Sauce looks muddy rather than glossy | Didn’t blanch; impurities clouded the liquid | Blanch and rinse before main braise; strain liquid before reducing |
| Fat layer rubbery | White fat refuses to melt in the mouth | Insufficient braising time; fat needs longer to render | Extend main braise; ensure cubes stay submerged in hot liquid |
| Burnt, bitter sauce | Caramel notes turn acrid during reduction | Heat too high during final glaze; sugar scorched | Reduce on medium, not high; remove from heat if smoking |
| Sweet-only, no depth | Tastes like candy, lacks savory backbone | Skipped dashi; used artificial mirin substitute | Always use real dashi and real hon-mirin; never skip ginger |
| Uneven texture across cubes | Some pieces tender, others tough | Cubes cut unevenly; some too large or thin | Cut uniform 2-inch blocks; trim irregular pieces |
Pressure Cooker and Instant Pot Kakuni
If you don’t have 4 hours, a pressure cooker can deliver passable kakuni in about 70 minutes of active time. The compromise is texture nuance — pressure-cooked kakuni tends to be a touch more uniform and a fraction less silky than long-simmered, but for a weeknight it’s a real shortcut. Start by blanching the cubes on the stovetop as in Step 2 — this is non-negotiable even in the pressure cooker, because trapped impurities will compound at higher pressure.
After blanching, sear if desired, then add the cubes to your Instant Pot or stovetop pressure cooker along with the full braising liquid (dashi, soy, sake, mirin, sugar, aromatics). Seal and cook on high pressure for 30 minutes, then allow a 20-minute natural release. Open the pot, fish out the cubes, and reduce the liquid uncovered for 15 minutes either in the cooker on sauté mode or in a separate pan. Return cubes to the glaze for the final coating. Refrigerating overnight still improves the result dramatically — even pressure-cooked kakuni benefits from time.
Regional Variations Across Japan and Beyond
Kakuni isn’t a single recipe but a family of related braises, each shaped by its regional larder. Understanding the variations helps you adapt the technique to what you have and to your own taste. The major styles are:
| Regional Style | Region | Distinguishing Features | Signature Ingredients |
|---|---|---|---|
| Nagasaki Kakuni | Nagasaki, Kyushu | The original; Chinese-influenced; deeply sweet-savory; served with steamed buns | Brown sugar, ginger, kombu dashi, scallion whites |
| Tokyo Izakaya Kakuni | Kanto region | Smaller portions; cleaner sweetness; often served with mustard and egg | Hon-mirin, light soy, ginger, ajitama egg |
| Okinawan Rafute | Okinawa | Lighter color; uses awamori spirit; sometimes simmered with skin on | Awamori, brown sugar, awase miso (rare) |
| Kagoshima Buta no Kakuni | Kyushu | Heavier soy character; uses the local Berkshire pork (Kurobuta) | Kagoshima dark soy, black vinegar splash, brown sugar |
| Hakata Buta no Bara Ni | Fukuoka | Often served over rice in donburi style; richer dashi base | Tonkotsu-style pork stock blended with dashi |
| Chinese Dongpo Rou | Hangzhou (origin) | The ancestor of kakuni; uses Shaoxing wine instead of sake; sometimes skin-on | Shaoxing wine, rock sugar, dark soy, star anise |
| Taiwanese Lu Rou | Taiwan (variant cousin) | Smaller diced pork in similar profile; served over rice as lu rou fan | Five-spice, shallots, rock sugar, dark soy |
If you’ve mastered Japanese kakuni and want to explore its Chinese roots, see our companion article on Chinese red-braising (hong shao), which uses many of the same principles with a different aromatic register. For a deeper dive into the long-life braising liquid technique that some kakuni cooks use to enrich each successive batch, our guide to Chinese master stock (lu shui) covers the principles in detail.
Practice Exercises: Build Your Kakuni Intuition
Kakuni rewards deliberate practice. The five exercises below are designed to build specific skills in isolation so that when you assemble them into a full braise, each step is second-nature. Run through them over the course of two or three weekends and your finished kakuni will improve dramatically.
Exercise 1: The Knife Test
Buy a small (1 lb) piece of pork belly and practice cutting eight identical 2-inch cubes. Use a calipers or ruler to measure each one. Aim for all eight to be within 5mm of each other on each dimension. This sounds fussy but uniform cuts mean uniform cooking — and uniformity is the single biggest variable separating restaurant kakuni from home kakuni.
Exercise 2: The Blanch Comparison
Divide your cubes in half. Blanch one batch for 10 minutes and skim aggressively. Skip blanching the other batch entirely. Continue the same braise with both, side by side in separate pots. After braising, taste and compare the broths. The blanched broth will be clean, the unblanched will be cloudy and muddy. This is the most convincing case you’ll ever see for not skipping Step 2.
Exercise 3: The Temperature Trial
Cook the same kakuni recipe three times: once at a rolling boil, once at a gentle simmer (185°F), and once in a 250°F oven. Use a probe thermometer to confirm. Sample each on a fork. The boiled batch will be drier and stringier; the simmered batch will be silkier; the oven batch will be the most uniform. This builds intuition for what ”gentle simmer” really feels like.
Exercise 4: The Glaze Reduction
Make a 1-cup batch of the kakuni braising liquid (without pork) and practice reducing it to the right consistency. Watch for the moment when the liquid coats the back of a wooden spoon — a finger drawn across the back of the spoon should leave a clean trail that doesn’t immediately refill. This visual cue is reliable across batches and ingredients.
Exercise 5: The Overnight Rest
Make a single batch of kakuni. Eat half the day you make it. Refrigerate the other half overnight in its liquid. The next day, reheat gently. Taste both halves side by side. The overnight version will be noticeably better — denser, more uniformly seasoned, with a tighter texture. Once you’ve tasted the difference, you’ll never skip this step again.
Advanced Tips from Professional Kakuni Cooks
Once you’ve nailed the basic technique, these refinements push kakuni from very good to memorable. Most come from observing izakaya cooks and washoku chefs who have made the dish thousands of times.
- Tie each block with kitchen twine. Wrap each cube once with cotton twine before braising. The twine keeps the cube from delaminating along the fat seams during the long simmer. Cut off and discard before serving.
- Use a double-dashi approach. Make a strong ichiban dashi for the main braising liquid and use the lighter niban dashi for the first simmer. This layers umami depth.
- Add a small piece of leek skin. The papery outer layers of negi (Japanese leek) add a subtle pungent note that disappears as a discrete flavor but leaves a rounded aromatic background.
- Reduce in stages. Reduce the braising liquid in two passes — first to about ⅔, then strain, then reduce the final third to glaze consistency. This produces a clearer, cleaner glaze.
- Brush with hon-mirin at the very end. Just before serving, brush each cube with a thin layer of unheated hon-mirin. The aroma of fresh mirin lifts the dish.
- Reserve braising liquid for the next batch. Strain and freeze the final braising liquid. Use it as a base for your next kakuni — over time the liquid develops the depth of a master stock.
- Try a katsuobushi finish. A pinch of fine katsuobushi flakes added to the final glaze adds smoky umami without changing the visual register.
- Match the dish to the pork. Heavier soy and brown sugar with Kurobuta or other heritage breeds; lighter soy and granulated sugar with leaner commodity belly.
- Serve at the right temperature. Kakuni shines at 140–150°F (60–66°C). Too hot and the fat reads as oil; too cool and it congeals on the palate.
- Mind the rice. Pair with short-grain Japanese rice (Koshihikari or Akitakomachi), never long-grain or jasmine. The rice must absorb glaze without breaking.
How to Serve Kakuni: Five Classic Presentations
The same kakuni can headline several distinct dishes. Knowing the standard presentations gives you a versatile playbook.
- Kakuni Teishoku. The traditional set meal: three to four cubes of kakuni in a shallow bowl with glaze, a side of steamed rice, miso soup, blanched greens, and a small pickle plate. This is how it’s served in old Tokyo izakayas.
- Kakuni Donburi. Two or three cubes sliced lengthwise and fanned over a bowl of hot rice with glaze poured over. Garnished with shredded scallion, a halved ajitama egg, and a pinch of shichimi togarashi.
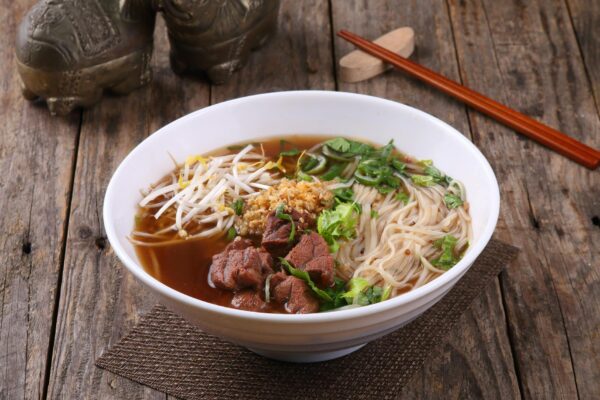
- Kakuni Ramen Topping. Cubes sliced thin and laid over a steaming bowl of homemade ramen broth with noodles, menma, and chopped negi. The kakuni glaze enriches the broth as the cube dissolves.
- Kakuni Bao Buns. Tuck a cube into a steamed white mantou-style bun with pickled mustard greens and a smear of karashi mustard. This Nagasaki specialty (called kakuni manju) was the original Sino-Japanese fusion.
- Kakuni Salad. A modern izakaya plate: sliced cold kakuni fanned over crisp lettuce, cucumber and shiso, dressed with a ponzu-soy vinaigrette. Bright and refreshing contrast to the richness.
Storing, Freezing, and Reheating Kakuni
Kakuni is one of the best make-ahead Japanese dishes — arguably it’s better the second day than the first. Stored properly, it keeps beautifully for a week in the fridge and three months in the freezer. The keys are temperature, submersion, and gentle reheating.
Refrigerator (up to 7 days). Cool the kakuni in its braising liquid to room temperature with the lid on, then transfer cubes and liquid together into a tight-sealing container. Make sure the cubes are fully submerged — exposed pork dries out and discolors. Refrigerate immediately. To reheat, gently warm a portion in a small saucepan over low heat, basting with the liquid, until heated through (about 8 minutes). Do not microwave from cold; the fat won’t render evenly and texture suffers.
Freezer (up to 3 months). Portion the kakuni into freezer bags or rigid containers with enough braising liquid to cover. Freeze flat for fastest thaw. To use, transfer to the refrigerator and thaw overnight, then reheat as above. Texture holds remarkably well thanks to the gelatin in the braising liquid, which protects the meat fibers from freezer damage. Avoid the temptation to freeze cubes without liquid — they’ll oxidize and develop off-flavors.
Recipe: Classic Nagasaki-Style Kakuni
A clean, balanced recipe in the Nagasaki tradition. Serves 4 to 6 as a main course with rice and sides.
Ingredients: 1.5 lbs (680 g) skinless pork belly, 2-inch thick slab; 2 cups dashi; 1 cup Japanese soy sauce; 1 cup sake; ½ cup hon-mirin; ½ cup light brown sugar; 4-inch knob fresh ginger, sliced into coins; 2 leeks, white parts only, smashed; 1 piece kombu (4-inch square); 4 soft-boiled eggs (optional, for serving); blanched spinach; karashi mustard for serving.
Method: Cut belly into 2-inch cubes. Blanch in water with ginger and a splash of sake for 10 minutes. Drain and rinse. Sear all four sides over high heat. Transfer to a heavy pot with water, sake, ginger, leek, and kombu. Simmer 90 minutes at 185°F under a parchment otoshibuta. Lift cubes out, defat liquid, and discard. Return cubes to pot. Add dashi, soy sauce, fresh sake, mirin, and sugar. Simmer 90 minutes more at 185°F. Cool, refrigerate overnight. The next day, lift cubes from the jellied liquid. Reduce liquid by half. Return cubes and glaze for 5–7 minutes. Serve hot over rice with spinach, egg, and mustard.
Recipe: Quick-Method Kakuni Donburi
For weeknights when you have a pressure cooker but no 4 hours. Serves 2.
Ingredients: ¾ lb (340 g) pork belly cut into 1.5-inch cubes; 1 cup dashi; ½ cup soy sauce; ½ cup sake; ¼ cup mirin; ¼ cup brown sugar; 2-inch ginger sliced; 1 scallion white; 2 cups cooked short-grain rice; 2 soft-boiled eggs; shichimi togarashi; sliced scallion greens for garnish.
Method: Blanch cubes 8 minutes; drain. Sear if desired. Place in pressure cooker with all braising liquid ingredients. Cook at high pressure 30 minutes; natural release 20 minutes. Open, remove cubes, reduce liquid uncovered 12 minutes. Return cubes to glaze for 3 minutes. Plate over hot rice, top with halved egg, drizzle remaining glaze, garnish with scallion and shichimi.
Pairing Kakuni: Sides, Drinks, and Menus
Kakuni’s richness demands sharp, clean accompaniments. Avoid heavy or fatty sides — the dish is already a fat-forward statement. Build a balanced plate around acidity, bitterness, and bite.
- Pickles: Sharp Japanese pickles like nukazuke (rice bran pickles), shibazuke (purple eggplant), or quick-cured daikon cut through the fat beautifully.
- Greens: Blanched komatsuna, spinach, or baby bok choy with a splash of soy and toasted sesame oil. The cleaner the green, the better the contrast.
- Rice: Plain steamed short-grain Japanese rice — Koshihikari or Akitakomachi — is the standard. Don’t season it; the kakuni glaze provides all the seasoning the rice needs.
- Soup: A light miso soup with tofu and wakame, or a clear osuimono with seasonal vegetables. The umami of miso paste echoes the dashi in the braise.
- Drinks: Junmai-class sake served slightly warm (40–45°C) is the classic match. Highballs (Japanese whisky and soda) work for a modern izakaya feel. For non-alcoholic, cold hojicha or unsweetened oolong tea cleanses the palate.
Frequently Asked Questions About Kakuni
Can I make kakuni without sake?
Sake plays two roles in kakuni — it tenderizes proteins and adds aromatic complexity — so removing it weakens the dish. If you must, substitute dry sherry or, in a pinch, Shaoxing wine (which pulls the dish toward Chinese dongpo rou territory). Don’t substitute white wine; the acid balance is wrong. Cooking sake (called ryōrishu) is fine and cheaper than drinking sake.
Why is my kakuni dry even though I braised it for hours?
Dry kakuni almost always means the braise ran too hot. If your liquid was boiling rather than simmering, the meat fibers contract and squeeze out moisture faster than the collagen can convert. Drop the heat to where you see only occasional bubbles breaking the surface and use a probe thermometer to keep things in the 185–195°F range.
Can I use pork shoulder instead of pork belly?
Pork shoulder works as a substitute but produces a different dish — closer to a hearty Western braise than to true kakuni. You lose the alternating fat-meat layers that define the texture. If you must use shoulder, look for a fatty cut with plenty of marbling and adjust cooking time down to about 90 minutes total since shoulder tenderizes faster than belly.
Is kakuni the same as Chinese dongpo rou?
They share a common ancestor and the same square-block presentation, but the seasoning profiles are distinct. Dongpo rou uses Shaoxing wine, rock sugar, dark soy, and often star anise — its flavor is warmer and slightly sweeter. Kakuni uses sake, mirin, dashi, and lighter soy — its flavor is more savory-umami with a cleaner sweetness. Both are excellent; they’re different expressions of the same idea.
Do I need to use real hon-mirin, or is mirin-style seasoning okay?
For kakuni, use real hon-mirin. The fermented rice sweetness and slight alcohol of true mirin contribute to both flavor and glaze formation. Mirin-style seasoning (often labeled mirin-fu chōmiryō) is essentially corn syrup and salt — it will make the dish taste flat and one-dimensional. The price difference is small for the quality jump.
Can I skip the overnight rest?
You can, but you shouldn’t. The overnight rest is when flavors fully penetrate the center of each cube and when the fat solidifies on the surface where it can be easily skimmed. Same-day kakuni is decent; overnight kakuni is transcendent. If you absolutely can’t wait, at least let the cooked kakuni cool to room temperature in its liquid, then chill it in an ice bath for 30 minutes before reheating and glazing.
What’s the right way to reheat leftover kakuni?
Always reheat in liquid. Place the cubes in a small saucepan with a few tablespoons of their braising liquid, cover, and warm over low heat for 6–8 minutes, turning once. Spoon liquid over the cubes as they heat. Avoid the microwave — direct heat dries the meat and breaks the glaze. If you must use a microwave, do it at 50% power in short bursts with the cubes submerged in liquid.
Can I make kakuni in advance for a dinner party?
Absolutely — kakuni is one of the most party-friendly braises in any cuisine. Make it 1 to 3 days ahead through the overnight rest step. On the day of, you only need to reduce the liquid and reglaze, which takes 20 minutes. The dish actually improves with the extra time, and you free yourself from last-minute cooking.
Is kakuni gluten-free?
Standard kakuni is not gluten-free because Japanese soy sauce contains wheat. To make a gluten-free version, substitute tamari (a wheat-free Japanese soy) at a 1:1 ratio. Confirm your dashi, mirin, and sake are also gluten-free — some brands of cheap mirin and instant dashi can contain wheat derivatives. The braising technique itself is unchanged.
How do I scale the recipe up for a crowd?
Kakuni scales linearly up to about 4 lbs of pork belly in a single pot. Beyond that, use multiple pots — a single overcrowded pot won’t simmer evenly and the bottom layer will compress. Keep ingredient ratios the same. Cooking time doesn’t change with batch size, since each cube cooks independently in the liquid; what changes is the volume of liquid needed to keep everything submerged.
Final Thoughts: Why Kakuni Is Worth Learning
Kakuni is one of those dishes that announces the difference between cooking and craft. Anyone can throw pork into soy sauce and walk away — but it takes attention to coax pork belly into the silky, jiggly, lacquered cube that defines proper kakuni. The technique teaches patience (you can’t rush collagen conversion), restraint (the recipe is short and ratios matter), and the value of resting (overnight changes everything). Once you’ve made it three or four times, the rhythm becomes second nature, and a Sunday afternoon kakuni session becomes one of the most satisfying projects in the home kitchen.
What makes kakuni special is its versatility. The same cubes can headline a formal teishoku set, sit atop a steaming bowl of shoyu ramen, fill a Nagasaki bao bun, or be folded into a quick fried rice the next morning. The braising liquid itself becomes a treasure — strain it, save it, and use it to enrich your next batch or to braise eggs, daikon, or tofu. Few dishes give back as much for so little active work. Put on your favorite music, pour yourself something cold, and spend an afternoon braising. The result will be the kind of dinner that people remember.

Mei Lin Chen
Mei Lin Chen is an Asian food writer and recipe developer. Melbourne-raised and London-based, she has spent over a decade exploring the rice paddies, hawker stalls, and home kitchens of South-East and East Asia. Her recipes balance traditional technique with everyday practicality.