Last updated: March 13, 2026
Chili oil is the backbone of countless Asian dishes, from Sichuan noodles to Korean fried chicken glazes. Learning how to make chili oil at home unlocks a world of customizable heat, fragrance, and depth that no store-bought bottle can match. Whether you call it la you, chili crisp, or simply red oil, mastering this technique transforms your cooking overnight.
This guide covers everything you need to know about making chili oil from scratch: the science behind the infusion, the equipment required, step-by-step instructions for multiple styles, common mistakes to avoid, and advanced variations that will take your homemade chili oil to the next level. By the end, you will have the confidence to create your own signature blend tailored to your palate.
What Is Chili Oil?
Chili oil is a condiment made by infusing oil with dried chili peppers and aromatics. At its simplest, it is just two ingredients: oil and chili flakes. At its most complex, it becomes a layered masterpiece incorporating dozens of spices, fermented ingredients, and crunchy toppings.
The technique originated in Sichuan province, where la you (辣油, literally ”spicy oil”) has been a kitchen staple for centuries. Sichuan cooks discovered that pouring hot oil over ground chili peppers coaxes out their fat-soluble capsaicin and carotenoids, creating a vibrant red oil with intense heat and flavor. The technique then spread across China and into neighboring cuisines, each region developing its own variation.
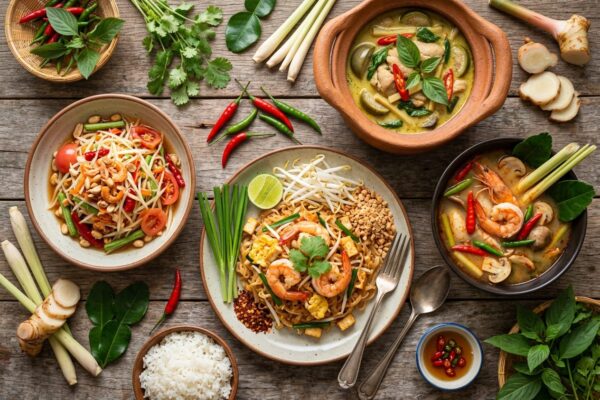
Today, chili oil appears in virtually every Asian cuisine. In China, it tops dan dan noodles and mapo tofu. In Japan, rayu is drizzled over ramen. In Korea, gochu-gireumis used in bibimbap sauces. In Southeast Asia, variations with garlic, shallots, and fish sauce add complexity to everything from rice to grilled meats.
Types of Chili Oil Across Asia
Before you start making chili oil, it helps to understand the major styles so you can decide which direction to take. Each type reflects the flavor priorities of its home cuisine.
Sichuan La You (Chinese Red Oil): The classic version. Uses Sichuan chili flakes (er jing tiao or facing heaven peppers), Sichuan peppercorns, star anise, and bay leaves infused in rapeseed or vegetable oil. The result is a deeply red, aromatic oil with a balance of heat, numbing sensation (ma la), and fragrance. This is the foundation style that most other chili oils derive from.
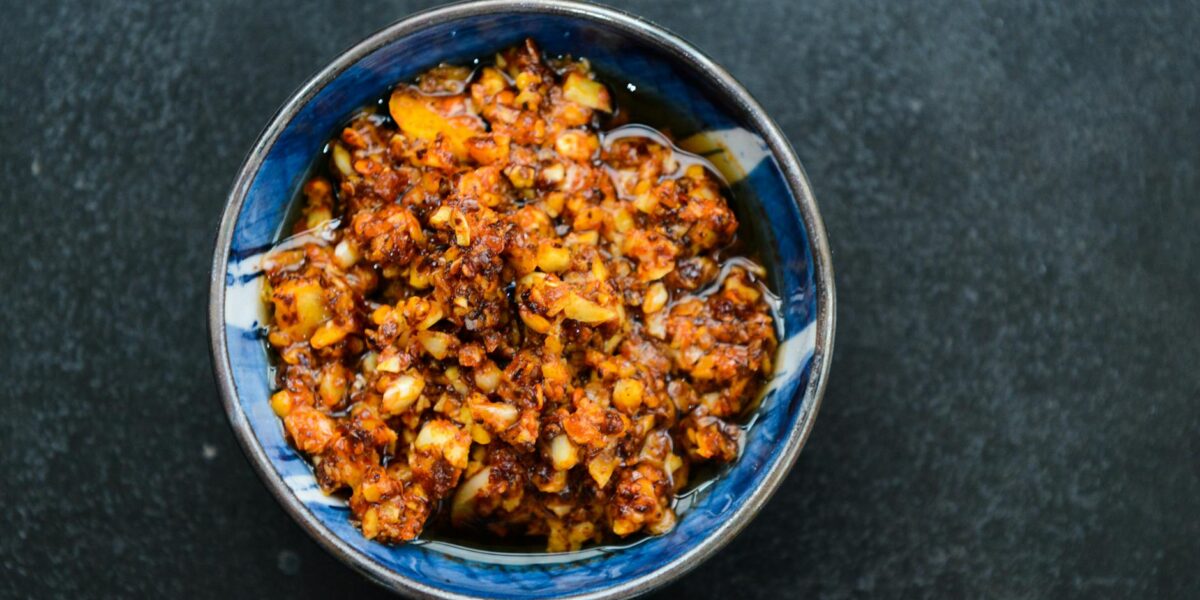
Chili Crisp (La Jiao Jiang): A textured version popularized globally by Lao Gan Ma brand. Contains fried shallots, garlic, fermented black beans, peanuts, and sesame seeds in addition to chili. The solids are as important as the oil. This is the style most Western home cooks want to recreate.
Japanese Rayu: A milder, more sesame-forward oil. Uses toasted sesame oil blended with neutral oil and ichimi togarashi (ground red pepper). Often seasoned with soy sauce or dashi. Less heat, more umami.
Korean Gochu-Gireum: Made with gochugaru (Korean chili flakes), which provide fruity, moderately spicy flavor with a distinctive sweetness. Often includes garlic and sesame oil. Used as a finishing oil for soups, rice, and bibimbap.
Southeast Asian Chili Oil: Variations from Thailand, Vietnam, and Indonesia tend to include shrimp paste, fish sauce, lemongrass, and galangal. These oils carry a savory, funky depth that pairs perfectly with rice dishes and spring rolls.
Essential Equipment for Making Chili Oil
One of the best things about making chili oil is that it requires minimal equipment. You probably already have everything you need in your kitchen.
Heatproof bowl or jar: This is where you will pour the hot oil over the chili flakes. Glass, ceramic, or stainless steel all work. Avoid plastic, which can melt or leach chemicals at high temperatures. A wide-mouth mason jar or a large Pyrex measuring cup is ideal.
Heavy-bottomed saucepan or wok: You need a vessel that heats oil evenly and retains heat well. A carbon steel wok or a 2-quart stainless steel saucepan works perfectly. Avoid thin aluminum pans, which create hot spots that can burn spices.
Thermometer: Oil temperature is the single most critical variable in making chili oil. An instant-read thermometer or a clip-on candy thermometer removes all guesswork. You are aiming for 275 to 375 degrees Fahrenheit depending on the stage.
Fine-mesh strainer: Useful for removing whole spices from the oil before pouring. Some recipes leave everything in, but straining gives you more control over the final texture.
Spice grinder or mortar and pestle: For grinding whole dried chilies to your preferred coarseness. A mortar and pestle gives you more control over the grind size. Pre-ground chili flakes work too, but freshly ground peppers have significantly more aroma.
Storage jars: Chili oil keeps for months in airtight glass jars stored in a cool, dark place. Wide-mouth jars make it easy to scoop out the flavorful sediment at the bottom.
Choosing the Right Ingredients
Great chili oil starts with great ingredients. Here is what to look for when sourcing each component.
Dried Chilies
The type of chili you use determines the color, heat level, and flavor profile of your oil. Most authentic Sichuan recipes use a blend of two or three varieties for complexity.
Er Jing Tiao (二荆条): The workhorse Sichuan chili. Moderately hot with outstanding red color and a pleasant, slightly sweet fragrance. This is the chili that gives Sichuan la you its signature look.
Chao Tian Jiao (朝天椒, Facing Heaven Peppers): Hotter than er jing tiao with a compact, bullet shape. Named because the peppers grow pointing upward. These provide the heat punch in chili oil blends.
Deng Long Jiao (灯笼椒, Lantern Peppers): Mild and round, these contribute deep red color and mild fruity sweetness without much heat. Great for boosting color.
Gochugaru (Korean Chili Flakes): Coarsely ground, fruity, and moderately spicy. Perfect for Korean-style chili oil or when you want a milder, sweeter result.
For a well-balanced Sichuan-style blend, use roughly 60 percent er jing tiao, 30 percent chao tian jiao, and 10 percent deng long jiao. If you cannot find these specific varieties, a combination of any medium-heat Asian chili flakes (like Tien Tsin peppers) will work.
Oil
The oil you choose affects both flavor and shelf life. Here are the most common options:
Rapeseed oil (canola): The traditional Sichuan choice. Mild flavor that lets the chili and spice aromatics shine. Heat the oil to its smoke point first (around 400 degrees Fahrenheit), then let it cool to the target temperature. This step, called ”ripening” the oil, removes the raw taste and improves the final flavor.
Vegetable or peanut oil: Neutral-flavored alternatives that produce clean, bright chili oil. Peanut oil adds a subtle nuttiness that works well with chili crisp styles.
Sesame oil: Used in Japanese rayu and Korean variations. Because sesame oil has a low smoke point, it is usually blended 50/50 with a neutral oil rather than used alone.
Aromatics and Spices
These transform plain chili oil into something extraordinary. Common additions include:
- Sichuan peppercorns: Essential for ma la (numbing-spicy) flavor. Use green for citrusy notes or red for classic warmth.
- Star anise: Adds a warm, licorice-like depth. One or two pods is enough for a cup of oil.
- Cassia bark or cinnamon: A small piece provides warm sweetness without being identifiable as cinnamon in the final oil.
- Bay leaves: One or two leaves contribute subtle herbal complexity.
- Fennel seeds: Common in Sichuan blends. Adds a slight anise note that complements the peppercorns.
- Garlic: Sliced thin and fried crispy, garlic is essential for chili crisp. Raw garlic can go into the flake mixture for a sharper flavor.
- Shallots or onion: Fried until golden and crispy, these add sweetness and crunch to chili crisp.
- Ginger: A few slices infused in the oil and removed before pouring add warm, clean notes.
- Fermented black beans (douchi): The secret ingredient in many chili crisp recipes. Adds deep umami and savory complexity.
- Sesame seeds: White sesame seeds, lightly toasted, add nuttiness and visual appeal.
How to Make Chili Oil: Step-by-Step
This master recipe produces a versatile Sichuan-style chili oil that works as a base for any variation. It makes about 2 cups.
Ingredients
- 2 cups neutral oil (rapeseed, vegetable, or peanut)
- 1 cup dried chili flakes (ideally a blend as described above)
- 1 tablespoon Sichuan peppercorns
- 3 star anise pods
- 1 small piece cassia bark or cinnamon stick (about 2 inches)
- 2 bay leaves
- 1 teaspoon salt
- 1 teaspoon sugar
- 1 tablespoon white sesame seeds
- Optional: 2 tablespoons Shaoxing wine added to chili flakes
Step 1: Prepare the Chili Flakes
Place the chili flakes in your heatproof bowl. Add the salt, sugar, and sesame seeds. Stir to combine. If using Shaoxing wine, drizzle it over the flakes and mix. The wine adds flavor and helps prevent the flakes from burning when the hot oil hits them. This small amount of moisture creates a brief burst of steam that gently blooms the chili before the oil temperature sears in the color and aroma.
Step 2: Heat and Infuse the Oil
Pour the oil into your saucepan or wok. Add the Sichuan peppercorns, star anise, cassia bark, and bay leaves. Place over medium heat and bring the oil temperature to around 275 to 300 degrees Fahrenheit. You will see tiny bubbles forming around the spices.
Let the spices infuse for 15 to 20 minutes at this temperature. The oil should be gently bubbling, not vigorously frying the spices. You want a slow extraction of flavors. The kitchen will fill with an incredible fragrance. When the spices darken slightly and the oil smells deeply aromatic, it is ready.
Remove and discard the whole spices using a fine-mesh strainer or slotted spoon. Now increase the heat to bring the oil to approximately 350 to 375 degrees Fahrenheit. Use your thermometer to verify. This is the critical pouring temperature.
Step 3: The Three-Stage Pour
This is the technique that separates great chili oil from mediocre chili oil. Instead of dumping all the hot oil at once, pour it in three stages at slightly different temperatures. Each stage activates different flavor compounds in the chili flakes.
First pour (about one-third of the oil at 350 to 375 degrees Fahrenheit): Pour slowly and stir immediately. The oil will sizzle aggressively and the chili flakes will darken. This initial blast of heat releases the fat-soluble capsaicin and creates the deepest, darkest color. The flakes will foam and bubble. Keep stirring to prevent burning.
Second pour (another one-third at 300 to 325 degrees Fahrenheit): Wait 2 to 3 minutes for the oil to cool slightly in the pan, then pour the second batch. This gentler heat extracts more aromatic compounds without the harshness of extreme temperature. Stir again.
Third pour (remaining oil at 250 to 275 degrees Fahrenheit): After another 2 to 3 minutes, pour the final batch. This lower-temperature oil preserves the most delicate volatile aromatics and brings the overall mixture to a balanced temperature. Stir one final time.
Step 4: Rest and Store
Let the chili oil cool completely at room temperature, uncovered, for at least 2 hours. During this time, the flavors meld and the sediment settles. Once cool, transfer to clean glass jars with tight-fitting lids. The oil will taste good immediately but reaches its peak flavor after 24 to 48 hours of resting.
Stored in a cool, dark place, homemade chili oil keeps for 3 to 6 months. Refrigeration extends the life further but may cause the oil to solidify, which is harmless and reverses at room temperature.
The Science Behind Chili Oil
Understanding why each step matters helps you troubleshoot problems and develop your own variations with confidence.
Capsaicin extraction: Capsaicin, the compound responsible for chili heat, is fat-soluble but not water-soluble. This is why oil is the perfect medium for extracting it. Higher temperatures dissolve more capsaicin from the dried chili cell walls, but temperatures above 400 degrees Fahrenheit begin to break capsaicin down, actually reducing the heat level.
Maillard reaction: When hot oil hits dried chili flakes, the sugars and amino acids in the pepper undergo the Maillard reaction, creating hundreds of new flavor compounds. This is the same reaction that makes bread crusts and seared steaks taste so good. The three-stage pour controls how much browning occurs, preventing the bitterness that comes from over-charring.
Carotenoid release: The vivid red color of chili oil comes from carotenoids, particularly capsanthin and capsorubin. These pigments are fat-soluble and dissolve readily in hot oil. Temperature control is key here: too low and the color extraction is incomplete, yielding a pale, lackluster oil. Too high and the carotenoids oxidize, turning the oil brown instead of red.
Volatile aromatic compounds: The fragrance of Sichuan peppercorns, star anise, and other spices comes from volatile essential oils. These compounds evaporate easily at high temperatures, which is why you infuse them at a lower temperature (275 to 300 degrees) and for a longer time rather than blasting them with extreme heat. The low-and-slow infusion captures these aromatics in the oil before they can escape as steam.
Common Mistakes When Making Chili Oil
Even experienced cooks can run into trouble with chili oil. Here are the most common pitfalls and how to avoid them.
| Mistake | What Happens | How to Fix It |
|---|---|---|
| Oil too hot (above 400°F) | Chili flakes turn black instantly, oil tastes bitter and acrid | Always use a thermometer. If the oil starts smoking, remove from heat and let it cool to 350-375°F before the first pour |
| Oil too cold (below 225°F) | Pale color, weak flavor, raw-tasting chili flakes | The oil should sizzle vigorously when it hits the flakes. If there is no sizzle, the oil is not hot enough. Reheat and try again |
| Pouring all oil at once | Uneven extraction: some flakes burn while others remain raw | Use the three-stage pour method described above for balanced heat and color |
| Not straining whole spices | Spices continue to infuse and become bitter over time | Remove whole spices before the pour. Ground spices like Sichuan peppercorn powder can stay |
| Using pre-ground chili powder | Fine powder burns easily and creates a muddy, gritty texture | Use coarsely ground chili flakes, not fine powder. The ideal texture is like crushed red pepper flakes |
| Wet or damp chilies | Violent sputtering when oil is poured, safety hazard | Ensure chili flakes are completely dry. Toast them briefly in a dry pan if unsure |
| Wrong oil choice | Strong-flavored oils overpower the chili; low smoke point oils burn | Use neutral, high smoke point oils as your base. Add sesame oil after cooling if desired |
| Not enough resting time | Flavor has not fully developed | Wait at least 24 hours before using for best results. The oil improves over the first few days |
| Storing in direct sunlight | Rapid oxidation and loss of color and flavor | Store in dark glass or in a cupboard away from light and heat |
| Adding fresh garlic too early | Raw garlic in oil creates risk of botulism over time | Fry garlic until completely crispy and golden before adding to the oil. No moisture should remain |
Practice Exercises to Build Your Skills
Making chili oil is a technique that improves with practice. Here are five exercises that will help you develop confidence and an intuitive feel for the process.
Exercise 1: Temperature Calibration. Make a small batch (half cup of oil) and practice hitting your target temperatures with a thermometer. Pour at exactly 350°F and note the sizzle level, color change, and aroma. Then make another small batch and pour at 300°F. Compare the two. This teaches you what each temperature looks, sounds, and smells like so you can eventually work without a thermometer.
Exercise 2: Single-Chili Tasting. Make three small batches of chili oil, each with a single variety of chili pepper. Taste them side by side. This exercise teaches you how each chili contributes to the final blend and helps you design your own custom ratios.
Exercise 3: Spice Infusion Timing. Make two batches: one where you infuse whole spices for 10 minutes and one for 25 minutes. Compare the aroma and flavor intensity. This helps you find your preferred infusion time and understand how extraction changes over time.
Exercise 4: Chili Crisp Texture Control. Practice frying garlic slices, shallot rings, and peanuts separately until each is perfectly golden and crispy. Frying each component individually teaches you the visual cues for doneness since each has a different ideal color and timing.
Exercise 5: Blind Comparison. Make your homemade chili oil and compare it to a commercial brand like Lao Gan Ma or Fly By Jing. Taste both on plain steamed rice. Identify what your version does better and where it falls short. This gives you a benchmark and specific improvement targets.
Advanced Tips and Variations
Once you have mastered the basic technique, these advanced tips will help you craft truly exceptional chili oil.
Toast and grind your own chilies. Buy whole dried chilies, remove the seeds (which add bitterness, not heat), and toast them in a dry wok for 2 to 3 minutes until fragrant and slightly pliable. Then crush them in a mortar and pestle to your desired coarseness. This produces dramatically more aromatic chili flakes than pre-ground versions.
Use the Shaoxing wine trick. Adding a tablespoon of Shaoxing wine to the chili flakes before pouring the oil creates a protective steam barrier that prevents scorching. It also adds a subtle fermented depth to the final oil. Many Sichuan home cooks consider this an essential step.
Double-infuse for maximum depth. After the initial infusion and pour, let the oil cool completely, strain it, and heat it again with a fresh batch of spices. This second infusion layer adds incredible complexity. It is more work, but the difference is noticeable in simple applications like plain noodles where the oil is the star.
Add umami boosters. Stir in a teaspoon of mushroom powder, a splash of soy sauce, or a pinch of MSG after the oil has cooled to about 200 degrees Fahrenheit. These additions do not change the technique but dramatically increase the savory depth of the finished oil.
Experiment with infused oils. Start with a flavored oil instead of neutral oil. Sesame oil (blended 50/50 with neutral oil), coconut oil, or even a high-quality extra virgin olive oil can create unique fusion-style chili oils suited to different cuisines.
Make a ma la version. Double the Sichuan peppercorns in the infusion and add an extra tablespoon of ground Sichuan peppercorn to the chili flakes before pouring. The result is intensely numbing and addictive, perfect for hot pot dipping sauces and dan dan noodles.
How to Make Chili Crisp (Crunchy Chili Oil)
Chili crisp is the textured, chunky cousin of smooth chili oil. It has taken the world by storm thanks to brands like Lao Gan Ma and Fly By Jing. Here is how to make your own at home.
Additional Ingredients for Chili Crisp
- 1/2 cup thinly sliced shallots
- 1/4 cup thinly sliced garlic (about 8 cloves)
- 1/4 cup raw peanuts, roughly chopped
- 2 tablespoons fermented black beans (douchi), roughly chopped
- 2 tablespoons white sesame seeds
- 1 tablespoon sugar
- 1 teaspoon five-spice powder
- 1/2 teaspoon MSG (optional but recommended)
Method
Start by frying the crispy components separately in the oil you will use for the chili oil. This approach serves double duty: it infuses the oil with flavor while creating the crunchy toppings.
Heat all the oil in your wok or saucepan over medium heat. Add the shallots first. Fry, stirring frequently, until golden brown and crispy, about 5 to 7 minutes. Remove with a slotted spoon and drain on paper towels. Next, fry the garlic slices until light golden, about 2 to 3 minutes. Garlic goes from golden to burnt very quickly, so stay attentive. Remove and drain. Finally, fry the peanuts until lightly browned, about 2 minutes. Remove and drain.
Now the oil is beautifully flavored. Continue with the standard chili oil method: add whole spices to the oil, infuse, remove spices, then do the three-stage pour over your chili flakes mixed with salt and sugar.
Once the oil has cooled to about 200 degrees Fahrenheit, stir in the fried shallots, garlic, peanuts, fermented black beans, sesame seeds, five-spice powder, and MSG. Mix everything thoroughly. The mixture will seem soupy at first but will thicken as it cools and the solids absorb some oil.
Transfer to jars and let rest at least 24 hours. The chili crisp will be at its best after 2 to 3 days as the flavors fully meld. Stir before each use, as the solids settle to the bottom.
Recipe Applications: How to Use Your Chili Oil
Homemade chili oil is incredibly versatile. Here are specific applications across different Asian cuisines that showcase the oil at its best.
Sichuan Red Oil Wontons (Hong You Chao Shou): Toss freshly boiled wontons with 2 tablespoons chili oil, 1 tablespoon soy sauce, 1 teaspoon rice vinegar, and a pinch of sugar. Garnish with scallions and crushed peanuts. This is one of the most iconic uses of chili oil in Sichuan cuisine.
Chili Oil Noodles (You Po Mian): Cook thick wheat noodles (biang biang noodles or wide knife-cut noodles), drain, and toss with 3 tablespoons of chili oil, soy sauce, and minced raw garlic. The hot noodles activate the aromatics in the oil. Top with a fried egg for a complete meal in 10 minutes.
Drizzle over congee: A tablespoon of chili oil transforms plain rice porridge into something extraordinary. The smooth, bland congee is the perfect canvas for the heat and complexity of a good chili oil.
Mapo tofu finishing oil: Drizzle a generous spoonful of chili oil over your finished mapo tofu for extra heat, color, and aroma. This is a restaurant trick that makes the dish look and taste more polished.
Dipping sauce for gyoza and dumplings: Mix chili oil with rice vinegar and soy sauce in equal parts for the ultimate dumpling dipping sauce. Add a drop of sesame oil if you like.
Fried rice booster: Stir a tablespoon of chili crisp into fried rice during the last 30 seconds of cooking. The crunchy bits add texture and the oil adds a layer of heat that plain chili flakes cannot match.
Pizza and eggs: Chili oil has crossed cultural boundaries. It is now a beloved topping for pizza, scrambled eggs, avocado toast, and even vanilla ice cream. The combination of fat, heat, and crunch works with almost anything savory and surprisingly well with some sweet foods too.
Chili Oil Comparison by Style
| Style | Base Oil | Key Chilies | Signature Additions | Heat Level | Best Used For |
|---|---|---|---|---|---|
| Sichuan La You | Rapeseed or vegetable | Er jing tiao, chao tian jiao | Sichuan peppercorn, star anise, cassia | Medium-High | Noodles, wontons, cold dishes |
| Chili Crisp | Vegetable or peanut | Mixed Chinese chili flakes | Fried shallots, garlic, peanuts, fermented black beans | Medium | Rice, noodles, toast, eggs, everything |
| Japanese Rayu | Sesame + neutral blend | Ichimi togarashi | Sesame seeds, sometimes soy sauce | Low-Medium | Ramen, gyoza, rice bowls |
| Korean Gochu-Gireum | Sesame + neutral blend | Gochugaru | Garlic, sesame seeds | Medium | Bibimbap, soups, marinades |
| Thai Nam Prik Num Oil | Vegetable | Thai dried chilies | Shrimp paste, fish sauce, garlic | High | Rice dishes, grilled meats, stir fries |
| Vietnamese Sa Te | Vegetable or lard | Dried bird’s eye chilies | Lemongrass, shallots, shrimp paste | Medium-High | Pho, noodle soups, dipping sauces |
Troubleshooting Guide
If your chili oil did not turn out as expected, here is how to diagnose and fix the issue.
Oil is too dark or tastes burnt: The oil temperature was too high. Next time, verify with a thermometer before pouring. You can partially salvage a burnt batch by straining out all solids and blending the oil 50/50 with fresh oil.
Oil is pale and lacks heat: The oil was not hot enough or you used too little chili relative to oil. Increase the chili-to-oil ratio (try 1 cup flakes per 1.5 cups oil) and ensure the first pour is at 350 to 375 degrees Fahrenheit.
Oil smells great but has no heat: You may have used mild chilies or removed too many seeds. Seeds contain some capsaicin, and removing all of them reduces heat. Add some chao tian jiao (facing heaven peppers) for more punch.
Chili crisp is soggy, not crunchy: The fried components were not cooked long enough or were added while the oil was still too hot. Fry shallots and garlic until fully golden and let them drain thoroughly on paper towels. Add them to the oil only after it has cooled below 200 degrees Fahrenheit.
Oil develops off flavors after storage: This usually indicates oxidation from exposure to light or air. Always store in airtight jars in a dark location. If you added fresh (not fully dried) ingredients, they may have introduced moisture, which can cause spoilage. Ensure all components are thoroughly dehydrated or fried crispy.
Frequently Asked Questions
How long does homemade chili oil last?
Properly made chili oil with only dried ingredients lasts 3 to 6 months at room temperature and up to a year refrigerated. Chili crisp with fried garlic and shallots should be used within 2 to 3 months and refrigerated after the first week for best quality. The key to longevity is ensuring no moisture enters the jar. Always use a clean, dry spoon when scooping.
Can I make chili oil without a thermometer?
Yes, but a thermometer makes the process much more reliable. Without one, test the oil temperature by dropping a single chili flake into the oil. If it sizzles immediately and the flake turns dark red within 2 to 3 seconds (not instantly black), the oil is in the right range. If there is no sizzle, the oil needs more heat. If the flake turns black instantly, let the oil cool for a few minutes.
What is the best oil for chili oil?
For Sichuan-style chili oil, rapeseed (canola) oil is traditional and produces excellent results. Vegetable oil and peanut oil are great alternatives. Avoid extra virgin olive oil (too strong a flavor and low smoke point), coconut oil (solidifies at cool temperatures), and pure sesame oil (burns easily). If you want sesame flavor, blend toasted sesame oil 50/50 with a neutral oil.
Is chili oil the same as chili crisp?
Not exactly. Chili oil is the smooth, infused oil, while chili crisp includes crunchy fried additions like garlic, shallots, peanuts, and fermented beans. Chili crisp always contains chili oil as its base, but chili oil does not have to include the crunchy toppings. Think of chili oil as the foundation and chili crisp as the fully dressed version.
Can I use fresh chilies instead of dried?
Fresh chilies contain too much moisture for the traditional hot-oil pour method. The water content causes dangerous splattering and prevents proper infusion. If you want to use fresh chilies, cook them slowly in oil over low heat (around 225 degrees Fahrenheit) for 30 to 45 minutes instead. The result is different: more of a cooked chili sauce in oil rather than a classic chili oil, but still delicious.
Why does my chili oil separate?
Separation is completely normal. The heavier chili solids sink to the bottom while the clear red oil rises to the top. This is actually desirable because it gives you two products in one: the clear red oil for cooking and drizzling, and the concentrated sediment for spooning over dishes when you want maximum flavor. Simply stir before using if you want a blended consistency.
How do I make my chili oil spicier?
Increase the proportion of hot chili varieties like chao tian jiao or add a small amount of cayenne pepper to your blend. You can also increase the chili-to-oil ratio. Another technique is to leave some seeds in when grinding, as the seeds and the white pith of the pepper contain concentrated capsaicin. Finally, a second infusion with fresh chili flakes and the already-made oil will boost the heat without losing the original aromatics.
Is homemade chili oil safe?
Yes, as long as you follow basic food safety principles. The primary concern is botulism from garlic or other fresh ingredients stored in oil. To eliminate this risk, ensure all ingredients are either completely dried or fried to a crispy, moisture-free state before combining with oil. Never add raw fresh garlic to oil and store it at room temperature. If you include any fresh components, refrigerate the oil and use it within two weeks.
Your Chili Oil Journey Starts Now
Making chili oil at home is one of the most rewarding techniques in Asian cooking. It requires no special skills, minimal equipment, and less than an hour of active time. Yet the result is a condiment so versatile and delicious that you will find yourself reaching for it at nearly every meal.
Start with the basic Sichuan recipe, master the three-stage pour, and then branch out into chili crisp and regional variations. Before long, you will have a signature blend that friends and family beg you to make. That is the beauty of chili oil: it is a simple technique with infinite room for personal expression.
Ready to stock your pantry with the right ingredients? Browse our collection of Asian cooking ingredients to find premium dried chilies, Sichuan peppercorns, sesame oil, and everything else you need to make exceptional chili oil at home.

Mei Lin Chen
Mei Lin Chen is an Asian food writer and recipe developer. Melbourne-raised and London-based, she has spent over a decade exploring the rice paddies, hawker stalls, and home kitchens of South-East and East Asia. Her recipes balance traditional technique with everyday practicality.