Last updated: March 10, 2026
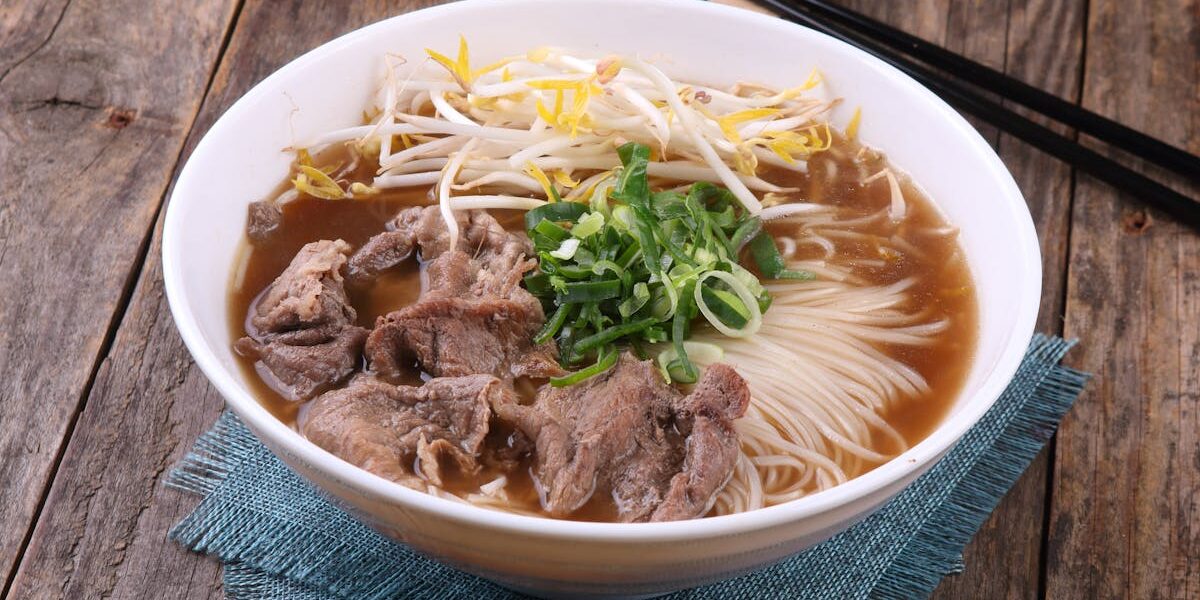
Pho broth is the soul of Vietnam’s most famous noodle soup, and learning how to make pho broth from scratch is one of the most rewarding techniques in Asian cooking. A great pho broth is crystal clear, deeply beefy, gently sweet, and perfumed with toasted spices — yet it is built from only a handful of bones, aromatics, and patience. This complete guide walks you through every step of the technique: choosing bones, parboiling, charring aromatics, simmering, skimming, and seasoning the finished broth. Whether you are aiming for the bold beefiness of Hanoi-style pho bac or the sweeter, herbaceous pho nam of Saigon, the principles in this guide will help you turn out a restaurant-quality pot at home.
What Pho Broth Actually Is
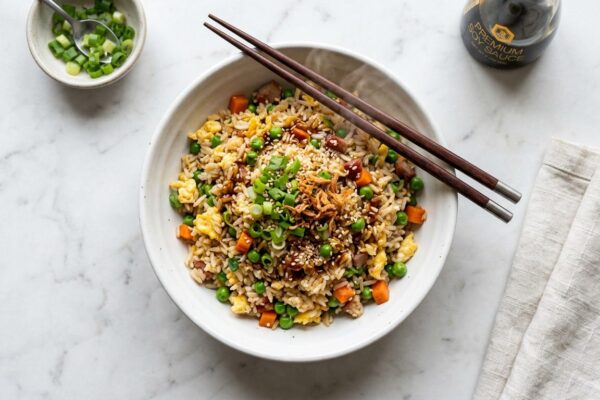
Pho (pronounced ”fuh”) is a Vietnamese rice noodle soup typically served with thinly sliced beef or shredded chicken, fresh herbs, and a complex aromatic broth called nuoc dung pho. The broth is the technical centerpiece of the dish — the noodles, meat, and garnishes are simple, but the liquid is the result of a careful, multi-hour extraction. Unlike Western beef stocks that lean roasted and dark, traditional pho broth is light golden, almost translucent, and tastes like a long, slow exhale of beef and warming spices.
The broth is built from three major components: beef bones (and often cuts with connective tissue) for body and richness; charred aromatics — onion and ginger — for sweetness and a smoky base note; and a small spice bouquet of star anise, cinnamon, cloves, coriander seed, and sometimes cardamom and fennel. The cook’s job is to coax flavor from each one without letting any single element dominate, and to keep the liquid clean throughout. Master those two priorities — extraction and clarity — and you have mastered the technique.
A Brief History of Pho and Its Regional Styles
Pho is a relatively young dish by Asian standards, with most food historians placing its emergence in northern Vietnam in the early twentieth century, around the Nam Dinh and Hanoi area. It draws on Vietnamese rice noodle soup traditions, Chinese spiced beef cookery brought south by traders, and the French colonial introduction of beef as a more widely eaten meat. The result is a dish that feels distinctly Vietnamese — restrained, herbal, and balanced — but with technical fingerprints from across the region.
Two regional styles dominate. Pho bac (northern) is the original: a spare, savory broth with minimal sugar, served with simple garnishes like green onion, cilantro, and quartered lime. Pho nam (southern, Saigon-style) is what most diners outside Vietnam know — a slightly sweeter, more aromatic broth served with a generous platter of bean sprouts, Thai basil, sawtooth herb, lime wedges, and chili. Both rely on the same core technique. The differences lie in spice ratios, sugar content, and how the broth is finished at the table.
Equipment You Need for Pho Broth
One reason pho is intimidating to home cooks is the perceived equipment list — but the real requirements are modest. You need a large stockpot, a flame source for charring aromatics, a fine strainer, and time. Everything else is optional convenience.
- Stockpot (8-12 quart): Tall, narrow pots are ideal because they minimize evaporation and keep bones submerged. A 10-quart pot will comfortably handle 4 to 5 pounds of bones with 5 to 6 quarts of water.
- Heavy-bottomed pan or open flame: Charring onion and ginger is non-negotiable. A gas burner, broiler, cast iron skillet, or even a small charcoal grill all work.
- Fine-mesh strainer plus cheesecloth or muslin: A two-stage strain produces glass-clear broth.
- Spider or skimmer: Essential for removing scum during the first 30 minutes of simmering.
- Large bowl or second pot: For holding strained broth.
- Spice satchel or tea ball (optional): Makes spice removal cleaner; a square of cheesecloth tied with twine does the same job.
- Instant-read thermometer (optional): Helps confirm the broth is held below a hard boil.
The Bones: What to Buy and Why
Bone selection is the single biggest factor in pho broth quality. Pho relies on a blend of bones with different properties: marrow bones for richness, knuckle and joint bones for collagen and body, and meaty bones (oxtail, neck, shank) for clean beef flavor. Buying only one type produces a one-dimensional broth.
Aim for a roughly 60/40 split between marrow/knuckle bones and meaty bones. For 6 quarts of finished broth, you want about 4 to 5 pounds of bones total. Vietnamese cooks often add a piece of beef brisket or chuck to be poached in the broth — it both flavors the liquid and provides sliced beef for serving.
| Bone or Cut | What It Contributes | Recommended Amount (per 6 qt) |
|---|---|---|
| Beef marrow bones (femur, leg) | Richness, body, fat | 1.5 lb |
| Knuckle / joint bones | Collagen, silky mouthfeel | 1 lb |
| Oxtail | Deep beef flavor, gelatin | 1 lb |
| Beef shank or neck bones | Meaty flavor, color | 1 lb |
| Brisket or chuck (optional) | Flavor + sliced beef for bowls | 1 lb |
If your butcher will saw the marrow bones in half lengthwise, take them up on it. Exposed marrow extracts faster and contributes more to the broth. Frozen bones are fine; thaw fully before parboiling.
The Aromatics and Spices
The aromatic profile of pho is unmistakable, but it is also restrained. The goal is perfume, not a curry. Most home cooks overspice their first pot. Start lighter than you think you should — you can always add, but you cannot remove.
- Yellow onions (2 large): Charred whole, skin on. Provides sweetness and a smoky base note.
- Fresh ginger (1 large hand, about 4 oz): Charred. Adds warmth and cuts through the bone fat.
- Star anise (4-6 whole pods): The dominant spice; provides licorice and warmth.
- Cinnamon stick (1 stick, 3 inches): Use cassia or true cinnamon. Sweet, woody backbone.
- Whole cloves (4-6): Powerful and easy to overdo. Stay at the low end.
- Coriander seeds (1 tablespoon): Citrusy lift; balances the heavier spices.
- Fennel seeds (1 teaspoon, optional): Adds gentle sweetness; common in southern-style pho.
- Black cardamom or green cardamom (1-2 pods, optional): Adds smoky depth in northern-style pho.
- Rock sugar or yellow rock sugar (1-2 tablespoons): Rounds out the broth without making it overtly sweet.
- Fish sauce (3-4 tablespoons, finishing): Adds savoriness and depth at the end of cooking.
- Salt: To taste, finished after fish sauce.
Toast the spices before adding them to the broth. A dry skillet over medium heat for 2 to 3 minutes, shaking constantly, is enough to bloom their oils. Stop the moment you smell them strongly — burnt spices will turn the broth bitter.
The Pho Broth Technique: Step by Step
Step 1: Parboil the Bones (15 minutes)
This is the single step that separates clear pho broth from cloudy, gray pho broth. Place all bones (and the brisket if using) in your stockpot and cover with cold water by 2 inches. Bring to a hard, rolling boil and let it rip for 5 to 10 minutes. You will see thick, brown-gray foam rise — this is the impurities, blood, and surface protein you want to discard. Once the foam has stabilized, pour the entire pot into the sink and rinse each bone under cold running water, scrubbing off any clinging scum with your hands or a brush. Wash out the pot, too.
Skipping or shortening this step is the most common reason home pho looks muddy. The investment is fifteen minutes of attention; the payoff is a broth you can read a newspaper through.
Step 2: Char the Aromatics (10 minutes)
Halve the onions through the root and leave the skin on. Slice the ginger lengthwise into thick slabs. You want maximum surface area exposed to direct heat. There are three ways to char them, listed best to worst:
- Open flame: Hold each piece directly over a gas burner with tongs until blackened in spots and starting to soften, about 4 to 5 minutes per side.
- Broiler: Place cut-side up on a sheet pan and broil 4 inches from the heat for 6 to 8 minutes, until charred and fragrant.
- Dry skillet: A heavy cast iron pan over medium-high heat, cut-side down, for 6 to 8 minutes.
You are looking for genuine blackening — not just color, but actual char. The Maillard reaction is what gives pho its signature smoky-sweet base. Do not rinse the char off; the bits of carbonized sugar will dissolve into the broth and contribute color and flavor.
Step 3: Toast the Spices (3 minutes)
While the bones are parboiling and the aromatics are charring, set a small dry skillet over medium heat. Add the star anise, cinnamon, cloves, coriander seeds, fennel, and cardamom (if using). Toast for 2 to 3 minutes, shaking the pan constantly, until fragrant. Tip them onto a plate to stop the cooking. If you are using a spice satchel, transfer them in once cool enough to handle.
Step 4: Build and Simmer the Broth (3-6 hours)
Return the rinsed bones to the cleaned pot. Add the charred onion and ginger. Cover with 6 quarts of fresh cold water — always start cold, never hot, so the bones release flavor gradually. Bring slowly to a bare simmer over medium heat. As it approaches a simmer, you will see a fresh layer of foam form on the surface. Skim aggressively for the first 20 to 30 minutes with a wide spoon or spider, removing every bit of scum and excess fat. This is the second clarity gate.
Once the foam stops forming and the surface looks clean, add the spice satchel and a tablespoon of salt. Reduce the heat so the liquid is barely trembling — small bubbles rising occasionally, no rolling boil. The technical sweet spot is 195 to 200 degrees Fahrenheit. A hard boil at this stage will emulsify fat into the broth and turn it cloudy.
Cover loosely (the lid resting at an angle, not sealed) and simmer:
- Beef pho broth: 4 to 6 hours minimum; 8 hours for very rich versions.
- Chicken pho broth: 1.5 to 2 hours.
- Quick pressure-cooker pho broth: 60 to 90 minutes at high pressure, with natural release.
If you added brisket, pull it out after 90 minutes — it should be tender but still sliceable. Submerge in cold water briefly to firm up, then refrigerate until serving.
Step 5: Strain (15 minutes)
Remove the spice satchel and discard. Strain the broth in two stages: first through a fine-mesh strainer into a large bowl to catch bones and aromatics, then through a strainer lined with two layers of cheesecloth or a clean tea towel into a clean pot. Resist the urge to press on the solids — pressing pushes fine particles through and clouds the broth. Let gravity do the work.
Step 6: Defat and Season (10 minutes)
Pho should have some beef fat — that golden sheen is part of the dish — but excessive fat is greasy and dulls the spices. The cleanest way is to refrigerate the broth overnight; the fat will solidify on top and lift off easily. If you are serving same-day, ladle off as much surface fat as you can with a wide spoon, or run a paper towel across the surface to wick the last layer.
Now season. Bring the strained broth back to a gentle simmer and add fish sauce one tablespoon at a time, tasting after each addition. Add rock sugar to round the edges. Adjust salt last. Restraint is key — the broth should taste a little under-seasoned in the pot, because the noodles, raw beef, and garnishes in the bowl will absorb seasoning when you serve.
Common Pho Broth Mistakes and How to Fix Them
| Mistake | What Happens | The Fix |
|---|---|---|
| Skipping the parboil | Cloudy gray broth, scummy taste | Always parboil and rinse bones before the real simmer |
| Boiling too hard | Cloudy, fatty, emulsified broth | Hold at 195-200 degrees F, never a rolling boil |
| Charring aromatics in oil | Greasy onion taste, no smoky depth | Char dry over flame or in a dry pan; no oil |
| Too much spice | Curry-like flavor, harsh cinnamon notes | Use the listed amounts; remove the satchel after 1-2 hours if needed |
| Adding spices too early | Bitter, dusty notes | Add spices only after the broth is clean and simmering |
| Pressing on the strainer | Cloudy final broth | Let gravity strain; never push the solids |
| Over-salting in the pot | Final bowl tastes harsh after fish sauce | Season under, finish at the bowl with fish sauce or salt |
| Using only marrow bones | Greasy, one-note broth | Mix marrow with knuckle, oxtail, and meaty bones |
| Cooking too short | Thin, watery, no body | Beef pho needs at least 4 hours; 6 is better |
| Not skimming foam | Cloudy, bitter top notes | Skim aggressively for the first 30 minutes |
Northern vs. Southern Pho Broth
Anyone who has eaten pho in both Hanoi and Ho Chi Minh City can confirm that the soups are recognizably different. The technique is largely the same, but ratios and finishing change. Understanding the regional axes lets you tune your broth to taste.
| Element | Pho Bac (Northern) | Pho Nam (Southern) |
|---|---|---|
| Broth color | Light golden, almost clear | Deeper amber, slightly fuller |
| Sugar level | Minimal; restrained | Pronounced rock sugar sweetness |
| Spice profile | Star anise, cinnamon, cardamom forward | Star anise, cinnamon, cloves, fennel |
| Fish sauce | Lighter touch | More pronounced |
| Garnishes at the table | Green onion, cilantro, lime, vinegar-soaked garlic | Bean sprouts, Thai basil, sawtooth herb, lime, chili, hoisin, sriracha |
| Serving size | Smaller bowl, broth-forward | Larger bowl, generous garnishes |
Practice Exercises to Master Pho Broth
Pho broth is best learned by repetition with structured variation. Each of these exercises isolates one variable so you can hear what it changes in the final broth.
- The Parboil A/B test: Make two small pots — one with parboiled and rinsed bones, one without. Use the same aromatics, spices, and timing. Compare clarity and aroma side by side. This single comparison sells the technique forever.
- Char depth ladder: Char three sets of onions to different levels — pale gold, deeply browned, and full charcoal black. Make three half-batches. Identify which level you prefer and standardize on it.
- Spice timing: In one batch, add the spice satchel at the start of the simmer. In a second batch, add it at the 90-minute mark and remove after one hour. Compare for harshness and aroma. Most home cooks find the second method cleaner.
- Bone ratio: Make one batch with all marrow bones, one with all meaty bones, one with the recommended blend. The blended pot will win every time, but tasting the extremes teaches you what each contributes.
- Time depth: Pull samples at 2, 4, 6, and 8 hours. Refrigerate them. Compare the next day. You will learn exactly where, on your stove, the broth peaks.
- Fish sauce calibration: Hold back fish sauce until plating. Pour finished broth into four bowls and add fish sauce in increments of half a teaspoon, one teaspoon, two teaspoons, and three teaspoons per bowl. Find your seasoning baseline.
Advanced Pho Broth Tips
- Roast some bones first: For deeper color and a nuttier base, roast about a third of the meaty bones at 425 degrees F for 30 minutes before parboiling. Do not roast all of them — that pushes pho toward French stock territory.
- Add a sliver of dried squid or scallop: A traditional Hanoi trick. A single small piece of dried cuttlefish or one or two dried scallops in the simmer adds a deep umami undertone without making the broth taste seafoody.
- Simmer with the lid cracked: A fully sealed lid traps fat and pushes the boil up. A lid resting at an angle keeps the broth at the right temperature and lets steam escape.
- Skim with a paper towel pass: After the main skim, pull a paper towel flat across the surface and lift. It catches the thin film that a spoon misses.
- Make broth a day ahead: Pho broth tastes better the next day after the fat has solidified and the spices have integrated. Pho is one of the few soups where overnight rest is genuinely an upgrade.
- Use rock sugar, not white sugar: Yellow Vietnamese rock sugar (duong phen) has a cleaner, less candy-like sweetness than refined sugar. Coconut sugar is a passable substitute; honey is not.
- Reserve the bones for a second pull: After the first strain, the bones still have flavor. Cover with fresh water, simmer two more hours, and freeze the result. Use this lighter remi as the base for sauces, congee, or future pho top-ups.
- Fortify with a tail-end aromatic: Twenty minutes before straining, drop in a fresh slice of ginger and a sliced shallot. This top-note refresh keeps the finished broth from tasting flat.
- Salt is for the pot, fish sauce is for the table: Salt builds backbone in the broth itself. Fish sauce delivers high-impact umami and is most fragrant when added late or at the bowl.
- Watch your water: Heavily chlorinated tap water can dull subtle aromatics. If your tap water tastes off, use filtered water for the final fill (after parboiling, where it does not matter).
Variations on the Core Technique
Pho Ga (Chicken Pho Broth)
Pho ga uses the same technique with chicken bones — preferably a whole bird plus extra backs and feet for collagen. Skip the parboil for chicken; instead, blanch the bird whole for two minutes, drain, and rinse, which is gentler on chicken meat. Reduce spices to half quantity. Total simmer time is 1.5 to 2 hours. The result is lighter, cleaner, and just as soothing.
Pressure Cooker Pho Broth
For weeknight pho, parboil and char as described, then transfer everything to an 8-quart electric pressure cooker. Cover with 4 quarts of water (the lower volume reflects reduced evaporation). Cook on high pressure for 60 minutes for chicken, 90 minutes for beef, with a full natural release. The broth will be a hair less complex than a 6-hour simmer, but indistinguishable to most diners.
Vegetarian Pho Broth
A respectable vegetarian pho is built on the same aromatic backbone, with depth coming from charred onion and ginger, dried shiitake mushrooms, kombu, daikon, carrot, and roasted apple or pear. Use vegetable bouillon or a glug of soy sauce in place of fish sauce. Total simmer is 90 minutes; longer dulls the vegetables.
Pho Bo Vien (Beef Meatball Pho Broth)
The same broth doubles as the base for pho bo vien (beef meatball pho). The springy, bouncy meatballs are simmered in the broth at serving time, releasing additional beefiness and seasoning. Make the broth slightly under-seasoned because the meatballs add salt.
Assembling a Bowl of Pho
Once the broth is made, assembly is fast. Pho is a building exercise: noodles, raw or cooked meat, hot broth, garnishes.
- Soak the noodles: Use dried banh pho rice noodles (medium width, about 1/8 inch). Soak in warm water for 20 minutes, then blanch in boiling water for 10 to 30 seconds just before serving. Drain, shake dry, and divide into bowls.
- Slice the meat: For raw beef, choose eye of round or sirloin. Freeze for 30 minutes, then slice against the grain as thinly as you possibly can. For poached brisket from the broth, slice across the grain into 1/8-inch pieces.
- Add the meat: Lay raw beef slices over the noodles. Add cooked brisket or meatballs alongside.
- Pour boiling broth: Bring the broth to a hard simmer just before serving. Ladle directly over the raw beef — the heat cooks it instantly.
- Garnish: Top with thinly sliced raw onion, chopped green onion, and a pinch of black pepper. Serve with a side plate of bean sprouts, Thai basil, sawtooth herb, lime wedges, and sliced bird’s eye chili. Hoisin and sriracha go on the side, never in the pot.
Storage, Freezing, and Reheating
Pho broth is freezer gold. The work is upfront; the rewards last for weeks.
- Refrigerator: Strained, defatted broth keeps 4 to 5 days in a sealed container. The flavor peaks on day 2.
- Freezer: Freeze in portion-sized containers (2 to 4 cups) for up to 3 months. Leave headroom — broth expands when frozen.
- Ice cube trays: Freeze concentrated broth in trays for quick-add savor cubes; pop two cubes into a noodle bowl for instant flavor.
- Reheating: Always reheat from the stovetop, not the microwave. Bring to a fresh simmer for 5 minutes before serving. Re-skim if needed.
- Refreshing reheated broth: Add a fresh slice of ginger and a star anise pod for the last 5 minutes of reheating to revive aromatics.
Pho Broth Frequently Asked Questions
How long does it really take to make pho broth?
For traditional beef pho, plan on 5 to 7 hours of total cooking time, plus 30 minutes of active prep. Active hands-on time is closer to 60 to 90 minutes — the rest is unattended simmering. Chicken pho is faster, totaling about 2.5 hours.
Why is my pho broth cloudy?
Cloudy pho broth almost always traces to one of three causes: skipping the parboil, simmering too hard (which emulsifies fat), or pressing the strainer. Address all three. If a finished broth is cloudy, you can rescue it by chilling overnight, lifting off the solid fat, and reheating gently.
Can I make pho broth in a slow cooker?
Yes, but parboil and char first on the stovetop. Transfer everything to a 6 to 8 quart slow cooker, cover with water, and cook on low for 8 to 10 hours. Add the spice satchel only for the last 90 minutes. The broth will be slightly less developed than a stovetop version because slow cookers run cooler than ideal, but it is a good hands-off option.
What is the difference between pho broth and ramen broth?
Pho broth is clear, beef and aromatic-driven, and seasoned with fish sauce. Ramen broth comes in many styles, but the most familiar versions (tonkotsu, shoyu, miso) are typically opaque, pork or chicken-based, and seasoned at the bowl with a separate concentrated tare. Pho is lighter and herbaceous; ramen is richer and umami-bombed. The techniques share little beyond the long simmer.
Can I use beef stock from the store as a base?
For an emergency 30-minute pho, yes. Char onion and ginger, simmer with toasted spices in a quart of low-sodium beef stock for 20 minutes, then strain and finish with fish sauce. It will not match a from-scratch pot, but it satisfies the craving on a Tuesday night.
How much salt should I add?
Start with 1 tablespoon of kosher salt per gallon of water during simmering, then finish with 3 to 4 tablespoons of fish sauce and adjust salt at the end. The broth should taste a hair under-seasoned in the pot — it will balance once it hits the noodles, beef, and garnishes.
Do I need fish sauce or can I substitute?
Fish sauce is essential for authentic flavor. Vietnamese fish sauce (nuoc mam) is preferred. If you cannot use it, light soy sauce plus a small amount of mushroom seasoning approximates the umami profile, but the broth will read more Chinese than Vietnamese.
Why is my broth bitter?
Bitterness in pho usually comes from one of three sources: too many cloves, burnt (rather than charred) aromatics, or a spice satchel left in too long. Cap cloves at 6, char until blackened but not ashed, and pull the spice satchel after 1 to 2 hours of simmering.
Can I make pho broth ahead of time?
Absolutely — and you should. Pho broth tastes better on day 2, after the fat has solidified and the spices have integrated. Make it the day before serving, refrigerate overnight, lift off the solidified fat, and reheat gently.
What noodles should I serve with pho broth?
Use dried or fresh banh pho — flat rice noodles, typically labeled ”rice noodles for pho” or by their Vietnamese name. Medium width (about 1/8 inch) is standard. Do not substitute thin rice vermicelli (bun) — the texture and absorption are wrong for this dish.
Building on the Pho Broth Technique
Pho broth is a foundational Vietnamese technique, and the skills carry across the cuisine. The same parboil-char-simmer-strain framework underlies bun bo Hue (substitute pork bones, lemongrass, and shrimp paste) and bun rieu (crab and tomato broth). The aromatic restraint and clarity-first mindset will also sharpen your work in stocks, dashi, and Chinese double-boiled soups. If you have already worked through our guides on ramen broth, dashi, and Chinese master stock, pho broth slots in as the gentlest, most aromatic of the four.
For the full meal, pair this broth with our bun bo Hue recipe for a contrast in style, or use it as the base for a beef noodle soup with the brisket you poached. Round out a Vietnamese spread with banh mi, bun cha, or banh xeo. Explore more in our complete Vietnamese recipes guide.
Final Thoughts on Pho Broth
The first time you make pho broth from scratch, the kitchen will smell like a Hanoi street stall by the four-hour mark, and you will understand why this dish has earned the place it holds in Vietnamese cooking. The technique rewards patience, a light hand with spices, and a stubborn commitment to clarity. Once you have it, you have it for life — every subsequent pot will be faster, calmer, and better. Start with a smaller pot, run the practice exercises, and trust your palate. The bowl in front of you on the day after cooking will be one of the most memorable things you make all year.

Mei Lin Chen
Mei Lin Chen is an Asian food writer and recipe developer. Melbourne-raised and London-based, she has spent over a decade exploring the rice paddies, hawker stalls, and home kitchens of South-East and East Asia. Her recipes balance traditional technique with everyday practicality.