Last updated: March 06, 2026
Scallion pancakes — known as cong you bing (葱油饼) in Mandarin — are one of the great paradoxes of Chinese cooking. The ingredients are almost laughably plain: flour, water, salt, oil, and scallions. Yet when you bite through a great one, you encounter dozens of paper-thin, blistered layers that shatter at the edges and pull apart like flaky pastry in the middle, releasing puffs of fragrant scallion-infused steam. The difference between a doughy disappointment and a properly layered, golden, lacy pancake comes down entirely to technique. Specifically: how you hydrate the dough, how you laminate the oil and scallions inside, how you coil and rest, and how you cook.
This is a complete walkthrough of the cong you bing technique — every gram, every fold, every pan-temperature decision that separates a dense disc from a multilayered Chinese flatbread that rivals the best ones from a Shanghai street stall. We’ll cover the chemistry of hot-water dough, the geometry of the snail coil, the art of the oil paste (you su), the four pan-frying methods used across China, and a troubleshooting matrix for every way it can go wrong. Whether you’ve never rolled dough before or you’ve been making jiaozi for years, this guide will sharpen your technique to professional standards.
What Are Scallion Pancakes? An Overview of Cong You Bing
Scallion pancakes are a savory unleavened flatbread from the eastern coastal regions of China, especially Shanghai, Shandong, and Jiangsu provinces, though they appear all across the country in regional variations. Unlike Western pancakes, which are batter-based, cong you bing is dough-based — closer in spirit to French puff pastry than to a hotcake. The defining feature is lamination: the dough is rolled out, painted with seasoned oil and chopped scallions, then rolled, coiled, and flattened. This creates dozens of thin sheets of dough separated by vapor pockets and infused fat, which puff up dramatically when they hit a hot pan.
The technique dates back at least to the Tang dynasty (618–907 CE), when scallion-stuffed flatbreads called cong you bing were sold by street vendors in the imperial capital of Chang’an. Some food historians argue that scallion pancakes may have been the inspiration for the Italian pizza, brought back along the Silk Road — though the evidence for that is folkloric rather than documented. What is certain is that cong you bing has become one of the most iconic Chinese street foods, sold everywhere from sidewalk pushcarts in Taipei to dim sum restaurants in San Francisco.
There are two principal styles. The Shanghai style uses a half-and-half blend of hot and cold water, producing a dough that is tender but still chewy, with a distinctly flaky, almost croissant-like crumb. The Shandong style is larger, rolled thinner, more bread-like, often eaten with stews or used as a wrap. Within these umbrella categories, every household and street vendor has slight variations: some add a touch of lard or sesame oil to the laminating paste, some include white pepper or five-spice, some pre-cook the scallions briefly to soften their bite. The technique we teach here is rooted in the Shanghai approach because it produces the most dramatic lamination — the most layers per millimeter — which is what most home cooks aspire to.
Beyond the snack itself, mastering cong you bing teaches you principles that transfer directly to other Chinese flatbreads, layered breads, and even pastries. The hot-water dough technique is the same one used for dumpling wrappers and Beijing duck pancakes. The lamination technique appears in shao bing, lao bing, and Shandong’s da bing. Once you understand how to handle this dough, an entire family of breads opens up.
The Science Behind the Layers: Why Hot-Water Dough Works
Cong you bing is built on a foundation called tang mian (烫面), or ”scalded dough.” Instead of mixing flour with cold water as you would for noodles, you pour boiling water — typically water that’s just come off the boil at around 90–100°C (194–212°F) — directly into the flour. This does three important things at the molecular level.
First, it partially gelatinizes the starches. When wheat starch granules hit water above 60°C, they absorb water and swell, eventually bursting and releasing amylose and amylopectin chains. These gelatinized starches act like glue, giving the dough a soft, almost sticky pliability that’s essential for stretching it ultra-thin without tearing.
Second, hot water denatures gluten proteins. Cold-water doughs develop strong, elastic gluten that snaps back when you try to roll it thin — great for dumplings, terrible for layered flatbreads. Hot water deactivates some of the gluten-forming proteins, producing a dough that’s soft, extensible, and easy to roll. The result is a flatbread that’s tender rather than chewy.
Third, the heat speeds hydration. A cold-water dough needs 20–30 minutes of resting before the flour fully hydrates. Hot water cuts that to 10 minutes or less, which is why cong you bing dough comes together so fast.
The Shanghai-style refinement is to use a 50:50 mix of boiling and room-temperature water. This gives you the soft pliability of hot-water dough plus enough live gluten to hold the layers together when you cook. Some recipes use 60% hot to 40% cold, or 70:30 — the exact ratio is a matter of preference and humidity. We’ll specify exact ratios further down.
The lamination itself relies on a separate principle: a fat barrier between dough layers. When you brush a thin layer of oil paste across the rolled dough and then roll it into a log, you’re trapping microscopic sheets of dough between sheets of fat. When the pancake hits the hot pan, water in the dough turns to steam, the fat melts and lubricates, and the layers separate, creating the puffed, flaky structure that defines a great cong you bing. This is the same principle behind croissants and shao bing — only the dough chemistry differs.
Equipment You Need (And What You Can Skip)
Cong you bing is a humble snack, and the equipment list reflects that. You don’t need a stand mixer, a tandoor, or a wok. But a few specific tools make the technique easier and the results more consistent.
- Digital kitchen scale. Non-negotiable for serious dough work. Cup measurements vary by 30% or more depending on how packed the flour is. A scale ensures consistent hydration every batch.
- Large mixing bowl. At least 3-quart capacity. You’ll be pouring boiling water into flour, so use heat-safe glass, stainless, or thick ceramic — not plastic.
- Sturdy wooden chopsticks or a silicone spatula. For mixing the scalding-hot dough before it cools enough to handle.
- Flat surface for kneading. A large wooden board or stone counter at least 18×24 inches.
- Rolling pin. A 12-inch French-style tapered pin works well, but a Chinese dowel pin (smaller, lighter) is more nimble for this work. Avoid heavy ball-bearing pins — you want to feel the dough.
- Pastry brush. For applying the oil paste evenly. A 1.5-inch silicone or natural-bristle brush works.
- Bench scraper. For dividing dough cleanly and lifting sticky portions off the counter.
- Cast iron, carbon steel, or heavy nonstick skillet. Ideally 10–12 inches. Cast iron and carbon steel develop the crispiest crust; nonstick is forgiving for beginners. A flat-bottomed wok works too.
- Heavy-bottomed lid that fits the skillet. Steam-frying is one of the cooking techniques covered later.
- Plastic wrap or a damp towel. For resting the dough without it skinning over.
Things you don’t need: a tortilla press (the dough is too soft and will stick), a food processor (it overworks gluten and creates a tough dough), a pasta machine (the dough is too soft to feed through cleanly), or a cast-iron tortilla comal (any flat skillet works fine).
Ingredients and Ratios: The Master Formula
This recipe makes four 8-inch pancakes — enough for four people as an appetizer or two as a light meal. Scale up linearly. Flour is the anchor; everything else is a percentage of flour weight (baker’s percentages, in case you want to scale).
| Ingredient | Amount | Baker’s % | Notes |
|---|---|---|---|
| All-purpose flour | 300 g (about 2.5 cups) | 100% | Mid-protein flour (10–11%); avoid bread flour or cake flour |
| Boiling water | 105 g | 35% | Just off the boil; measure by weight, not volume |
| Cold water | 75 g | 25% | Room temperature; combined hydration is 60% |
| Fine sea salt | 5 g (1 tsp) | 1.7% | For the dough only; no salt in the oil paste |
| Neutral oil (for paste) | 45 g (3 tbsp) | 15% | Vegetable, canola, or peanut oil |
| Toasted sesame oil (for paste) | 15 g (1 tbsp) | 5% | Optional; adds aromatic depth |
| Flour (for paste) | 20 g (2.5 tbsp) | 6.7% | Thickens oil into a brushable paste |
| Salt (for paste) | 3 g (0.5 tsp) | 1% | Seasons the layers from inside |
| White pepper (for paste) | 1 g (0.25 tsp) | 0.3% | Optional but classic |
| Scallions (green parts mostly) | 120 g (about 8–10 stalks) | 40% | Sliced thin; pat dry before using |
| Frying oil | 3–4 tbsp per pancake | — | Enough for shallow pan-frying |
A few notes on ingredient choices. Use unbleached all-purpose flour with about 10–11% protein (King Arthur AP is a touch high at 11.7% but works; Gold Medal AP at 10.5% is closer to ideal; in Asia, look for ”all-purpose” or ”medium gluten” 中筋面粉). Bread flour creates a chewy, dense pancake. Cake flour produces a crumbly, structurally weak one. The scallions should be the green part primarily, with just a sliver of light green near the white — pure white scallion is sharp and watery. Slice them no thicker than 2 mm and pat dry on a paper towel before use; surface moisture causes blowouts during rolling.
Step-by-Step Technique: From Flour to Finished Pancake
Step 1: Make the Hot-Water Dough
Weigh 300 g of flour into a large heat-safe bowl. Add the salt and whisk briefly to distribute. Boil the water in a kettle and immediately pour 105 g over the flour — don’t wait, the temperature drops fast. With sturdy chopsticks or a silicone spatula, stir vigorously in a circular motion for about 30 seconds. The mixture will look shaggy and sticky and steam will rise. Now drizzle in the 75 g of cold water in a thin stream, stirring continuously. Keep stirring until you have a rough, lumpy mass with no visible dry flour.
Cover the bowl with plastic wrap or a damp towel and let it rest for 10 minutes. This rest hydrates the flour fully and lets the dough cool to a temperature your hands can tolerate. Don’t skip this — kneading too soon means you’ll either burn yourself or work the dough unevenly.
Step 2: Knead Until Smooth
After the rest, turn the dough onto a lightly floured surface. Knead for 5–7 minutes using the heel of your hand: push, fold, quarter-turn, push. The dough will start sticky and become smoother and more elastic with each fold. Resist the urge to add flour — a sticky dough now produces a tender pancake later. If it’s truly unworkable, dust your hands and the surface with the smallest pinch of flour. The finished dough should be soft as a baby’s earlobe — pillowy, slightly tacky, and elastic enough that you can stretch a small piece thin without it breaking. The technical term in Chinese is 三光: guang meaning ”shining” — the dough is shining (smooth), your hands are shining (no dough stuck), and the bowl is shining (no residue).
Form into a ball, return to the bowl, cover, and rest for 30 minutes minimum (an hour is better). This second rest is critical: it lets the gluten relax so you can roll the dough paper-thin without it springing back. While the dough rests, prepare the oil paste and the scallions.
Step 3: Make the You Su (Oil Paste)
The oil paste is the secret weapon. Plain oil tends to leak out of the layers during rolling; a flour-thickened paste stays put and creates a more consistent fat barrier. Heat the 45 g of neutral oil in a small saucepan until it shimmers — about 150°C (300°F). Carefully whisk in the 20 g of flour off the heat. It will sizzle and form a thin roux. Whisk for 30 seconds, then add the salt, white pepper, and the 15 g of toasted sesame oil. The paste should look like soft peanut butter and pour off the spoon in slow ribbons. Let it cool to room temperature before using — hot paste will tear the rolled dough.
If you want to skip the cooked roux, you can simply mix the cold neutral oil with the flour, sesame oil, salt, and pepper into a slurry. The cooked version develops more nutty depth from the heated flour, but a cold mix works fine for beginners.
Step 4: Prep the Scallions
Wash and thoroughly dry the scallions. Trim off the root end and any wilted greens. Cut them in half lengthwise if they’re thick, then slice crosswise into 1–2 mm rings. Aim for the thinnest, most uniform cut you can manage — a sharp knife or a Chinese cleaver helps. Pile the scallions on a clean kitchen towel and pat them dry. Excess moisture is the number-one cause of pancakes that won’t laminate, because the water turns to steam and bursts the layers from inside before they can set.
Step 5: Divide and Roll the Dough
After the rest, turn the dough out and divide into four equal pieces (about 120 g each). Cover three with plastic so they don’t dry out. Take the first piece, dust the work surface with the lightest film of flour, and roll it into a rough rectangle. Now keep rolling — pivoting and stretching — until you have an oblong sheet roughly 12 × 18 inches and as thin as a corn tortilla, around 1.5 mm. You should be able to almost see the wood grain through it. If the dough resists and snaps back, cover it for 5 minutes to relax the gluten, then continue.
Tip: dust the rolling pin lightly with flour rather than the dough. This prevents excess flour from being incorporated into the layers, which would make them dry and gummy.
Step 6: Apply the Oil Paste and Scallions
Using the pastry brush, paint a thin, even layer of oil paste across the entire surface of the dough — leave a 1-inch border bare on one long edge so the seal will hold. You’re aiming for visible coverage but not pooling; about 1 tablespoon of paste per pancake. Sprinkle a quarter of the chopped scallions evenly over the dough, again keeping the bare border clean.
Step 7: Roll Into a Log
Starting from the long edge opposite the bare border, roll the dough up tightly into a long, thin log — like a jelly roll. The tighter you roll, the more layers you get. Pinch the seam closed firmly when you reach the bare border. The log should be about 18 inches long and an inch in diameter. Gently stretch the log slightly longer (to maybe 22 inches) by working it with your palms — this thins the layers further.
Step 8: Coil Into a Snail
Now the iconic move: take one end of the log and coil it tightly around itself, like winding a garden hose, into a flat snail spiral. Tuck the loose end under the spiral. You should have a thick disc about 4 inches across with visible concentric rings. Pinch the underside seam to seal. Cover and rest the coiled discs for at least 15 minutes — preferably 30. This rest is non-negotiable: it lets the gluten relax so you can flatten the coil without unspooling it. While the first coil rests, repeat steps 5–8 with the remaining three dough pieces.
Step 9: Flatten Into Pancakes
Take a rested coil. Flatten it gently with the heel of your hand into a 5-inch disc, keeping it as round as possible. Now use the rolling pin — but only roll outward from the center in short, gentle strokes. Don’t squash it flat in one pass. Aim for an 8-inch round about 6–8 mm thick. Some scallions may poke out; that’s fine. If your dough is well-rested, you should see beautiful concentric rings on top and bottom. The pancake is now ready to cook.
Step 10: Pan-Fry to Crispy Perfection
Heat a 10-inch cast-iron or heavy skillet over medium heat for 2 minutes. Add 2 tablespoons of neutral oil — enough to coat the bottom generously, almost a shallow fry. When the oil shimmers but isn’t smoking, slide in the pancake. It should sizzle steadily but not violently. Cook for 2–3 minutes on the first side until the underside is golden brown with darker spots. The pancake will puff slightly as steam builds inside the layers — this is the lamination working.
Flip with a spatula. Add another tablespoon of oil around the edges if the pan is dry. Cover with the lid for 1 minute — this traps steam and helps the interior cook through without drying the exterior. Uncover, cook another 1–2 minutes uncovered to crisp the second side. Total cooking time: 5–6 minutes per pancake. The pancake is done when both sides are deeply golden, the edges are visibly flaky, and you can hear it crackle when you press it with a spatula.
Transfer to a wire rack — not paper towels, which steam the bottom soggy — and immediately whack the top once with the back of a wooden spoon. This ”fluffing” technique cracks the layers apart, releasing trapped steam and revealing the lacy interior. It’s the signature move of a Taipei night-market vendor. Cut into 6 wedges with a pizza cutter or kitchen scissors, and serve hot.
Common Mistakes and How to Fix Them
Almost every cong you bing problem traces back to one of seven specific mistakes. Use this matrix to diagnose what went wrong, in order from most to least common.
| Symptom | Likely Cause | Fix Next Time |
|---|---|---|
| Dense, doughy interior with no layers | Dough rolled too thick before laminating, or coil not rested before flattening | Roll the rectangle to 1.5 mm (you should almost see through it). Rest the snail coil at least 15 minutes before flattening. |
| Pancake is tough and chewy | Flour too high in protein, or dough overworked | Switch to AP flour at 10–11% protein. Knead just until smooth, no more than 7 minutes. |
| Layers fused into one mass | Not enough oil paste between layers, or paste was too hot when applied | Cool the paste fully before brushing. Use the full 1 tablespoon per pancake. Make sure the paste is brushed edge to edge. |
| Pancake burns outside but raw inside | Pan too hot, or pancake too thick | Drop heat to medium. Roll the final pancake to 6–8 mm. Cover with lid for 1 minute mid-cook. |
| Scallions burn black and turn bitter | Pan too hot when scallions on outside hit the surface, or scallions sliced too thick | Slice scallions at 1–2 mm. Tuck stray scallions back into the dough before frying. Use medium heat. |
| Pancake bursts open in pan, scallions fly out | Coil seam not sealed; or scallions wet | Pinch the spiral’s tail under the coil firmly. Pat scallions dry on paper towels before sprinkling. |
| Greasy, oil-saturated bottom | Oil not hot enough when pancake hits pan | Wait for the oil to shimmer (about 175°C / 350°F). A drop of water should sizzle violently when flicked in. |
| Pancake shrinks back when rolled | Gluten not rested enough | Add a 30-minute rest after kneading and a 15-minute rest after coiling. Don’t try to roll a tense dough. |
| Sticky dough won’t roll out | Too much hot water, or not enough kneading | Use a kitchen scale, not cups. If sticky now, dust counter and pin lightly — don’t add flour to the dough mass. |
| Dough is dry and cracks at the edges | Underhydrated, or rested uncovered | Hit the 60% hydration target by weight. Always cover dough with plastic or a damp towel during rest. |
Practice Exercises to Build the Skill
Cong you bing is a technique you internalize through repetition, not by reading. Here are five graduated exercises that build the specific skills involved, from beginner to advanced. Do each one at least three times before moving to the next.
Exercise 1: The Hot-Water Dough Solo
Make just the hot-water dough — no fillings, no lamination — and divide it into four equal balls. Roll each one into a 6-inch round disc and pan-fry plain. Your goal is to learn the feel of properly hydrated tang mian: how it stretches, when it tears, when it springs back. A correctly made dough should pan-fry into a tender, slightly puffed plain flatbread that you can tear like fresh pita. If yours is rubbery or cracks at the edges, your hydration is off. Repeat until all four discs come out tender and uniform.
Exercise 2: The Single-Layer Roll
Now make the dough, brush a single piece with oil paste only (no scallions), and laminate it once: roll it up into a log, then immediately flatten and pan-fry. You’re isolating the lamination step. The pancake should show a few distinct layers when you tear it open. If it’s still solid, your paste was too thin or your roll was too loose. Practice rolling the log as tightly as you can without tearing the dough.
Exercise 3: The Coil Master
Now add the snail coil step but still skip the scallions. Make the dough, brush with paste, roll into a log, coil into a snail, rest 15 minutes, flatten, and fry. Examine the cross-section: you should see clear concentric rings inside. Count them — a well-coiled pancake will show 12–18 distinct layers in cross-section. If you only see 4–6, your roll wasn’t tight enough. The coil is the move that multiplies your layers from a few to dozens.
Exercise 4: Scallion Inclusion
Add the scallions back in. Pay attention to two specific failure modes: scallions poking through the surface during rolling, and scallions wet enough to steam apart your layers. Practice patting them dry, slicing them paper-thin, and distributing them evenly. By the end of this exercise, you should be able to look at a flattened coil and see the scallions visible through the surface in even speckles, with no concentrated clumps.
Exercise 5: Paper-Thin Roll
The final and most advanced exercise: roll the rectangle as thin as humanly possible — try for 1 mm, paper-thin enough that you can read text through it. This requires perfect dough hydration, a fully relaxed gluten network, and patient rolling. The thinner you roll, the more layers you get when you coil. A skilled cong you bing maker can produce 30+ visible layers from a single 120-gram dough ball. When you can hit that, you’ve mastered the technique.
Advanced Tips: Going from Good to Great
Once you have the basics, the following techniques separate good cong you bing from the kind sold at the best Shanghai street stalls. None of these are required, but each one adds a measurable improvement.
Use Lard Instead of (or with) Oil for the Paste
Traditional cong you bing in older Shanghai households used pork lard for the laminating paste. Lard is solid at room temperature, which means it stays put between layers more reliably than liquid oil. It also adds a savory depth that’s hard to replicate. Replace half the neutral oil in the paste with rendered lard for the most traditional flavor. Beef tallow works similarly. If you keep kosher, halal, or vegetarian, stick with vegetable oil.
Add Sichuan Peppercorn Oil
For a Sichuan twist, infuse the laminating oil with toasted Sichuan peppercorns before mixing it into the paste. Heat 45 g of oil with 1 teaspoon of crushed peppercorns until just fragrant, strain, then proceed as usual. The numbing tingle of the peppercorn pairs unexpectedly well with the sweetness of pan-fried scallions. This works equally well with crushed star anise or a pinch of Chinese five spice for a Beijing-style aromatic version.
Rest the Coil Overnight
If you have time, refrigerate the coiled snails overnight, well-wrapped. The cold rest fully relaxes the gluten and lets the scallion aromatics permeate the dough. The next day, let them warm to room temperature for 30 minutes before flattening. Cong you bing made this way has noticeably more flavor and the layers separate more cleanly. Many Taiwanese stalls prep the coils the day before service.
Steam-Fry for Maximum Flake
Use the gyoza-style steam-fry method for the most dramatic lamination. After 1 minute on the first side, add 2 tablespoons of water to the pan and immediately cover with a lid. The trapped steam puffs the layers apart from within. Uncover after 90 seconds, drain any residual water, add fresh oil, flip, and crisp the second side dry. The result has noticeably more visible layers and a softer interior.
The Double-Coil for Extra Layers
For competition-level lamination, after coiling once, gently flatten the snail to about 1 cm thick, brush with another light coat of paste, and re-coil it. This doubles your layer count. Be careful — the dough is now thinner and more fragile, so handle gently. The result is an absurdly flaky pancake with 40+ layers that’s almost like a scallion croissant.
Cook in Beef Tallow for Northern Style
In Shandong and northern China, cong you bing is often pan-fried in rendered beef tallow rather than vegetable oil. The flavor is dramatically richer and the crust crisper. Replace the frying oil with 2 tablespoons of tallow per pancake. The smoke point is high (about 250°C / 482°F) so you can crank the heat slightly. Pair with a chili oil dipping sauce.
Recipe Examples: Classic and Variations
Recipe 1: Classic Shanghai-Style Cong You Bing
Follow the master technique above exactly. Serve with a dipping sauce of 2 tablespoons soy sauce, 1 tablespoon black vinegar, 1 teaspoon sugar, 1 minced garlic clove, and a drizzle of homemade chili oil. The classic pairing is unbeatable: the bright vinegar cuts the rich pancake, the chili oil adds heat, and the soy provides the umami backbone.
Recipe 2: Taiwanese Street-Style with Egg
This is the famous ”dan bing” variation popular at Taipei breakfast carts. Make and pan-fry the cong you bing as normal. While it cooks, beat 1 egg with a pinch of salt. Just before flipping the pancake the final time, push it to one side of the pan, pour the egg into the empty space, and lay the pancake flat on top of the egg. Cook 1 minute until the egg sets, then flip the whole thing as one unit. The egg adheres to the bottom, creating a custardy layer. Roll the finished pancake into a tight log, slice into 1-inch pinwheels, and dip in soy-vinegar.
Recipe 3: Five-Spice Beef-Stuffed Cong You Bing (Niu Rou Bing)
A heartier Beijing variation. Brown 200 g of ground beef with 1 tablespoon of Shaoxing wine, 1 tablespoon soy sauce, 1 teaspoon sugar, half a teaspoon of five-spice, and a knob of grated ginger. Cool fully. After rolling the dough rectangle and brushing with paste, sprinkle the cooled beef along with the scallions before rolling into a log. Coil and flatten as normal. The pancakes will be slightly thicker (1 cm flat); cook with the lid-on steam-fry method to ensure the beef heats through.
Recipe 4: Sichuan Numbing Cong You Bing
Use the Sichuan peppercorn-infused oil for the paste (see Advanced Tips above). Add 1 teaspoon of Sichuan peppercorn powder to the dough’s salt. Sprinkle the rolled-out rectangle with toasted sesame seeds along with the scallions. Pan-fry as normal. Serve with a bowl of cold sesame noodles or as a side to Dan Dan Noodles — the numbing-spicy combination amplifies both dishes.
Recipe 5: Vegan Cong You Bing
The base recipe is naturally vegan. For maximum richness, use cold-pressed coconut oil (deodorized so it doesn’t taste of coconut) for the paste — its solidity at room temperature mimics lard’s lamination behavior. Add a teaspoon of nutritional yeast to the paste for umami depth. Pan-fry in pure peanut oil for an aromatic finish.
Storage, Reheating, and Make-Ahead Strategies
Cong you bing is best eaten within 5 minutes of cooking, but real life often requires planning ahead. Here’s how to make it work without sacrificing the layered crispness that defines the dish.
Make ahead, freeze raw. The best strategy. After flattening the pancakes, stack them with parchment paper between each, wrap the whole stack tightly in plastic, and freeze. They keep for 3 months. To cook, drop a frozen pancake straight into a hot oiled pan — no thawing — and add 1–2 minutes to the total cook time. The freezing actually improves the layer separation slightly because the ice crystals in the dough vaporize aggressively when they hit the heat.
Refrigerate cooked pancakes. Cool fully on a wire rack, wrap individually, refrigerate up to 3 days. To reheat, do not microwave — this turns them into rubber. Instead, dry-fry in a cold pan over medium heat for 2 minutes per side. The pancakes will re-crisp and the layers will re-puff slightly.
Refrigerate dough. The dough keeps in the fridge for 2 days, well-wrapped. Bring to room temperature before rolling. The oil paste keeps in a sealed jar at room temperature for a week, or refrigerated for a month — re-warm gently before using.
Toaster oven reheating. A surprising winner. 350°F (175°C) for 4 minutes returns refrigerated pancakes nearly to original crispness. Better than microwave, faster than re-pan-frying.
Pairings and Serving Ideas
Cong you bing is versatile. It works as breakfast, snack, side, wrap, or even dessert (lightly sweetened versions exist). Some favorite pairings:
- With congee. The classic Shanghai breakfast: a bowl of silky rice porridge, soft-boiled tea egg, pickled vegetables, and a hot scallion pancake torn into pieces.
- With soy-vinegar dipping sauce. The default. 2 parts soy sauce, 1 part Chinese black vinegar, a teaspoon of sugar, garlic, and chili oil.
- As a wrap. Use the larger Shandong-style version to wrap stir-fried beef, Peking duck, or even braised pork belly. The flaky shell holds up to wet fillings better than a Mandarin pancake.
- With a meat braise. A bowl of red-braised pork belly or hong shao rou begs for a torn-up scallion pancake to mop up the sauce.
- Cong you bing roll. Spread the cooked pancake with hoisin sauce, layer with cucumber matchsticks, scallion ribbons, and shredded smoked duck. Roll tightly, slice into 1-inch wheels — a great party appetizer.
- Dan bing breakfast roll. The Taiwanese street version with egg (Recipe 2) wrapped around bacon, ham, or cheese.
Regional Variations Across China
The basic flatbread-with-scallions concept appears all over China, but the specifics vary dramatically by region. Knowing these variations expands your repertoire and deepens your appreciation of the form.
- Shanghai (上海): The version this guide focuses on. Small (8 inches), thick edges, super-flaky interior, lots of scallions, slightly sweet from caramelization.
- Shandong (山东): Larger and thinner — sometimes 14 inches across — almost crepe-like. Often rolled and served with stews. Less lamination, more bread-like chewiness.
- Beijing (北京): Often called ”lao bing” (老饼). Thicker and more layered, with sesame seeds on top. Frequently used as a wrap for braised meats.
- Henan (河南): ”Suo si bing” — silk-thread pancake. The dough is stretched into long thin ropes before being coiled, producing a particularly fine-stranded interior.
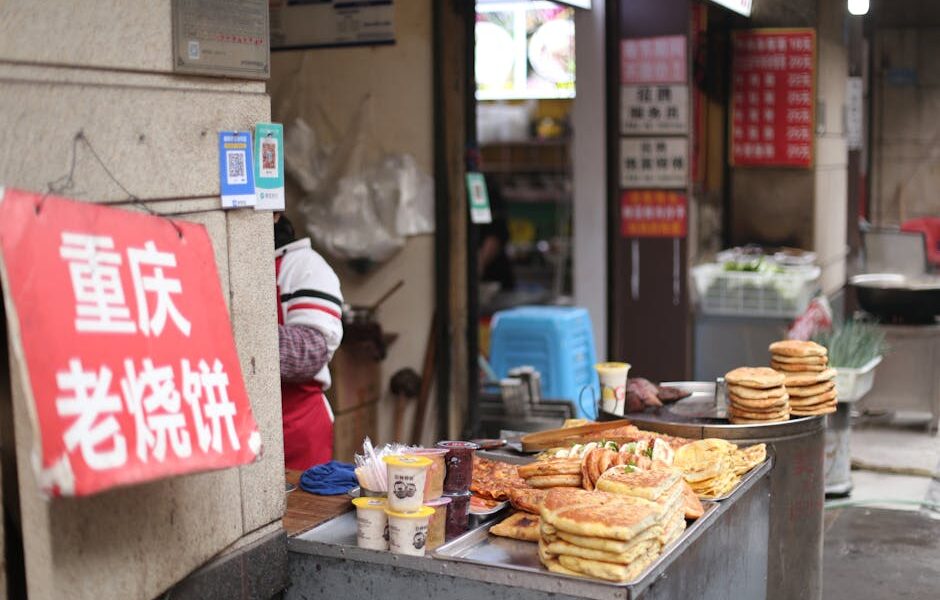
- Taiwan (台湾): The Taipei night-market version, often topped with an egg (”dan bing”), and famously fluffed with a spatula whack right out of the pan to maximize the lacy interior reveal.
- Sichuan (四川): Often spiked with chili paste, peppercorns, or pickled vegetables in addition to scallions. Served with intensely flavored dipping sauces.
- Korean variation (파전): Although technically a different dish — pajeon is batter-based, not dough-based — it’s a close cousin. The Korean approach skips lamination entirely in favor of a savory pancake-style batter studded with whole scallions.
Frequently Asked Questions
Why are my scallion pancakes not flaky?
Three causes, in order of likelihood: the dough wasn’t rolled thin enough before laminating (aim for paper-thin, 1.5 mm or less); the oil paste wasn’t applied generously enough across the entire surface; or the snail coil wasn’t rested before flattening, so the layers compressed back together. Run through the troubleshooting matrix above and isolate which step you skipped.
Can I make cong you bing without hot water?
You can, but the result will be tougher and chewier — closer to a flatbread than a layered pastry. The hot-water tang mian technique is what gives cong you bing its tender, almost croissant-like texture. If you must use only cold water, increase the kneading time to 12 minutes, rest the dough for 90 minutes minimum, and roll it especially thin. Even then, the interior will be denser than the proper version.
What can I substitute for scallions?
Garlic chives (Chinese chives, jiu cai) are the classic alternative — they’re more pungent and produce a stronger-flavored pancake. Regular chives work but lack the green allium punch. Leek tops, sliced fine, also work though they produce a slightly stringy texture. Avoid red onion or shallot — they’re too watery and burn easily.
How thin should the rolled rectangle really be?
As thin as you can manage without tearing — ideally 1–1.5 mm. A useful test: place a printed page under the rolled dough. If you can read individual letters through it, you’re good. Most beginners stop too early because they fear tearing; a properly hydrated tang mian dough is more forgiving than it looks. If it does tear, just patch with a small dab of water and keep going.
Why do my scallions turn black?
Burnt scallions on the surface mean the pan was too hot when they made contact, or your scallions were sliced too thick. Slice no thicker than 1–2 mm, tuck any escaping scallions back into the dough before frying, and reduce heat to medium. The scallions inside the layers should never burn because they’re protected by the dough; the only ones at risk are the few that poke through.
Can I bake instead of pan-fry?
You can, but the texture suffers. Baking at 425°F (220°C) for 15 minutes on a preheated pizza stone produces a crisper but drier result, more like a flatbread. The oil interaction with the hot pan is what creates the signature golden, slightly chewy crust of authentic cong you bing. If you do bake, brush the tops generously with oil before and during baking.
Is cong you bing the same as scallion oil noodles?
No — they share the cong you (scallion oil) flavor profile but are completely different dishes. Cong you bing is a layered flatbread; scallion oil noodles (cong you ban mian) are wheat noodles tossed with deeply caramelized scallion oil. Both are Shanghai classics. If you make scallion pancakes regularly, save the spent scallions and oil scraps to make a quick cong you ban mian — nothing wasted.
How do I know when the dough is the right hydration?
The ”windowpane test”: pinch off a small ball of dough and gently stretch it between your fingers. A properly hydrated tang mian will stretch into a translucent membrane before tearing. If it tears immediately, it’s underhydrated. If it sticks to your fingers and won’t form a window, it’s overhydrated. Use a scale and you’ll hit it on the first try.
Can I use a tortilla press?
No. A tortilla press flattens dough quickly but can’t roll it into the long thin rectangle the technique requires. The lamination depends on a thin sheet, not a thick pressed disc. Use a rolling pin — and accept that the rolling step takes practice.
My pancake is greasy. What went wrong?
The pan wasn’t hot enough when the pancake hit it. Cold oil is absorbed by dough; hot oil seals the surface immediately. Test the oil temperature with a wooden chopstick — if bubbles stream up the chopstick within 2 seconds, the oil is ready (around 175°C / 350°F). If no bubbles or just a few lazy ones, wait. Also, drain finished pancakes on a wire rack, never paper towels, which trap steam and make the bottom soggy.
Can I make a gluten-free version?
Honestly, it’s very difficult. The lamination depends on a gluten network that holds together when stretched paper-thin. Gluten-free flour blends with xanthan gum can produce a passable result, but it will be more brittle, less flaky, and more crumbly. Use a 1:1 GF AP flour blend, increase the hydration to 70%, and reduce the rolling thinness to about 3 mm. The result is a cousin of cong you bing rather than a true substitute.
How do I scale this for a crowd?
The dough scales linearly: double the recipe for 8 pancakes, triple for 12, etc. Mix in batches if your bowl can’t handle large volumes — pouring 600 g of boiling water into 600 g of flour at once is hard to stir evenly. The cooking is the bottleneck: each pancake takes 5–6 minutes in a single skillet. Use two skillets simultaneously for parties, or hold cooked pancakes on a wire rack in a 200°F oven for up to 30 minutes — they’ll stay warm without going soggy.
Bringing It All Together
Cong you bing is one of those dishes where the gap between mediocre and great is enormous, and the difference is almost entirely technique. The same five ingredients in a Shanghai street vendor’s hands produce a flaky, crackling, scallion-perfumed marvel; the same ingredients in untrained hands produce a chewy, bland disc. Hot-water dough chemistry, careful lamination, patient resting, and proper pan heat — those are the four pillars. Master them and you can produce restaurant-quality scallion pancakes from your home kitchen with under a dollar of ingredients.
The technique transfers directly to other Chinese flatbreads — shao bing, lao bing, da bing, niu rou bing — and even adapts to other cuisines. Once you understand lamination through scallion pancakes, Indian paratha, Iranian sangak, and Yemeni malawach all become much easier to learn. Cong you bing is, in that sense, a gateway technique into a whole world of layered flatbreads. Pair it with a bowl of stir-fried greens and a pot of jasmine tea, and you’ve got a meal that connects you to a thousand years of Chinese culinary history.
Start with the master recipe, work the practice exercises, and pay attention to which steps your hands struggle with. After your fifth or sixth batch, the dough will start to feel familiar — you’ll know exactly when to stop kneading, exactly how thin to roll, exactly when to flip. That tactile knowledge is the real prize. The pancakes are just the delicious side effect.

Mei Lin Chen
Mei Lin Chen is an Asian food writer and recipe developer. Melbourne-raised and London-based, she has spent over a decade exploring the rice paddies, hawker stalls, and home kitchens of South-East and East Asia. Her recipes balance traditional technique with everyday practicality.