Last updated: March 18, 2026
Tamagoyaki (玉子焼き), which translates literally to ”grilled egg,” is the Japanese rolled omelet that anchors breakfast plates, bento boxes, and sushi counters across the country. Beneath its tidy golden rectangle lies one of the most deceptively technical egg preparations in world cuisine: a stack of paper-thin sheets, each one tilted, rolled, and laminated into the next while the pan stays in motion. Done well, it is glossy, custardy, and supports its own weight at a clean square edge. Done poorly, it is rubbery, scorched, or collapsed into a sad scramble.
This guide breaks the technique down step by step. We will cover the rectangular tamagoyaki pan and the workarounds for round skillets, the chemistry of the seasoning base, how to read each layer as it sets, the rolling rhythm itself, the most common failure modes and their fixes, three practice exercises to build muscle memory, advanced variations from the sushi-bar atsuyaki to the dashi-soaked Kyoto style, and three full recipes you can cook tonight. By the end, you will have everything you need to roll tamagoyaki as confidently as a Tokyo breakfast cook.
What Tamagoyaki Actually Is
Tamagoyaki is not a single recipe; it is a family of rolled-omelet dishes that share one signature gesture. The cook pours a thin layer of seasoned egg into a hot, oiled pan, lets it set just past wet, rolls it toward themselves (or away, depending on the regional school), pushes the roll back to the far end of the pan, oils the empty surface, pours the next thin layer (lifting the existing roll so fresh egg flows beneath it), and rolls again. Repeat four to seven times and the result is a striped block of egg that can be sliced into glistening pinwheels.
Three broad families exist. Atsuyaki tamago is the thick, slightly sweet style associated with sushi restaurants, often enriched with shrimp paste or yamaimo (mountain yam) for a cake-like density. Dashimaki tamago is the Kyoto-style version, looser and wetter, with a high ratio of dashi to egg that gives a custardy, almost soufflé-like interior. Atsuyaki and dashimaki home tamagoyaki sits between the two: seasoned with sugar, soy, mirin, and sometimes a splash of dashi, firm enough to pack in a bento but tender enough to please a kid for breakfast.
The technique itself, however, is the same across all three. Master the rolling rhythm and the heat control, and you can move between styles by adjusting the liquid ratio and the number of layers.
A Short History of the Rolled Omelet
Eggs were not common in the Japanese diet until the Edo period (1603–1868), when poultry became more widely raised and refined sugar began trickling into kitchens through the Nagasaki trade. Early egg cookery in Japan favored simmered or steamed preparations such as chawanmushi. The rolled-omelet technique appears in cookbooks by the mid-eighteenth century, and by the time Tokyo sushi culture exploded in the late nineteenth century, tamagoyaki had become a fixture on the counter, where it doubled as both palate cleanser and a discreet way for the chef to demonstrate skill.
Today the dish is so embedded in Japanese daily life that many home cooks roll their first tamagoyaki as children, and the technique is taught alongside rice cooking and miso soup as one of the foundational washoku skills. It is also the egg at the heart of nigiri sushi, where a single rectangular slab strapped to vinegared rice with a band of nori marks the end of an omakase meal.
The Equipment You Need
The single most useful purchase is a rectangular tamagoyaki pan (makiyakinabe). The straight sides and squared corners do the geometric work for you, producing the iconic blocky shape with almost no effort. Pans come in three regional shapes: the Kanto (Tokyo) style is a tall, narrow rectangle; the Kansai (Osaka–Kyoto) style is wider and shallower; and a square Nagoya style is favored for thicker atsuyaki. For a Western kitchen, the Kanto pan (roughly 5 by 7 inches) is the most versatile starting point.
Tamagoyaki pans come in three materials. Copper lined with tin is the professional choice: it conducts heat instantly and evenly, but the tin lining is delicate and needs careful maintenance. Carbon steel behaves like a wok, requires seasoning, and rewards patience with an excellent nonstick patina. Coated nonstick aluminum is the easiest for beginners; you sacrifice a little finesse for forgiveness.
If you do not have a tamagoyaki pan, a small (8-inch) round nonstick skillet will work. You will need to trim the rounded edges of the first roll with chopsticks to fake a rectangular shape, and the final block will be smaller, but the rolling mechanics are identical.
Beyond the pan, you need: long wooden cooking chopsticks (saibashi) or a small silicone spatula, a small bowl or fat-dipping pad for the oil, a clean dish towel or paper towel folded into a thick wad to wipe the pan, a bamboo sushi mat (makisu) wrapped in plastic for optional shaping at the end, and a ladle or small measuring cup to pour even portions of egg.
Choosing Your Ingredients
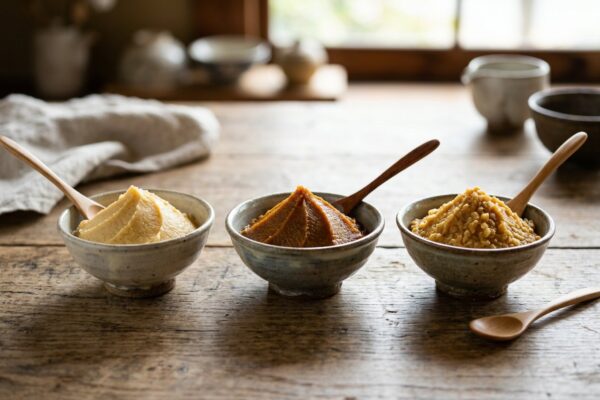
Tamagoyaki has only five core ingredients, which means each one matters. Eggs should be fresh and at room temperature; cold eggs from the fridge set unevenly and crack the layers. Use large eggs (50 grams of liquid each) for consistency. Some Japanese cooks separate one extra yolk into the mix for a richer color and silkier set.
Dashi is the soul of the dish in most styles. A simple kombu-katsuobushi awase dashi, freshly made or reconstituted from quality dashi powder, adds glutamate-driven umami without competing with the egg. Avoid stock cubes that contain MSG plus aromatics designed for Western soups; the flavor profile clashes.
Soy sauce should be light Japanese koikuchi shoyu, not Chinese dark soy. Mirin contributes both sweetness and a subtle sheen; hon-mirin is preferable to aji-mirin if you can find it. Sugar in small amounts deepens the browning and gives the omelet that signature gentle sweetness that makes it a child’s favorite. Salt seasons the egg directly. Some cooks add a splash of sake or a pinch of kombu salt for added depth.
For oil, use a neutral high-smoke-point fat: rice bran oil, grapeseed oil, or a refined vegetable oil. Toasted sesame oil is overpowering. Butter is occasionally used in modern fusion versions but is not traditional.
The Base Recipe and Ratios
Most home tamagoyaki begins from this simple formula, scaled to 3 large eggs:
| Ingredient | Home tamagoyaki (3 eggs) | Sushi-bar atsuyaki (3 eggs) | Kyoto dashimaki (3 eggs) |
|---|---|---|---|
| Dashi | 1 tbsp (15 ml) | 1 tsp (5 ml) or none | 3 tbsp (45 ml) |
| Soy sauce (light) | 1 tsp | 1/2 tsp | 1 tsp |
| Mirin | 1 tsp | 2 tsp | 1/2 tsp |
| Sugar | 1 tsp | 1 tbsp | 1/4 tsp |
| Salt | Pinch | Pinch | 1/4 tsp |
| Layers rolled | 4–5 | 6–8 | 4–6 (very wet) |
Whisk the eggs gently with chopsticks in a cutting motion rather than a circular whisk; you want the whites broken into the yolks without incorporating bubbles, which will create craters in your finished layers. Strain the mixture once through a fine sieve for the smoothest result.
Step-by-Step: How to Make Tamagoyaki
This walkthrough assumes you are using a rectangular tamagoyaki pan, 3 eggs, and the home-style ratio above. Read it through once before you start; once the pan is hot, you will not have time to consult a recipe.
Step 1: Prepare and Strain the Egg Mixture
Crack 3 room-temperature eggs into a bowl. Add the dashi, soy, mirin, sugar, and salt. Use chopsticks to lift and cut through the mixture about thirty times, just enough to combine. Strain through a sieve into a measuring cup with a spout. Set near the stove.
Step 2: Make an Oil Pad
Fold a paper towel into a thick square and saturate it with a tablespoon of neutral oil. Place it on a small plate next to the stove. You will use this pad to re-oil the pan between every layer; it gives a thinner, more even film than a brush or bottle pour.
Step 3: Heat the Pan
Set the pan over medium heat for about 90 seconds. Test the heat by flicking a drop of egg into the pan; it should sizzle and set within 2 seconds but not brown. Adjust to medium-low if it browns instantly, medium-high if it pools without setting.
Step 4: Pour the First Layer
Run the oil pad across the entire pan surface. Pour just enough egg to coat the bottom in a thin sheet (about one fifth of the mixture). Tilt the pan to spread it. As large bubbles form, prick them with chopsticks; trapped air will tear your layers.
Step 5: Roll the First Layer
When the surface is mostly set but the top is still glossy and wet (about 30 seconds), start rolling. With chopsticks or a small spatula, lift the far edge of the egg sheet and fold it toward you in three or four small folds, ending with a tight roll at the near edge of the pan. The wet top will glue each fold to the next. Push the finished roll to the far end of the pan.
Step 6: Oil and Pour the Next Layer
Run the oil pad across the empty near half of the pan and, crucially, under the finished roll by lifting it with chopsticks. Pour another thin layer of egg, tilting so it covers the entire pan and flows under the existing roll. This bonds the new layer to the old one.
Step 7: Roll Again
When the new layer is mostly set but still glossy, use the existing roll as the core and roll it back toward yourself, picking up the new sheet as it goes. Push back to the far end. Repeat steps 6 and 7 until all the egg is used—typically 4 to 5 layers total for a home-style omelet, 6 to 8 for sushi-bar atsuyaki.
Step 8: Shape and Rest
Turn the finished block out of the pan onto a sheet of plastic wrap or a bamboo sushi mat lined with plastic. Roll it up tightly while still hot and let it rest 3 to 5 minutes. The wrap squares the edges and the rest sets the interior so you get clean, glossy slices.
Step 9: Slice and Serve
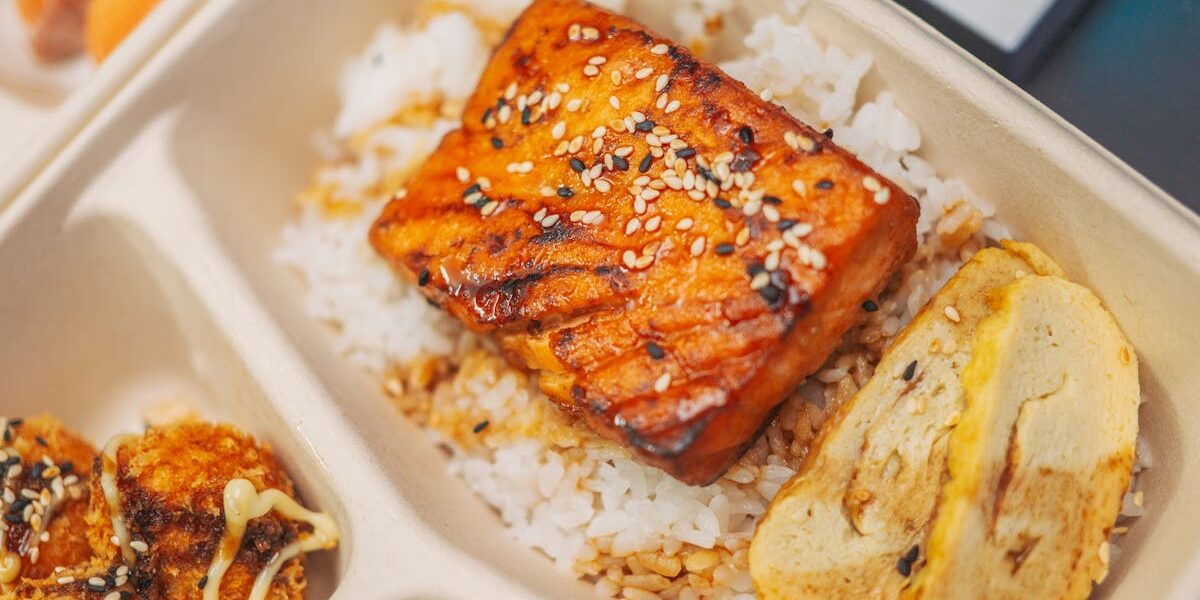
Unwrap, trim the ends if they are uneven, and slice crosswise into 4 to 6 pieces about 3/4 inch thick. Serve warm with grated daikon and a drizzle of soy, alongside steamed rice for breakfast, in a bento with a sprig of pickled ginger, or as a sushi-bar finale on vinegared rice with a strap of nori.
Reading the Layers: How to Know When to Roll
The hardest skill to learn is timing the roll. Roll too soon and the layer tears or smears; roll too late and the layer is dry and will not bond to the next. There are three visual cues. First, the edges should release cleanly from the pan when nudged with chopsticks. Second, the surface should still look glossy and slightly wet—you should be able to see your reflection in it. Third, when you tilt the pan, no liquid egg should run.
If you wait until the surface looks matte and dry, you have waited too long. The layer is fully set, has no surface tackiness, and will refuse to fuse with the next pour. The roll will look striped on the outside instead of presenting as a single continuous block.
Common Mistakes and How to Fix Them
| Mistake | What you’ll see | Cause | Fix |
|---|---|---|---|
| Browning instead of golden yellow | Dark spots, bitter flavor, leathery texture | Pan too hot; oil overheated; sugar caramelizing too fast | Drop to medium-low; wipe excess oil with the pad; lift pan off heat between layers |
| Layers do not stick | Roll falls apart when sliced; visible seams between layers | Each layer set too dry before rolling | Roll while top still glossy; ensure new layer flows under the roll |
| Holes and craters in slices | Lacy, swiss-cheese appearance | Too many bubbles whisked in; bubbles not popped | Whisk gently with chopsticks in cutting motion; strain mixture; prick bubbles as they form |
| Sticking to the pan | Egg tears when you try to roll; ragged edges | Pan not hot enough; not enough oil; pan not seasoned | Preheat properly; re-oil between every layer; season carbon-steel pans before first use |
| Rubbery or tough texture | Bouncy, dense, dry bite | Overcooked; ratio too lean; too much salt | Add more dashi; pull from heat earlier; check salt |
| Block is lopsided or trapezoidal | Thicker on one side, leaning rolls | Uneven layer thickness; pan not level; rolling pressure uneven | Use a measuring cup for equal pours; level burner; roll with even chopstick pressure |
| Leaking liquid after slicing | Watery puddle on the cutting board | Dashi ratio too high for the layer count | Reduce dashi or add more layers to bind the liquid; rest longer in the wrap |
| Pale, flavorless interior | Looks like plain scrambled egg | Underseasoned; no soy or mirin | Taste-check the raw mixture by frying a tiny test patty; adjust salt and sugar |
Practice Exercises to Build Muscle Memory
Tamagoyaki is a sequence of physical reflexes more than it is a recipe. These three drills, done over a week of breakfasts, will get you to a confident roll faster than reading more recipes.
Exercise 1: The Single Sheet
Use one egg and no other ingredients. Beat, strain, and pour the entire egg as a single thin sheet. Practice tilting the pan, popping bubbles, judging the moment the surface goes from wet to glossy-set, and rolling that one sheet from far to near in three folds. Repeat with another egg. The goal is to internalize the timing of one layer before you have to manage multiple.
Exercise 2: The Two-Layer Stack
Beat two eggs with a pinch of salt. Cook in exactly two layers. The focus here is the transition: pushing the roll back, oiling, pouring the second pour while lifting the existing roll, and getting the new layer to flow underneath. Once you can produce a clean two-layer block consistently, you can scale to any number of layers.
Exercise 3: The Blindfold Roll
Sounds gimmicky but professional cooks practice it. Cover the pan with a sheet of foil cut to size after pouring each layer (do not actually blindfold yourself—just remove visual cues for a moment). Listen to the sizzle, smell the seasoning, feel the lift of the egg under your chopsticks. This forces you to stop staring at the surface and start reading the pan through your other senses, which is how working sushi cooks track several pans at once.
Advanced Tips From Working Cooks
Warm your eggs in a bowl of warm tap water for 10 minutes before cracking. Room-temperature eggs set evenly and produce a more uniform yellow.
Strain twice for sushi-bar quality. Some Tokyo masters strain three times to remove every chalaza and bubble, producing a perfectly smooth cross-section.
Use a spritz of sake just before rolling each layer. The alcohol flashes off and the steam helps seal the new layer to the old one without making the omelet wetter.
Lift the pan, not the chopsticks. Beginners try to do all the work with their chopsticks. Experienced cooks tilt and rotate the pan with their wrist, letting gravity flow the egg and form the roll. This protects fragile layers from being torn.
Wipe with the oil pad between every layer, even if the pan looks fine. A consistent thin film of oil is what gives tamagoyaki its even, silky surface.
Square the block in the bamboo mat immediately after rolling. Press gently for 60 seconds and the residual heat will set the seams. This is how restaurants get those perfect 90-degree corners on every slice.
For sweet sushi-bar atsuyaki, replace 1 tablespoon of egg with 1 tablespoon of grated yamaimo (Japanese mountain yam) or shrimp paste. The starch traps moisture and gives the cake-like density associated with high-end sushi tamago.
For Kyoto dashimaki, increase dashi to 50% by weight of the egg. Roll fewer, thicker layers and accept a softer, almost custard texture. Serve immediately; this style does not travel well.
Three Recipes to Practice the Technique
Recipe 1: Classic Home-Style Tamagoyaki for Bento
Yield: 1 block (4 slices) | Time: 10 minutes
- 3 large eggs, room temperature
- 1 tablespoon dashi (or water)
- 1 teaspoon light soy sauce
- 1 teaspoon mirin
- 1 teaspoon sugar
- Pinch fine salt
- Neutral oil, for the pan
Whisk eggs, dashi, soy, mirin, sugar, and salt with chopsticks until just combined; strain. Heat a rectangular tamagoyaki pan over medium heat and oil with a folded paper-towel pad. Pour one fifth of the mixture in a thin layer; tilt to coat; pop bubbles. When the surface is set but still glossy, fold from far to near in 3 to 4 folds. Push roll to the far end, re-oil pan and under the roll, pour another fifth and tilt so it flows under the roll. Roll back toward you. Repeat until all egg is used (5 layers total). Turn out onto plastic wrap, roll tightly into a rectangular block, rest 3 minutes, slice into 4 pieces, and pack into bento with a leaf of pickled ginger.
Recipe 2: Sushi-Bar Atsuyaki Tamago
Yield: 1 dense block (6 sushi-counter slices) | Time: 25 minutes
- 4 large eggs, room temperature
- 1 tablespoon grated yamaimo (or 1 teaspoon mild white miso for body)
- 1 tablespoon sugar
- 1 tablespoon mirin
- 1 teaspoon light soy sauce
- 1/2 teaspoon sake
- Pinch salt
- Neutral oil, for the pan
Whisk gently, strain twice. Heat the pan over medium-low (sugar will burn quickly otherwise). Cook in 7 to 8 thin layers, rolling each one carefully. The texture should be dense and slightly chewy with a clear sweetness. After unmolding, roll in a bamboo mat for 5 minutes to set a square cross-section. Slice into 3/4-inch slabs for nigiri sushi; bind each piece to a finger of vinegared rice with a thin strap of nori. This is the tamago served at the end of a sushi meal as a final test of the chef.
Recipe 3: Kyoto-Style Dashimaki Tamago
Yield: 1 silky block (4 slices) | Time: 12 minutes
- 3 large eggs, room temperature
- 3 tablespoons cold dashi (kombu-katsuobushi awase)
- 1 teaspoon light soy sauce
- 1/2 teaspoon mirin
- 1/4 teaspoon salt
- Neutral oil, for the pan
- Grated daikon and a few drops of soy, to serve
The high liquid ratio makes this style trickier. Whisk gently, strain. Cook in 4 to 6 generous layers over medium heat, rolling while each layer is still visibly wet. The interior should be almost custardy—do not aim for a fully set block. Turn out onto plastic wrap and roll the mat firmly for 60 seconds. Slice and serve immediately, mounded with grated daikon and a drizzle of soy sauce. This is what is served as the egg course at a Kyoto kaiseki breakfast.
Pairing Tamagoyaki on the Plate
Tamagoyaki is a supporting actor more often than a star. For a traditional Japanese breakfast, slice it onto a plate with steamed short-grain rice, a small bowl of miso soup, a piece of grilled salted salmon, and a few pickles. For a bento, two slices fit neatly alongside rice, a small piece of fried chicken or salmon, blanched broccoli or sesame spinach, and a wedge of orange. As a sushi-bar finale, place a single 3/4-inch slab over a finger of seasoned rice with a band of nori. For brunch, serve it whole as the centerpiece with a salad of pickled cucumber, a bowl of dashi-poached vegetables, and a pot of hojicha tea.
Within a bento, the rectangular shape is a gift for packing. A tamagoyaki block can be sliced and arranged like dominoes against rice, holding its shape through a morning commute and tasting just as good at room temperature. This is one of the reasons tamagoyaki is so deeply embedded in Japanese lunch culture; it is a piece of egg cookery purpose-built for portability.
Storage, Make-Ahead, and Reheating
Tamagoyaki keeps in the fridge, wrapped tightly in plastic, for 2 to 3 days. The flavor often improves overnight as the dashi and soy distribute. To reheat, slice and warm briefly in a dry nonstick pan over medium-low heat, or simply bring to room temperature for a bento. Do not microwave; the texture turns rubbery in seconds.
Freezing is possible but not recommended. The custard texture, particularly in dashimaki style, suffers irreversible damage from ice crystals. If you must, slice first, freeze on a tray, then transfer to a bag and thaw overnight in the fridge.
Variations Worth Exploring
Negi tamago folds in finely chopped scallions before the second pour, distributing green flecks through every layer. Mentaiko tamagoyaki tucks strips of spicy pollack roe into the rolls at the third layer for a Kyushu-style version. Nori-iri places a sheet of nori on top of each pour just before rolling, giving a striking dark spiral when sliced. Sakura ebi adds a tablespoon of dried tiny shrimp for sweetness and a pink hue. Cheese tamagoyaki is a modern home variation, common in elementary-school bento, that lays slices of processed cheese between layers; not traditional, but beloved by children.
For a savory dinner version, fold finely diced mushrooms (shiitake or maitake) sautéed in soy and mirin into the egg base. For a vegetable-forward bento, add a tablespoon of grated carrot and chopped spinach to a 3-egg base. The technique stays the same; only the inclusions change.
Tamagoyaki in Bento Culture
If you have ever opened a Japanese bento box, you have probably seen a slice or two of tamagoyaki tucked next to the rice. It is one of the three or four foundational bento items, alongside rice, a protein, and a vegetable side. Bento cooks prize tamagoyaki for three reasons: it travels well, it is colorful (the yellow contrasts beautifully with white rice and green vegetables), and it tastes good at room temperature, which is how most bento are eaten.
For bento purposes, cook the omelet slightly firmer than you would for breakfast—reduce dashi by a teaspoon and add an extra half layer to give it structure. Slice into 1/2-inch thick pieces (thinner than serving slices) so they fit neatly into the box. Cool completely on a rack before packing; warm tamagoyaki packed in a sealed box will steam, soften, and risk food safety issues.
Frequently Asked Questions
Do I need a special pan to make tamagoyaki?
No, but you will produce a better-looking block faster with a rectangular tamagoyaki pan. A small (8-inch) round nonstick skillet works for practice; just trim the rounded edges of the first roll with chopsticks to fake a rectangular shape. Once you find yourself making tamagoyaki regularly, a 5-by-7-inch Kanto-style pan is a worthwhile $25 to $40 investment.
What is the difference between tamagoyaki and dashimaki tamago?
All dashimaki is tamagoyaki, but not all tamagoyaki is dashimaki. Dashimaki specifically refers to the Kyoto-style version with a high ratio of dashi to egg, producing a soft, almost custardy interior. Tamagoyaki is the umbrella term for any rolled Japanese omelet, including the sweeter Tokyo home style and the dense, sugary sushi-bar atsuyaki.
Can I make tamagoyaki without dashi?
Yes. Substitute water and add a pinch more salt. The result will be a touch less complex but still delicious. Many sushi-bar atsuyaki versions use little or no dashi at all, relying on sugar and mirin for body. If you keep instant dashi powder on hand, even a quarter teaspoon dissolved in a tablespoon of water dramatically improves the flavor.
Why does my tamagoyaki turn brown?
Your pan is too hot or you have too much sugar. Drop to medium-low heat, wipe excess oil between layers, and consider lifting the pan off the burner between pours to let it cool slightly. For sweet styles, accept that a faint golden-brown bottom on each layer is normal; only obvious dark spots indicate a problem.
Should I roll toward myself or away?
It is a matter of regional school and personal comfort. Tokyo tradition often rolls away from the cook; Kansai tradition often rolls toward. The mechanics and the final block are identical. Pick one direction and stick with it for muscle-memory consistency.
How do I get rid of the bubbles in my layers?
Three steps. First, whisk gently with chopsticks in a cutting motion, never a circular whisk. Second, strain the mixture through a fine sieve before cooking. Third, prick any bubbles that form on the surface during cooking with the tip of your chopsticks before rolling that layer.
Can I make tamagoyaki ahead of time for a party?
Yes. Cook up to a day in advance, wrap in plastic, and refrigerate. Bring back to room temperature, slice, and serve. The flavor often improves with rest. For Kyoto dashimaki, this is less successful; the wet, custardy texture is best eaten immediately.
Is tamagoyaki sweet or savory?
It is both, in varying proportions. Sushi-bar atsuyaki leans sweet, with up to a tablespoon of sugar for three eggs. Home-style versions sit in the middle, with a teaspoon or so of sugar balanced against soy and dashi. Kyoto dashimaki is essentially savory, with sugar reduced to a barely-there quarter teaspoon. Pick your style based on context: sweet with sushi, balanced with breakfast, savory at kaiseki.
What is the best oil for tamagoyaki?
Neutral, high-smoke-point oils such as rice bran, grapeseed, or refined vegetable oil. Avoid extra-virgin olive oil (wrong flavor) and toasted sesame oil (too aggressive). Some traditional cooks use a thin film of rendered chicken fat for atsuyaki; it deepens the umami but is optional.
How many layers should a tamagoyaki have?
For home tamagoyaki, 4 to 5 layers is standard. For sushi-bar atsuyaki, 6 to 8 layers give the dense, cake-like texture. For dashimaki, 4 to 6 layers with very wet pours preserve the soft interior. More layers means a tidier striped cross-section but also a longer cooking time and more chances to overcook.
Bringing It All Together
Tamagoyaki rewards repetition more than reading. You can study the ratios, memorize the steps, and watch every video on the internet, and your first attempt will still come out as a flat, partially scrambled disaster—because the technique lives in the wrist, the eye for surface gloss, and the rhythm of pour-roll-push-oil-pour. Give yourself a week of breakfasts with a carton of eggs and your nonstick pan; by the end of it, you will be turning out tidy striped blocks without thinking about it.
Start with the home-style ratio (3 eggs, dashi, soy, mirin, sugar, salt), use a folded oil pad, keep the heat at medium, roll while each layer is still glossy on top, and rest the finished block in plastic wrap for three minutes. Master that base, then branch out to the dense sweet atsuyaki of sushi counters and the silky dashi-soaked dashimaki of Kyoto kaiseki. The same gestures unlock all three styles, and once you can roll a clean tamagoyaki, you have one of the most versatile, portable, and quietly impressive items in the entire Japanese kitchen.

Mei Lin Chen
Mei Lin Chen is an Asian food writer and recipe developer. Melbourne-raised and London-based, she has spent over a decade exploring the rice paddies, hawker stalls, and home kitchens of South-East and East Asia. Her recipes balance traditional technique with everyday practicality.