Last updated: March 04, 2026
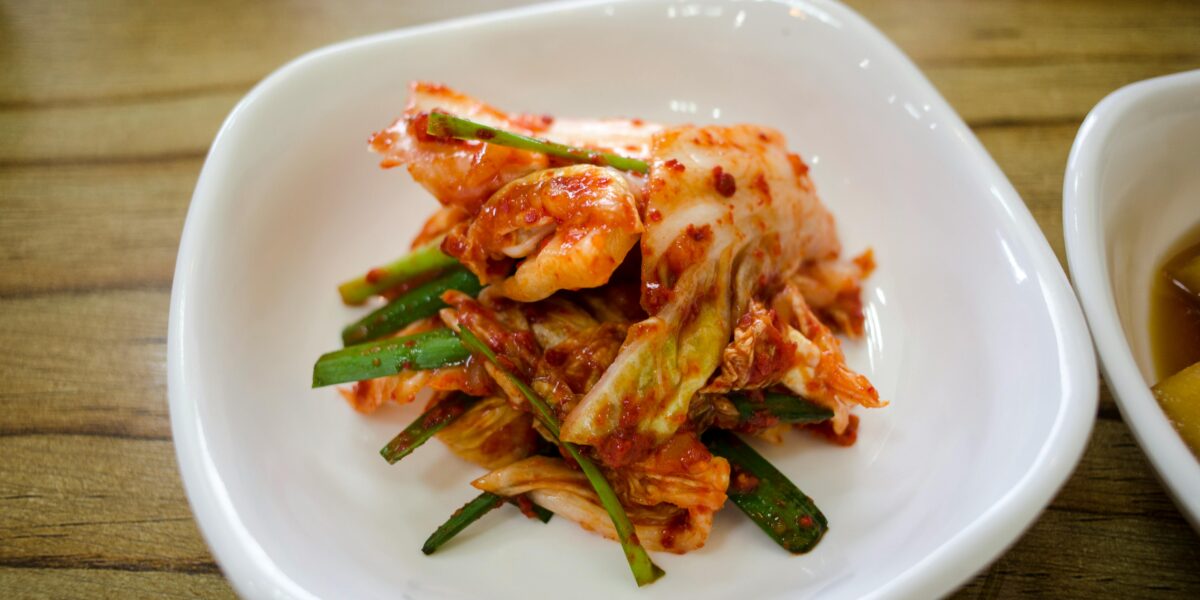
Kimchi is more than a side dish—it is the living soul of Korean cooking, a centuries-old fermentation practice that transforms humble cabbage and radish into a tangy, funky, deeply flavored condiment with billions of beneficial bacteria per spoonful. Making kimchi at home is one of the most rewarding cooking projects you can take on. The technique itself is ancient, but the process is forgiving, requires almost no specialized equipment, and yields a jar of crackling, alive food that improves over weeks and months in your refrigerator.
This complete guide walks you through Korean fermentation from end to end. You will learn the science of why kimchi works, the role of every ingredient, the salting and rinsing techniques that determine final texture, how to build a balanced kimchi paste, the temperature and time variables that drive fermentation, and how to troubleshoot every common failure mode. By the end you will be confident enough to ferment napa cabbage, radish, cucumber, and seasonal vegetables in your own kitchen with consistency that rivals what you find in any Korean grocery cold case.
What Is Kimchi and Why Do Koreans Ferment Vegetables?
Kimchi (김치) refers to a vast family of Korean fermented vegetable preparations, with the Korea Agro-Fisheries Corporation recognizing more than 200 distinct regional varieties. The most familiar is baechu kimchi—whole-leaf napa cabbage rubbed with a spicy paste and aged for days, weeks, or even years. But kimchi also includes radish cubes (kkakdugi), water kimchi (dongchimi), young radish (chonggak), cucumber (oi sobagi), green onion (pa kimchi), and dozens of seasonal preparations made from mustard greens, perilla leaves, eggplant, and even pumpkin.
The reason Koreans ferment so prolifically is rooted in geography and history. The Korean peninsula has long, brutal winters where fresh produce was scarce until the modern era. Salting and lacto-fermenting vegetables in autumn (a communal practice called kimjang, recognized by UNESCO in 2013 as Intangible Cultural Heritage) preserved a winter's worth of nutrition in earthenware onggi jars buried in the ground. The buried jars maintained a stable cold temperature that slowed fermentation just enough to keep kimchi crunchy and bright through spring.
Fermentation does three things simultaneously: it preserves vegetables by lowering pH below the threshold where most spoilage organisms can grow; it transforms raw, sometimes harsh-tasting produce into something complex, sour, and deeply savory; and it generates measurable quantities of B vitamins, vitamin K2, and beneficial lactic acid bacteria. Modern research has identified the dominant species in mature kimchi as Lactobacillus sakei, Leuconostoc mesenteroides, and Weissella koreensis, all of which contribute to gut health and immune function.
The Science of Lactic Acid Fermentation
Understanding what is happening inside your jar will make you a better fermenter. Kimchi is a wild lacto-fermentation, meaning you do not add a starter culture. The vegetables, the salt brine, and the air around them already contain everything the process needs.
When you salt napa cabbage, the salt draws water out of the cells through osmosis. This wilted, partially dehydrated cabbage is now both a hostile environment for most spoilage bacteria (which cannot tolerate salt) and a hospitable home for halotolerant lactic acid bacteria, which thrive in salty, oxygen-poor conditions. Once the cabbage is mixed with the spicy paste and packed tightly into a jar, surface-clinging bacteria from the genus Leuconostoc ignite the early ferment, generating carbon dioxide bubbles, mild acidity, and a fizzy, fresh tang. After several days at room temperature, Lactobacillus species take over and drive the pH lower, producing the deeper, sour, more complex flavors of mature kimchi.
Three variables control the speed and quality of this transformation. Salt concentration in the finished kimchi should land between 2 and 3 percent by weight—too little and bad bacteria win, too much and good bacteria stall. Temperature matters enormously: at 65°F to 72°F (18°C to 22°C), kimchi reaches drinkable sourness in two to four days; at refrigerator temperature of 38°F (3°C), the same flavor takes two to four weeks. Time is the third lever—the longer kimchi ferments, the more lactic acid accumulates, the softer the cabbage becomes, and the more umami the broth develops. Newly fermented kimchi is bright and crunchy; aged kimchi (mukeunji, six months or older) is mellow, sour, and beloved for stews and pancakes.
Equipment You Need (and What You Do Not)
One of the joys of making kimchi is how little gear it requires. The traditional onggi—a porous, breathable Korean clay jar—is beautiful but absolutely optional. Glass works perfectly. So does food-grade plastic. The list below covers everything most home cooks actually need.
- A large mixing bowl or pot — at least 6 quarts (5.7 L) for a single head of napa cabbage. Stainless steel, glass, or food-grade plastic only. Avoid aluminum and reactive metals because the salt and acid will pit them.
- A 2-quart or 4-quart wide-mouth glass jar — or several smaller jars. Wide mouths make packing and tamping easier. Plastic deli quarts also work for first-time fermenters.
- Food-safe nitrile or latex gloves — non-negotiable. Korean red pepper flakes (gochugaru) will tint your skin red and burn any cut, hangnail, or eye you touch for hours afterward.
- A digital kitchen scale — essential for the salting step, where ratios matter. Volume measurements are not precise enough for fermentation safety.
- Coarse Korean sea salt (cheonilyeom) — or any non-iodized coarse salt. Iodized table salt inhibits the bacteria you want and can produce off flavors.
- A small saucepan — to make the rice flour porridge that helps the paste cling to the cabbage and feeds initial fermentation.
- A blender, food processor, or molcajete — to puree the aromatics into a smooth paste.
- Heavy zip-top bag filled with brine or a glass weight to keep vegetables submerged below the liquid line during fermentation.
You do not need a vacuum sealer, an airlock, a temperature-controlled fermentation chamber, or a starter culture. Korean home cooks have been making kimchi successfully without any of those for centuries. What you do need is cleanliness: scrub your jar with hot water and white vinegar before packing, and never reach into your kimchi with hands or utensils that have touched raw meat or other ferments.
The Core Ingredients (and What Each One Does)
A classic napa cabbage kimchi is built from four ingredient families: the vegetables themselves, the salt, the spicy paste, and the umami amplifiers. Each one plays a specific role.
Napa Cabbage
Choose firm, heavy heads with tightly packed white ribs and pale yellow-green inner leaves. The base of each leaf should snap crisply when bent. Wilted, soft, or yellowing cabbages will produce mushy kimchi. A medium head weighs 4 to 5 pounds (1.8 to 2.3 kg) and yields roughly 2 quarts of finished kimchi.
Korean Radish (Mu)
Cut into matchsticks and tucked between cabbage leaves, Korean radish adds crunch and a sweet, peppery counterpoint. If you cannot find it, daikon is the standard substitute. Read more about how to use daikon and why it differs from Korean mu in our complete guide to daikon radish.
Gochugaru (Korean Red Pepper Flakes)
This is the soul of red kimchi. Gochugaru gives kimchi its color, gentle heat, and fruity sweetness. Use the coarse-grind variety for cabbage kimchi, not fine powder. Buy it from a Korean grocer or trusted online supplier; the difference between fresh gochugaru and stale, off-brand flakes is dramatic. Our complete guide to gochugaru covers heat levels, sourcing, and storage.
Garlic, Ginger, and Aromatics
Korean kimchi pastes use surprising quantities of fresh garlic and ginger—often 8 to 12 cloves of garlic and a thumb of ginger per head of cabbage. The garlic mellows during fermentation, but its raw bite is essential to the early flavor. Fresh ginger adds warmth and a clean, citrusy lift. See our guide to fresh ginger in Asian cooking for selection and storage tips. Korean leeks, scallions, and the entire allium family also play supporting roles.
Fish Sauce, Salted Shrimp, and Anchovy
Most Korean kimchi recipes use one or more salty seafood ferments to build depth. Korean fish sauce (aekjeot) is darker and milder than Vietnamese versions but Vietnamese fish sauce works in a pinch. Saeujeot—tiny brined shrimp—adds a sharp, oceanic funk. Together with the umami of dried anchovies, these ingredients give kimchi its meaty, savory backbone. For vegan kimchi, replace these with extra soy sauce, kelp dashi, or a splash of mushroom soy. Our guide to fish sauce explains the brand differences.
Sweet Rice Flour Porridge
Cooking sweet rice flour with water makes a thin, glossy slurry that does two crucial jobs: it binds the paste to the cabbage so the chili and aromatics cling rather than slide off, and it provides simple sugars that feed the lactic acid bacteria during the first 24 hours of fermentation. This jump-starts a vigorous, healthy ferment.
Asian Pear, Apple, or Onion
A pureed Asian pear or sweet onion adds natural fruit sugars that feed fermentation and balance the salt and chili. Korean cooks consider this addition essential for round, mature flavor.
Step-by-Step: How to Make Classic Napa Cabbage Kimchi
This is the master technique. Once you have made baechu kimchi successfully, every other variety becomes a variation on this same eight-stage process. Read through all steps before you start so the rhythm makes sense.
Step 1: Quarter and Score the Cabbage
Trim any wilted outer leaves, then with a sharp knife cut a 4-inch (10 cm) slit straight up the stem end of the cabbage—just deep enough to start splitting it. Use your hands to pull the cabbage apart along the slit. Repeat with each half so you have four wedges with cores still attached. Tearing rather than cutting keeps each leaf intact, which is the texture you want in finished kimchi.
Step 2: Salt the Cabbage
This is the most important step in the entire process. Dissolve 1 cup of coarse salt in 8 cups of water to make a brine. Submerge the cabbage wedges briefly, then lift them out, holding them open like a book. Sprinkle additional dry salt between every layer of leaves, paying special attention to the thick white ribs at the base. Use about ½ cup of additional dry salt total for a single 4-pound head.
Place the salted wedges in a large bowl, cover, and let them sit at room temperature for 4 to 6 hours, flipping every hour. The cabbage is properly salted when the white ribs bend without snapping—they should feel pliant, like soft leather. Under-salted cabbage will be crunchy but spoil quickly. Over-salted cabbage will stay too crunchy and never develop flavor. The pliable rib test is your best indicator.
Step 3: Rinse Thoroughly
Rinse the salted cabbage under cold running water three times, gently flushing each leaf. The goal is to remove excess surface salt without washing out the cabbage's internal salinity. Set the rinsed wedges in a colander, cut-side down, and let them drain for 30 minutes to an hour. Squeeze gently to remove additional water before mixing with paste. Wet cabbage equals diluted paste equals weak kimchi.
Step 4: Cook the Rice Flour Porridge
In a small saucepan whisk together 2 tablespoons sweet rice flour and 1 cup of cold water. Heat over medium, whisking constantly. The mixture will go from cloudy to translucent and thicken to the consistency of a loose pudding in about 4 to 5 minutes. Remove from heat, whisk in 2 tablespoons of sugar (it dissolves into the warm porridge), and let it cool to room temperature before mixing into the paste.
Step 5: Build the Kimchi Paste
In a blender, puree 1 small Asian pear (or apple), ½ medium onion, 8 cloves garlic, and a 2-inch knob of ginger with ¼ cup of water until smooth. In a large bowl combine this puree with the cooled rice porridge, ½ to 1 cup gochugaru (depending on your preferred heat), ¼ cup fish sauce, and 2 tablespoons salted shrimp (chopped). Whisk until you have a glossy, brick-red paste with the texture of thick yogurt.
Step 6: Prepare the Filling Vegetables
Cut 1 medium Korean radish into matchsticks. Slice 6 scallions into 2-inch lengths. Add both to the paste bowl along with 1 small bunch of garlic chives if you can find them. Toss everything together until the vegetables are completely coated.
Step 7: Stuff and Pack
Put on your gloves. Take one cabbage wedge at a time and, working from the outermost leaf inward, lift each leaf and smear paste between every layer with your gloved hand. You do not need a heavy coat—a generous smear is plenty. Once the wedge is fully filled, fold it in half and wrap the outermost leaf around the bundle to hold the shape. Pack the wrapped wedges tightly into your jar, pressing down with your knuckles to expel air pockets and bring the brine up over the cabbage. Leave at least 2 inches of headspace at the top of the jar; kimchi expands and bubbles vigorously during the first 48 hours.
Step 8: Ferment, Then Refrigerate
Cover the jar loosely (so gas can escape) and leave it at room temperature for 24 to 72 hours. You will know fermentation is active when bubbles climb the inside of the jar, the brine turns slightly cloudy, and the aroma shifts from sharp and raw to round and tangy. Taste it on day 2: if it has the bright, fizzy sourness you want, transfer the jar to the refrigerator. If it tastes flat, give it another day. Once refrigerated, kimchi continues to ferment slowly for weeks. Most Koreans agree that the flavor peaks between weeks 2 and 4. Aged kimchi past 6 months is a separate ingredient unto itself, used for stews, fried rice, and pancakes.
Common Mistakes and How to Fix Them
| Mistake | What Goes Wrong | Fix |
|---|---|---|
| Using iodized table salt | Iodine inhibits lactic acid bacteria; kimchi tastes metallic and may not ferment | Switch to coarse Korean sea salt or kosher salt |
| Skipping or shortening the salt step | Cabbage stays crunchy briefly, then turns to mush within a week | Salt 4 to 6 hours, flipping hourly, until ribs bend without snapping |
| Cabbage floats above the brine | Exposed leaves grow surface mold or kahm yeast | Weight cabbage down with a brine-filled zip bag or glass weight |
| Sealing the jar too tightly during fermentation | Pressure builds dangerously; jar may crack or explode | Cover loosely or burp the jar twice a day for the first 3 days |
| Fermenting in direct sunlight or above 80°F (27°C) | Yeasts outcompete lactic bacteria; kimchi tastes alcoholic or bitter | Keep at 65–72°F (18–22°C); a kitchen counter is ideal |
| White, fuzzy mold on the surface | Often kahm yeast (harmless) or true mold (toxic) | Skim kahm yeast and submerge cabbage; discard if mold is fuzzy and colored |
| Stale or weak gochugaru | Pale color, no fragrance, dull flavor | Buy fresh gochugaru, store in the freezer, replace yearly |
| Not enough sugar or pear in the paste | Slow fermentation start; flat early flavor | Add 1 tablespoon sugar or ½ pureed apple to feed bacteria |
| Cross-contaminating with dirty utensils | Off smells, slimy texture, spoilage | Always use a clean spoon; never double-dip from a meal plate |
| Refrigerating immediately after packing | Fermentation barely starts; kimchi tastes raw and salty | Allow 24–72 hours at room temperature before chilling |
Practice Exercises to Build Your Skills
Like any technique, kimchi-making rewards repetition. The exercises below progress from simple to more advanced and will deepen your feel for the variables involved.
Exercise 1: Quick-Salted Cabbage Salad
Before committing to a full ferment, salt half a small head of napa cabbage as you would for kimchi. After 4 hours of salting and rinsing, dress the cabbage with a quick paste of gochugaru, garlic, fish sauce, and a drizzle of sesame oil. Eat immediately. This geotjeori-style fresh kimchi teaches you what properly salted cabbage feels and tastes like, with no fermentation variables to worry about.
Exercise 2: Cucumber Kimchi (Oi Sobagi) in Two Days
Cucumber kimchi ferments fast (24 to 48 hours), uses tiny amounts of paste, and is forgiving for first-timers. Score Korean or Persian cucumbers lengthwise, salt for one hour, rinse, stuff with paste, and let sit at room temperature for one night. The fast turnaround means you can iterate on paste seasoning every couple of days.
Exercise 3: Side-by-Side Salt Test
Make two small jars of identical kimchi but salt one batch for 3 hours and the other for 6 hours. Ferment them at the same temperature. Taste both at days 3, 7, and 14. You will discover firsthand how salting time controls texture (crunch vs. tender) and longevity (fast spoilage vs. months of stability).
Exercise 4: Vegan Kimchi Conversion
Make a batch using only soy sauce, dried kelp dashi, and shiitake mushroom powder in place of fish sauce and salted shrimp. Compare it to your standard recipe at week 2. You will learn how seafood ferments contribute to depth and how plant-based umami can fill that gap.
Exercise 5: Mukeunji (Aged Kimchi) Project
Set aside one jar of cabbage kimchi and label it "do not eat" for 6 months. When you finally open it, the cabbage will be limp, sour, and almost wine-like in complexity. Use it for kimchi jjigae or kimchi pancakes—you cannot buy this flavor in any store.
Advanced Techniques and Regional Variations
White Kimchi (Baek Kimchi)
This non-spicy version skips gochugaru and uses a milder paste of pear, garlic, ginger, and salted shrimp. The result is delicate, crunchy, and especially loved by children and elderly Koreans. Serve baek kimchi with grilled fish or as a palate cleanser between rich courses.
Water Kimchi (Dongchimi)
Made with whole or quartered radishes, fruit, and a clear brine, dongchimi ferments into a refreshing pickled drink. The brine itself is the prize—Koreans use it to make naengmyeon (cold buckwheat noodles) and to settle the stomach after a heavy meal.
Cubed Radish Kimchi (Kkakdugi)
Bite-sized radish cubes tossed with the same paste used for cabbage kimchi. Kkakdugi is essential alongside Korean stews and seolleongtang (ox bone soup). Because radish is denser than cabbage, kkakdugi takes longer to fully ferment but holds its crunch for months.
Stuffed Cucumber (Oi Sobagi)
A summer kimchi that ferments in 24 to 48 hours. Cucumbers are scored crosswise, salted briefly, and stuffed with a thin paste before being eaten almost as quickly as they are made.
Green Onion Kimchi (Pa Kimchi)
Made from whole green onions or Korean stem leeks, pa kimchi has a sharp, allium-forward flavor that mellows into something almost candy-sweet after weeks of fermentation. It is traditionally enjoyed with grilled pork belly.
Vegan Kimchi
Substitute fish sauce with soy sauce or tamari and replace salted shrimp with miso, shiitake powder, or kelp dashi. Add a tablespoon of doenjang for extra savory depth. Vegan kimchi tends to ferment slightly slower and ages more cleanly because there are no animal proteins to develop fishy off-flavors.
Northern vs. Southern Style
Northern Korean kimchi (Pyongyang style) tends to be milder, with less gochugaru, more brine, and a focus on water-style preparations. Southern kimchi (Jeolla, Gyeongsang) is bolder, spicier, and richer in seafood and aromatics. Climate explains the divergence: warmer southern weather demands stronger salt and spice for preservation, while colder northern winters allow milder ferments to keep safely.
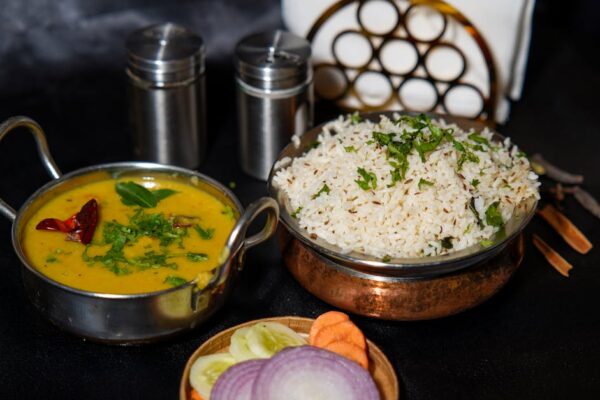
How to Use Kimchi in Cooking
Fresh, crunchy kimchi (1 to 2 weeks old) is best eaten raw as a side dish (banchan) alongside rice and grilled meats. Mature kimchi (2 to 6 months old) is your weeknight cooking workhorse—the sourness and depth become an ingredient in their own right.
- Kimchi jjigae — the iconic kimchi stew, made with aged kimchi, pork belly or tuna, tofu, and a splash of kimchi brine.
- Kimchi fried rice (kimchi bokkeumbap) — chopped kimchi sizzled with day-old rice, gochujang, and a fried egg on top.
- Kimchi pancakes (kimchijeon) — aged kimchi mixed into a flour batter and pan-fried into crisp, savory pancakes.
- Kimchi mandu — chopped kimchi folded into dumpling filling for tang and texture. See our guide to dumpling folding techniques.
- Kimchi ramen — a tablespoon of kimchi and brine added to instant ramen turns it into a meal.
- Bibimbap topping — a spoonful of kimchi alongside other banchan in Korean mixed rice bowls.
- Tacos and burgers — kimchi has crossed into Western kitchens as a fusion condiment that cuts through rich grilled meats.
Storage, Aging, and the Kimchi Lifecycle
| Age | Flavor and Texture | Best Uses |
|---|---|---|
| Fresh (day 1–3, room temp) | Salty, raw, slightly fizzy | Quick salad, banchan with grilled fish |
| Young (week 1–2, fridge) | Bright, crunchy, balanced sour | Banchan, bibimbap, ssam wraps, Korean BBQ |
| Mature (week 3–6) | Deeper sour, softer texture, more umami | Kimchi fried rice, mandu filling, omelets |
| Ripe (months 2–6) | Sharply sour, brine cloudy, leaves limp | Kimchi jjigae, kimchijeon, soup base |
| Aged / mukeunji (6+ months) | Mellow sour, almost wine-like, fully tender | Slow-braised kimchi jjim, pancakes, dumplings |
Kimchi keeps in the refrigerator for at least 6 months and often a year or more. The brine will become cloudy and sometimes effervescent—both are normal. Store with cabbage submerged below the brine line at all times, and use only clean utensils to portion. If your kimchi develops a strong yeasty or alcoholic smell, it has likely fermented too warm; cool it immediately and the smell will fade.
Pro Tips from Korean Home Cooks
- Use a digital scale. Aim for finished kimchi at 2.5 percent salt by total weight. Weigh the cabbage after draining; salt should equal 2.5 percent of that weight before paste is added.
- Make paste a day ahead. Letting the gochugaru hydrate in fish sauce and pear puree overnight produces a glossier paste with deeper color.
- Save the brine. The cloudy, tangy brine that pools at the bottom of an aged kimchi jar is liquid gold for stews, marinades, and bloody-mary-style cocktails.
- Toast your gochugaru briefly. A 30-second dry-toast in a pan deepens its color and nuttiness before mixing it into the paste.
- Layer flavors. Some of the best Korean home cooks add a tablespoon of soy sauce, doenjang, or even finely minced raw oyster (in winter) for an additional dimension of umami.
- Burp the jar. Open the jar briefly twice a day for the first three days. This releases pressure and prevents an overflowing volcano of brine on your counter.
- Top off with cabbage juice. If the brine doesn't cover the cabbage after packing, mix 1 tablespoon of salt into 1 cup of water and pour it over the top to seal the surface.
- Track temperature. A small fermentation thermometer stuck to the jar shows you in real time whether your room is in the 65 to 72°F sweet spot.
Recipe: Master Napa Cabbage Kimchi
This is the foundational recipe to internalize. Once you know it cold, every other kimchi is a riff. Yields about 2 quarts.
Ingredients
- 1 medium head napa cabbage (about 4 lb / 1.8 kg)
- ½ cup coarse Korean sea salt or kosher salt
- 1 medium Korean radish or daikon, cut into matchsticks
- 6 scallions, cut into 2-inch pieces
- 1 small bunch garlic chives, optional
- 2 tablespoons sweet rice flour
- 1 cup water
- 2 tablespoons sugar
- ½ small Asian pear or apple, peeled and quartered
- ½ small onion
- 8 cloves garlic
- 2-inch knob fresh ginger
- ¾ cup gochugaru
- ¼ cup Korean fish sauce
- 2 tablespoons salted shrimp (saeujeot), chopped
Method
- Quarter the cabbage by scoring and tearing. Salt heavily between every leaf and let sit 4 to 6 hours, flipping hourly, until ribs bend without snapping.
- Rinse three times under cold water. Drain in a colander, cut-side down, for 30 minutes. Squeeze gently.
- Whisk rice flour and water in a saucepan. Cook over medium until translucent and thick. Whisk in sugar. Cool to room temperature.
- Blend pear, onion, garlic, ginger, and ¼ cup water until smooth. Combine with rice porridge, gochugaru, fish sauce, and salted shrimp.
- Toss radish matchsticks, scallions, and garlic chives in the paste.
- Wearing gloves, smear paste between every cabbage leaf. Fold each wedge in half and wrap with the outermost leaf.
- Pack tightly into a 2-quart jar. Press down to release air. Leave 2 inches of headspace.
- Cover loosely. Ferment at room temperature 24 to 72 hours, burping the jar twice daily. When it tastes pleasantly sour and fizzy, refrigerate. Best between weeks 2 and 4.
Recipe: Quick Cucumber Kimchi (Oi Sobagi)
- 6 Korean or Persian cucumbers
- 2 tablespoons coarse salt
- ½ small Korean radish, julienned
- 4 scallions, sliced
- 3 tablespoons gochugaru
- 1 tablespoon fish sauce
- 1 tablespoon salted shrimp
- 4 cloves garlic, minced
- 1-inch piece ginger, grated
- 1 teaspoon sugar
- Cut a deep cross into each cucumber lengthwise, leaving 1 inch attached at one end. Salt heavily inside the cuts and let sit for 1 hour.
- Rinse and drain. Mix radish, scallions, gochugaru, fish sauce, salted shrimp, garlic, ginger, and sugar in a bowl.
- Stuff each cucumber with the filling. Pack tightly into a jar.
- Ferment at room temperature for 24 to 48 hours, then refrigerate. Best within one week.
Recipe: Vegan Kimchi
- 1 medium napa cabbage
- ½ cup coarse salt
- 1 cup Korean radish, julienned
- 2 tablespoons sweet rice flour
- 1 cup vegan dashi (kelp + dried shiitake)
- 2 tablespoons sugar
- ½ cup gochugaru
- 3 tablespoons soy sauce or tamari
- 2 tablespoons miso or doenjang
- 1 tablespoon shiitake powder
- ½ pear or apple, blended
- 8 cloves garlic, blended
- 2-inch ginger, blended
- 4 scallions, chopped
- Salt and rinse cabbage as in the master recipe.
- Cook the rice flour porridge in vegan dashi instead of plain water. Whisk in sugar and cool.
- Blend porridge with gochugaru, soy sauce, miso, shiitake powder, pear, garlic, and ginger.
- Toss radish and scallions through the paste, smear between leaves, pack, and ferment as usual. Vegan kimchi often tastes fully developed at week 3.
Frequently Asked Questions
Why does my kimchi taste flat or salty without fermentation flavor?
You probably refrigerated it too soon. Kimchi needs 24 to 72 hours at 65–72°F to develop the lactic tang. If your kitchen is cold, leave the jar out longer or place it on top of the refrigerator where it's slightly warmer.
Is the white film on top of my kimchi mold?
It's most likely kahm yeast, a harmless surface yeast that forms when vegetables are not fully submerged. Skim it off, push the cabbage below the brine, and continue. True mold is fuzzy, blue-green or black, and has a sharp musty smell—in that case discard the jar.
Can I use regular green cabbage instead of napa?
Yes, but the texture will be tougher and you should chop it into bite-size pieces rather than ferment whole. Cut green cabbage into 1-inch squares, salt for 2 hours, rinse, and toss with paste. Ferment as usual.
Why did my kimchi turn mushy after a week?
Three likely causes: under-salting (cabbage didn't lose enough water before fermentation), iodized salt (which suppresses healthy bacteria), or fermentation too warm (above 80°F speeds enzyme breakdown). Use coarse non-iodized salt, hit the salting time, and ferment cooler.
How spicy is kimchi supposed to be?
Authentic Korean kimchi has noticeable but not blistering heat. The recipe above lands at a medium level. For mild kimchi, use ½ cup of gochugaru. For spicy, push to 1 cup. The heat softens significantly during fermentation as bacteria break down capsaicin.
Can I ferment kimchi in plastic?
Food-grade plastic deli quarts work for short ferments and refrigerator storage, but glass is preferred for long aging because it doesn't absorb the chili oils or smell. Avoid metal lids touching the brine—use plastic lids or put a layer of plastic wrap between metal and kimchi.
Why is my kimchi fizzy or carbonated?
That's carbon dioxide from active fermentation—a sign your bacteria are alive and working. It's harmless and many Koreans love the spritzy texture of young kimchi. Burp the jar daily during peak activity to prevent overflow.
Is kimchi gluten-free?
Traditional kimchi made with sweet rice flour, fish sauce, and salted shrimp is gluten-free. Always check fish sauce labels because some commercial brands include hydrolyzed wheat protein. Skip soy sauce or substitute tamari if you are sensitive.
How long does homemade kimchi last?
In the refrigerator, kimchi keeps safely for at least 6 months, and many Koreans age it a year or more. The flavor changes from bright and crunchy to deeply sour and tender, but it remains safe to eat as long as you don't see fuzzy mold and it doesn't smell putrid.
Can I make kimchi without gochugaru?
Yes—that's baek kimchi (white kimchi), the non-spicy version. Use the same paste minus chili and add an extra tablespoon of salted shrimp and a small handful of pine nuts and red dates for visual interest.
What pairs well with homemade kimchi?
Steamed white rice, grilled fatty meats like bulgogi or pork belly, soft tofu stew, instant ramen, and any Korean banchan spread. Kimchi is also a perfect counterpoint to rich Chinese braised dishes and Japanese rice bowls.
Why Making Your Own Kimchi Is Worth It
Store-bought kimchi has come a long way, but no jar from a refrigerated case can match the brightness, complexity, and personality of kimchi you ferment yourself. You control the salt, the heat, the sweetness, the seafood, and the age. You watch a head of cabbage transform over days into something fizzy, alive, and unmistakably yours. And once you've mastered baechu kimchi, the door opens to dozens of seasonal variations—cucumber in summer, radish in autumn, perilla leaves in late summer, scallions in spring. Kimchi-making becomes a slow, rewarding rhythm woven through the year.
Start with one head of cabbage, follow the master recipe above, and trust the process. Lacto-fermentation is one of the oldest food technologies humans have, and your great-great-grandmother's instinct is alive in every Korean kitchen. Make a jar this weekend. In two weeks you will have something extraordinary, and in three months you will be a fermenter for life.

Mei Lin Chen
Mei Lin Chen is an Asian food writer and recipe developer. Melbourne-raised and London-based, she has spent over a decade exploring the rice paddies, hawker stalls, and home kitchens of South-East and East Asia. Her recipes balance traditional technique with everyday practicality.