Korean fried chicken recipe has become a global staple, yet the secret to its legendary crunch stays hidden in street stalls across Seoul. We’re sharing the exact method that turned our home kitchen into a mini-pojangmacha, complete with two sauces that let you choose between sweet-spicy heat and a mellow soy-garlic glaze.
Key Takeaways
- Double-fry creates a shattering crisp that stays intact even after saucing.
- Potato starch is the silent hero that gives the coating its feather-light texture.
- We provide yangnyeom (sweet-spicy) and soy-garlic sauces side-by-side for a true taste test.
- The dish is at the heart of chimaek culture — an inseparable pairing of chicken and beer.
What Makes Korean Fried Chicken Different
The Double-Fry Method Explained
We begin with the science that makes Korean fried chicken stand out: the double-fry. The first fry at a modest 325°F (160°C) cooks the meat through while forming a thin skin that locks in moisture. After a brief rest, the second fry at a hotter 375°F (190°C) evaporates any remaining surface water, causing the starch to gelatinize and then crisp into a lattice that shatters under a fork — much like a fireworks display of texture.
The rest period between the two fryings is not a luxury; it is a chemical pause that allows steam to escape and the protein fibers to relax. If we skip this step, the coating becomes soggy because the interior moisture has nowhere to go. Research consistently shows that a 5-minute rest between fries improves final crispness and reduces oil uptake compared with continuous frying.
Finally, the second fry is brief — just 3–4 minutes — so the exterior reaches a deep golden amber without overcooking the meat. This timing aligns with the 190°C optimal temperature for potato starch, which maximises the Maillard reaction while preserving a tender bite inside. The result is a chicken that sings with a crunch lasting even after we toss it in sauce.
Potato Starch vs. Flour: Why It Matters
When we talk about the coating, potato starch is the unsung champion. Unlike wheat flour, which contains gluten that can create a doughy shell, potato starch is almost pure amylopectin. This molecular structure expands rapidly when heated, forming a porous, airy crust that is both light and resilient.
If we substitute all-purpose flour, the batter becomes heavier and absorbs more oil, leading to a greasier bite. A hybrid blend — half potato starch, half flour — offers a middle ground, but the pure starch version still wins the crunch contest. The starch also reacts well with a splash of sparkling water or beer, which introduces carbon dioxide bubbles that further aerate the batter.
The science behind the fizz is simple: carbonated liquid releases CO₂ when it hits hot oil, creating tiny pockets that burst into crispness. This is why many Korean street vendors swear by a beer batter variation. The carbonation, combined with the high amylopectin content, gives the coating a texture that is simultaneously delicate and sturdy — like lace-like armour around a juicy core.
KFC vs. American Fried Chicken vs. Japanese Karaage
Understanding how Korean fried chicken sits within the broader world of fried chicken helps clarify why each technique choice matters. Here is how the three most popular styles compare:
| Style | Batter | Fry Method | Texture | Sauce |
|---|---|---|---|---|
| Korean Fried Chicken | Potato starch (or starch-flour mix) | Double-fry: 325°F → 375°F | Shattering crisp — holds after saucing | Yangnyeom (sweet-spicy) or Soy Garlic (mild) |
| American Fried Chicken | Flour + buttermilk | Single fry at 350°F (177°C) | Thick, hearty crunch | Honey, hot sauce, or gravy |
| Japanese Karaage | Potato starch + soy marinade | Single fry at 340°F (171°C) | Light, almost airy | Plain or with dipping sauce |
What sets the Korean version apart is not just one technique but three working together: the batter choice, the double-fry method, and the glossy sauce applied at the end. No other style combines all three into a single, cohesive system designed to stay crispy even when coated.
Ingredients You Need
For the Chicken and Batter
- 2 lb (900 g) chicken wings or drumettes, skin on
- 1 cup potato starch (or ½ cup potato starch + ½ cup all-purpose flour)
- 1 tsp baking powder
- ½ tsp salt
- ¼ tsp white pepper
- ¼ tsp garlic powder
- 1 large egg, lightly beaten
- ½ cup cold sparkling water OR ½ cup light lager (beer batter variation)
For the Yangnyeom Sauce (Sweet-Spicy)
- 3 tbsp gochujang (Korean red pepper paste)
- 2 tbsp honey
- 1 tbsp brown sugar
- 1 tbsp soy sauce
- 1 tbsp rice vinegar
- 1 tsp sesame oil
- 3 cloves garlic, minced
- 1 tsp grated ginger
For the Soy Garlic Sauce (Mild Option)
- 3 tbsp soy sauce
- 2 tbsp honey
- 1 tbsp rice vinegar
- 4 cloves garlic, minced
- 1 tsp sesame oil
- ½ tsp white pepper
How to Make Korean Fried Chicken (Step by Step)
Preparing the Chicken
Pat the chicken pieces completely dry with paper towels. Any surface moisture prevents the batter from adhering and produces steam during frying that can collapse the crust before it sets. This step costs thirty seconds and pays dividends in the final crunch.
Toss the dried wings in a bowl with salt, white pepper, and garlic powder, working the seasoning into every crevice and joint. Let the seasoned chicken rest for 10 minutes at room temperature; this brief period allows the flavours to penetrate slightly and the surface to dry even further.
Consistent sizing matters too. If you mix drumettes with larger wingettes, the smaller pieces will overcook while the larger ones catch up. Trimming or separating the wing sections before seasoning ensures everything fries at the same rate — uniform pieces, uniform crunch.
Making the Batter (Including Beer Batter Variation)
In a large mixing bowl, whisk together the potato starch, baking powder, and a pinch of salt. Create a well in the centre and add the beaten egg, then slowly pour in the cold sparkling water — or your chosen lager — while whisking to prevent lumps.
The batter should land at the consistency of thin pancake batter: runny enough to coat the chicken in a sheer layer, yet thick enough to cling when lifted. If it feels too watery, add a tablespoon of starch; if it feels pasty, add a splash more liquid. Temperature matters here — ice-cold liquid keeps gluten (if using flour) from developing, which keeps the coating light.
For the beer batter variation, use any light lager; the carbonation introduces CO₂ bubbles that create extra lightness when they escape during frying. Let the batter sit for 5 minutes before using so the bubbles continue to develop. Korean brands like Hite or Cass work beautifully, though any mild lager does the job.
The Double-Fry Technique
Heat vegetable, canola, or peanut oil in a heavy-bottomed pot or deep-fat fryer to 325°F (160°C). Use a digital thermometer — this is non-negotiable. Oil temperature is the single variable that separates shatteringly crisp chicken from a greasy disappointment.
Working in batches of four to five pieces, lower the battered chicken into the oil and fry for 6–8 minutes until the coating sets to a pale gold and the meat is just cooked through. Avoid crowding the pot; each piece needs space, or the oil temperature drops and the chicken steams rather than fries. Remove to a wire rack over a baking sheet and rest for 5 minutes.
Raise the oil to 375°F (190°C) — the second fry is brief but transformative. Drop the rested pieces back in for 3–4 minutes until the surface turns a deep, glossy amber that audibly shatters when tapped. The contrast between the pale first fry and the lacquered second is striking: first fry cooks, second fry perfects. Transfer to a clean wire rack and let excess oil drip away before saucing.
Finishing with Sauce
For the yangnyeom sauce, combine all sauce ingredients in a small saucepan over medium heat, stirring until the honey and brown sugar dissolve fully and the mixture just begins to simmer — about 2 minutes. Pull it off the heat so it thickens slightly as it cools.
For the soy garlic sauce, follow the same process. The absence of gochujang makes it sweeter and more aromatic; the four cloves of garlic provide depth that the yangnyeom’s heat would otherwise mask. Both sauces can be made up to 3 days ahead and refrigerated.
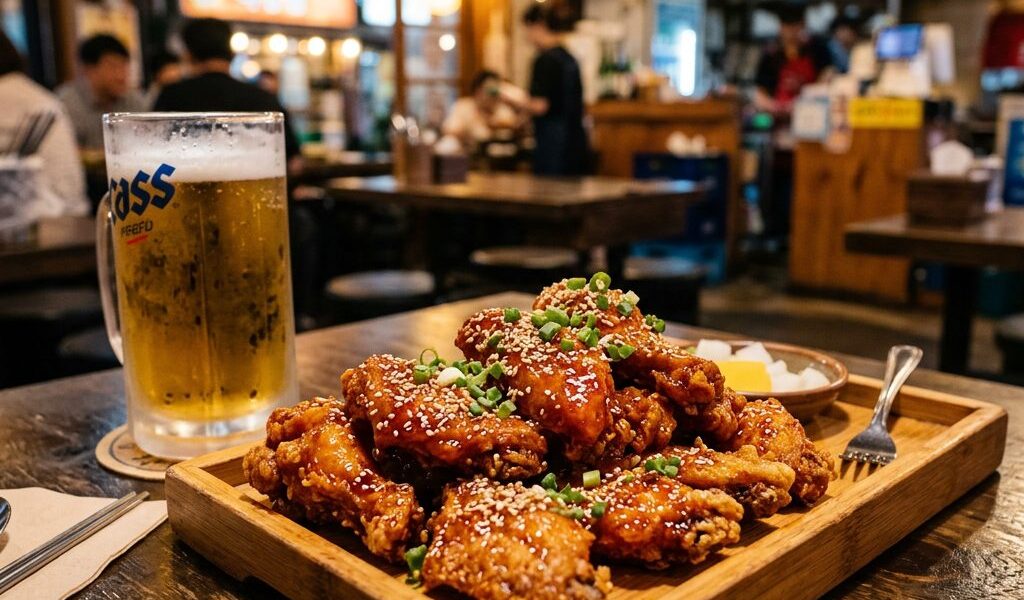
Toss half of the fried chicken in each sauce, working quickly so the coating stays crisp. Plate on a serving tray, scatter toasted sesame seeds and thinly sliced green onions over the top, and serve with a small bowl of pickled daikon on the side.
Tips for the Crispiest Korean Fried Chicken
Temperature Control Is Everything
A stable oil temperature is the backbone of this recipe. We keep the first fry at 160°C and the second at 190°C; a deviation of more than 5°C in either direction undermines the entire process. At too low a temperature, the chicken absorbs oil and steams from the inside out. At too high, the coating burns before the interior cooks through.
A heavy-bottomed pot — cast iron or a proper Dutch oven — distributes heat evenly and holds temperature between batches far better than a thin saucepan. If you are cooking a large batch, allow the oil to return to temperature for 60–90 seconds between each batch. Rushing this step is the most common reason home cooks end up with uneven crunch.
Use high-smoke-point oils only: vegetable, canola, or peanut oil all sustain 190°C comfortably. Their neutral flavour lets the sauces take centre stage rather than competing with the fat. We avoid olive oil for deep-frying; its lower smoke point causes it to break down and turn bitter at the temperatures this recipe requires.
Don’t Skip the Rest Between Fries
The 5-minute rest between the first and second fry is a deliberate chemical pause, not a convenience break. During this time, interior steam migrates outward and escapes through the crust, while the starch coating continues to firm. Skipping this rest traps moisture that will turn the second-fry coating soft within minutes of plating.
If you are cooking for a crowd, you can extend this rest to 15–20 minutes without any quality loss. The chicken can also be held on a wire rack in a low oven (150°F / 65°C) to stay warm while the oil climbs to second-fry temperature. This flexibility makes the recipe workable for dinner parties where perfect timing is difficult.
Food science research consistently confirms that double-fried proteins retain significantly less oil than single-fried equivalents when the rest period is observed. Less oil absorption means a lighter, crunchier bite and a coating that holds its integrity even after saucing — the defining quality of great Korean fried chicken.
Keeping Fried Chicken Crispy When Serving
Serve the sauced chicken on a perforated tray or wire rack rather than a flat plate; this allows excess sauce to drip away and prevents the bottom pieces from sitting in liquid that softens the coating. The difference between a perforated surface and a flat plate is ten minutes of crispness.
For larger gatherings, keep unsauced pieces on a wire rack in a warm oven at 200°F (93°C). Sauce only the pieces you are about to serve, never the whole batch at once. This discipline — sauce in stages, serve immediately — is how Korean fried chicken restaurants maintain their reputation for crunch from the first piece to the last.
If reheating next-day leftovers, place the chicken on a rack in a preheated 425°F (220°C) oven for 5–7 minutes. The high, dry heat drives away condensation and revives the crust without drying out the meat inside. A quick 90-second broil at the end restores the lacquered sheen of the sauce.
Serving Suggestions and Chimaek Culture
The Chimaek Tradition (Chicken + Beer)
Chimaek (치맥) is a portmanteau combining chikin (chicken) and maekju (beer) — a cultural institution that took hold in South Korea in the 1990s when office workers gathered at pojangmacha stalls for an after-work ritual that was part meal, part social decompression. The first modern Korean fried chicken franchises appeared in the 1970s — Lim’s Chicken opened in 1977 — and by the time chimaek became a recognised term, the habit of pairing fried chicken with cold beer was already deeply embedded.
The chimaek industry in South Korea was valued at approximately 4.2 trillion KRW (around $3.1 billion USD) in 2023, according to Korean food industry tracking data — a figure that reflects how deeply the ritual has become woven into daily life. Korean drama exports and global enthusiasm for Korean cuisine have since carried chimaek far beyond Seoul.
”Eating chimaek at a pojangmacha stall in Hongdae on a warm summer evening — sticky yangnyeom-coated wings, cold Cass lager, the noise of the street — is one of the most complete food experiences we’ve had. This recipe is our attempt to bottle that moment.”
— Mei Lin Chen, stage.umamicart.com
A light lager or crisp pilsner is the classic partner; the carbonation mirrors the fizz in our batter and the bitterness cuts cleanly through the yangnyeom glaze. For a non-alcoholic version, a citrus soda or sparkling barley tea offers a similar contrast without the alcohol.
Classic Korean Side Dishes to Serve Alongside
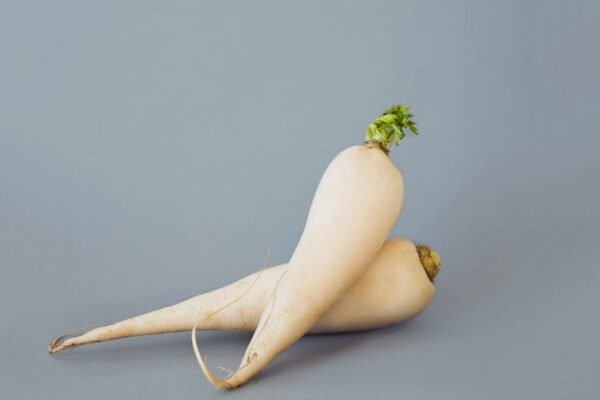
Danmuji (yellow pickled daikon radish) is the non-negotiable companion to Korean fried chicken. Its bright acidity and mild sweetness reset the palate between pieces, making the next bite taste as sharp as the first. Most Korean supermarkets sell it pre-sliced; it takes no preparation at all.
Kongnamul muchim (seasoned soybean sprouts) adds a fresh, slightly crunchy element that contrasts the richness of the fried chicken without competing with its flavour. A bowl of steamed short-grain rice alongside the chicken transforms the meal from a snack into a full dinner. For more Asian recipes that pair beautifully with Korean fried chicken, our Asian recipes hub has dozens of tested ideas.
For those who want to explore further into Korean cooking, our Korean recipes guide covers everything from bibimbap to doenjang jjigae — building the knowledge base that makes dishes like this one feel second nature. A small dish of kimchi rounds out the chimaek table perfectly, adding that characteristic fermented tang that cuts through the richness.
Storing and Reheating Leftovers
Store leftover chicken in a single layer inside an airtight container and refrigerate for up to 3 days. Stacking pieces traps steam between them and accelerates softening. If you have both sauced and unsauced pieces, keep them in separate containers — the sauced chicken loses crispness faster and is better eaten the day of cooking.
Reheat in a preheated oven at 425°F (220°C) for 5–7 minutes on a wire rack, or use a convection toaster oven that circulates hot air evenly around every surface. A microwave produces edible results but will not restore crunch; if you must use one, finish the pieces under a broiler for 90 seconds to firm the coating.
The sauces refrigerate well for up to 5 days in sealed jars. Reheat on the stovetop over low heat, stirring to prevent the sugars from catching on the pan. If the yangnyeom sauce thickens too much in the fridge, add a teaspoon of water and stir over gentle heat to loosen it back to a glossy, coating consistency. For more on Asian cooking techniques — from wok hei to tempering spices — our technique guide is a useful companion to any recipe on this site.
Frequently Asked Questions
Can I use chicken breast instead of wings?
Yes, boneless chicken breast cut into bite-size pieces works well with this method. Breast meat lacks the natural fat of wings, so the crust may feel slightly lighter, but the double-fry still delivers an impressive crunch. Marinate the pieces for 20 minutes in a little soy sauce, garlic, and white pepper before battering to compensate for the lower fat content and keep the interior moist.
What is the best oil for frying Korean fried chicken?
Vegetable, canola, or peanut oil are the best choices because their smoke points all exceed 400°F (204°C), providing a comfortable margin above the 375°F second-fry temperature. Neutral flavour is equally important — these oils let the sauces dominate rather than introducing competing tastes. Avoid olive oil for deep-frying; its lower smoke point causes it to break down and turn bitter at the temperatures this recipe requires.
Can I make this in an air fryer?
An air fryer can replicate the first fry reasonably well: spray the battered chicken lightly with oil and cook at 380°F (193°C) for 12–15 minutes, flipping halfway through. The second fry is harder to replicate, but a quick 2–3 minute blast at the air fryer’s maximum temperature (usually 400°F / 204°C) after the rest period gets close. The result will be very good home cooking, though it will not quite reach the shattering crunch of the stovetop double-fry.
Why is my Korean fried chicken not crispy?
The three most common culprits are low oil temperature, overcrowding the pot, and too much flour in the batter. Check your thermometer before every batch and wait for the oil to recover between batches. Fry in small groups — four to five pieces maximum — so the temperature stays stable. If the batter still feels heavy, switch to pure potato starch and make sure your liquid is properly cold before mixing.
Is gochujang very spicy?
Gochujang’s heat registers between 1,000 and 2,000 SHU (Scoville Heat Units), placing it in the mild-to-moderate range — significantly less intense than sriracha or a fresh chilli. The honey and brown sugar in the yangnyeom sauce further tame the heat, making the finished glaze sweet and complex rather than fiery. If you or your guests are sensitive to spice, reduce the gochujang to 1.5 tablespoons and increase the honey by the same amount.
Calories per serving (4 servings total): approximately 420 kcal. Last updated: March 2026.

Mei Lin Chen
Mei Lin Chen is an Asian food writer and recipe developer. Melbourne-raised and London-based, she has spent over a decade exploring the rice paddies, hawker stalls, and home kitchens of South-East and East Asia. Her recipes balance traditional technique with everyday practicality.