Last updated: March 01, 2026
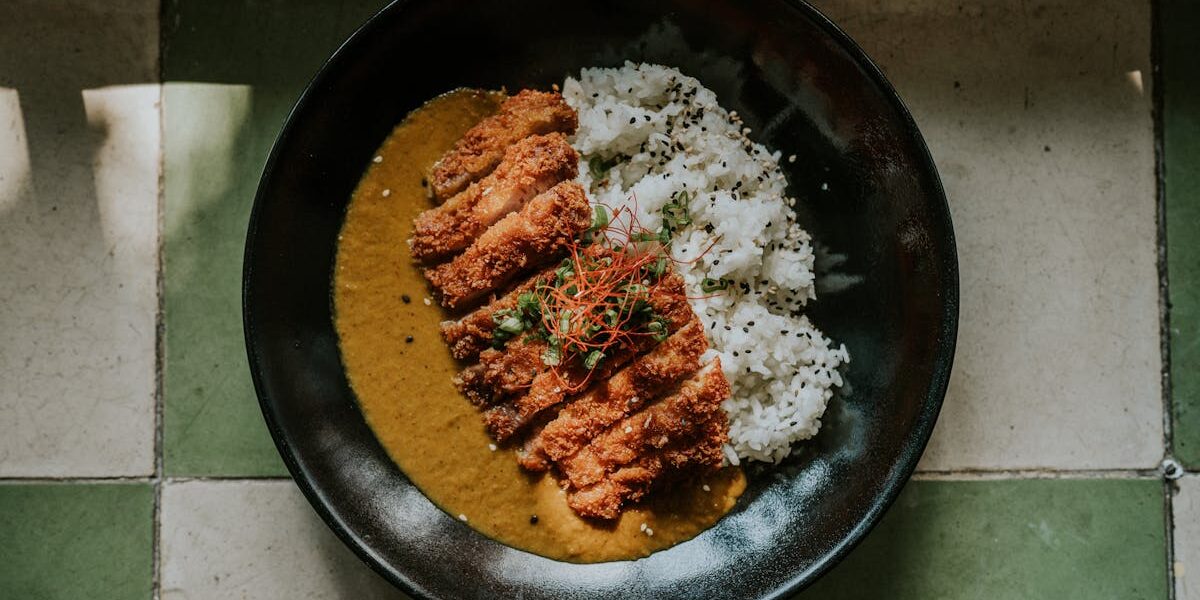
Katsu curry is the dish that turned a generation of skeptics into Japanese curry believers. A slab of golden, panko-crusted chicken cutlet, sliced into bite-sized strips and laid over a glossy pool of dark, fruit-forward curry sauce and short-grain rice — it is comfort food engineering at its most satisfying. The contrast is the whole point: shatteringly crisp breading against silky, slow-simmered curry; mild spice against the savory depth of caramelized onions; the bright bite of pickled fukujinzuke against rich, glossy gravy. This is not the cumin-and-turmeric curry of South Asia. Japanese curry — and katsu curry by extension — is its own beast, born in late-19th-century Yokohama, refined in Tokyo home kitchens, and now served everywhere from Osaka train station counters to London office cafeterias.
This guide will take you through an authentic, restaurant-style chicken katsu curry you can make at home in about an hour. We will cover the science behind the ultra-crisp panko crust, the building blocks of a deep, glossy curry sauce, and the small details — the order you bread the cutlet, the temperature of the oil, the way you slice the finished katsu — that separate a Tuesday-night dinner from something genuinely memorable. We will also walk through pork katsu, tofu, and shrimp variations, the proper way to plate it, what to serve alongside, and how to store and reheat leftovers without losing that signature crunch.
What Is Katsu Curry?
Katsu curry — written カツカレー in Japanese — is a composite dish that joins two Japanese comfort-food pillars: tonkatsu (or chicken katsu), a deep-fried breaded cutlet, and kare raisu, Japanese curry rice. The word katsu is a Japanese shortening of the English cutlet, while karē (カレー) is the Japanese rendering of curry. The mash-up is credited to a Tokyo restaurant called Grill Swiss in the 1940s, where a regular customer reportedly asked the chef to put his curry and his tonkatsu on the same plate. Within decades it had become a staple at yōshoku (Western-style Japanese) restaurants, school lunches, college cafeterias, and standalone curry chains like CoCo Ichibanya and Go!Go!Curry!.
Unlike Indian or Thai curries, Japanese curry is built around a thickened, almost gravy-like roux that is gently sweet, mildly spiced, and deeply savory. Apples, carrots, onions, and sometimes grated chocolate or honey provide rounded sweetness. Garam masala and curry powder bring warmth without heat. The roux clings to rice. The cutlet stays separate, sliced into thick strips and laid on top so the breading meets the sauce only when the diner takes a bite. It is a dish about textural contrast and balanced umami, not chili-fueled fireworks.
A Brief History of Japanese Curry and Its Marriage with Katsu
Curry arrived in Japan in the late 1860s, during the Meiji Restoration, when Japan ended two centuries of isolation and began absorbing Western ideas with great speed. The dish came not from India but from the British Royal Navy, which had adopted a thick, gravy-style curry as an easy-to-prepare shipboard meal. Japan’s own Imperial Navy adopted the recipe to combat beriberi among sailors, since the dish encouraged the consumption of vegetables and rice. From the navy, curry filtered into civilian Western-style restaurants and, eventually, into ordinary home kitchens once instant curry roux blocks were commercialized by S&B in 1950 and House Foods in 1960.
Tonkatsu has a similarly Meiji-era story. It evolved from European-style fried cutlets that Japanese chefs encountered through French cuisine, then localized: the crumb was switched from fine breadcrumbs to coarse, flaky panko; the cooking method shifted from pan-frying to full deep-frying; and the dish was served sliced with chopsticks, alongside shredded raw cabbage and a tangy Worcestershire-derived tonkatsu sauce. By the time Grill Swiss put cutlet and curry on the same plate, both were already national favorites. Katsu curry just made the partnership official.
Ingredients for Authentic Chicken Katsu Curry
This recipe serves four. It is built around boneless, skinless chicken thighs (juicier and more forgiving than breasts), Japanese curry roux blocks (the secret to authentic flavor without a 30-spice pantry), and panko breadcrumbs for that signature shattering crust. You will need three pots or pans going at once near the end, so a little prep organization goes a long way.
For the Chicken Katsu
- 4 boneless, skinless chicken thighs (about 1.25 lb / 600 g total), or 2 large chicken breasts butterflied
- 1 teaspoon kosher salt
- 1/2 teaspoon freshly ground black pepper
- 1/2 cup (60 g) all-purpose flour
- 2 large eggs, beaten with 1 tablespoon water
- 1.5 cups (90 g) panko breadcrumbs
- Neutral oil for frying (canola, sunflower, or rice bran), about 1 quart / 1 liter
For the Japanese Curry Sauce
- 2 tablespoons neutral oil
- 2 medium yellow onions (about 14 oz / 400 g), finely sliced
- 2 medium carrots (about 8 oz / 230 g), cut into 1/2-inch rolling chunks
- 3 medium Yukon Gold potatoes (about 1 lb / 450 g), peeled and cut into 1-inch chunks
- 3 garlic cloves, minced
- 1 tablespoon grated fresh ginger
- 1 medium apple (Fuji or Honeycrisp), peeled and grated
- 4 cups (950 ml) low-sodium chicken stock
- 1 tablespoon ketchup
- 1 tablespoon Worcestershire sauce
- 1 tablespoon soy sauce
- 1 teaspoon honey
- 1 small square (about 1 oz / 30 g) dark chocolate, 70% cacao or higher
- 1 box (3.5 oz / 100 g) Japanese curry roux, such as Vermont Curry, Golden Curry, or Java Curry — medium-hot
To Serve
- 4 cups cooked Japanese short-grain rice (such as Koshihikari or calrose)
- 1/4 cup fukujinzuke (sweet pickled vegetables) or rakkyo (pickled scallions)
- 2 tablespoons finely chopped scallions, green parts only
- Optional: tonkatsu sauce or curry-house brown sauce on the side
Step-by-Step Cooking Instructions
Plan to start the curry sauce first, since it benefits from at least 30 minutes of simmering. While the curry develops, you can prepare and bread the cutlets, then fry them last so they hit the table at peak crispness. Aim to time the rice so it finishes at the same moment as the katsu.
Step 1: Build the Aromatic Base
Heat 2 tablespoons of neutral oil in a heavy-bottomed Dutch oven or 4-quart saucepan over medium heat. Add the sliced onions and cook, stirring every couple of minutes, for 15 to 20 minutes. The onions should turn from translucent to golden brown and reduce dramatically in volume. This is the single most important flavor step in Japanese curry — most home cooks rush it. Keep the heat moderate, scrape any fond, and let the onions get deeply colored. If they look like they might scorch, add a tablespoon of water and keep going.
Step 2: Add Garlic, Ginger, and Apple
Stir in the minced garlic, grated ginger, and grated apple. Cook for 2 minutes until fragrant. The apple will look strange at this stage, almost like applesauce, but it will dissolve completely into the sauce and lend the natural sweetness Japanese curry is known for.
Step 3: Simmer the Vegetables
Add the carrots, potatoes, chicken stock, ketchup, Worcestershire sauce, soy sauce, and honey. Bring to a boil, then reduce to a gentle simmer. Cover partially and cook for 18 to 20 minutes, until the potatoes are tender when pierced with a knife but not falling apart. Skim any foam that rises to the top.
Step 4: Add Curry Roux and Chocolate
Turn off the heat. Break the curry roux into individual cubes and add them to the pot along with the small square of dark chocolate. Let them sit for 1 minute to soften, then stir gently and steadily until the roux dissolves completely. Return the pot to low heat and simmer uncovered for another 5 to 8 minutes, stirring occasionally, until the sauce thickens to a glossy, pourable gravy that coats the back of a spoon. Taste and adjust: if too sweet, add a small splash of soy sauce; if too thick, thin with a tablespoon of stock or water at a time. Keep warm over the lowest possible flame while you fry the katsu.
Step 5: Prepare the Chicken Cutlets
If using chicken thighs, lay them flat and gently pound any thick areas with a meat mallet or the bottom of a heavy pan until they reach an even 1/2-inch thickness. If using breasts, butterfly them open and pound to the same thickness. Even thickness equals even cooking. Season both sides with the salt and black pepper.
Step 6: Set Up a Three-Step Breading Station
Place the flour in a shallow dish. Beat the eggs with 1 tablespoon of water in a second shallow dish. Spread the panko in a third dish. Working one cutlet at a time, dredge it in flour and shake off the excess; dip into egg, letting any drips fall off; press firmly into the panko, scooping more panko on top and pressing it in so the crumbs adhere everywhere. This press is critical for an even crust. Place the breaded cutlet on a rack or sheet pan and repeat with the remaining cutlets. Let them rest for 5 minutes before frying — this helps the breading bind.
Step 7: Fry the Katsu
Pour about 1.5 inches of neutral oil into a wide, heavy pot or deep skillet. Heat the oil over medium-high to 340°F (170°C). You can test by dropping in a single panko crumb: it should sizzle immediately and rise to the surface but not brown right away. Lower one cutlet at a time into the oil, away from you to avoid splashes. Fry for 3 to 4 minutes per side, turning once, until the breading is deep golden brown and an instant-read thermometer reads 165°F (74°C) in the thickest part. Transfer to a wire rack set over a sheet pan (not paper towels — the steam ruins the crust). Repeat with the remaining cutlets, letting the oil return to temperature between batches.
Step 8: Slice and Plate
Let the katsu rest for 2 minutes. Using a very sharp knife, slice each cutlet crosswise into 3/4-inch strips. Mound about 1 cup of hot rice on one side of each plate, leaving the other side clear. Ladle a generous portion of curry over the clear side of the plate, allowing it to lap up against — but not over — the rice. Arrange the sliced katsu on top of the rice so half the cutlet rests on rice and half drapes into the curry. Garnish with a small pile of fukujinzuke and a scattering of scallion greens. Serve immediately.
Why This Method Works: The Science of Crispy Katsu
Three details separate restaurant-quality katsu from soggy supermarket imitations. The first is panko itself — these jagged, irregular Japanese breadcrumbs are made from yeast-leavened crustless bread, then dried in a way that creates an open, flaky structure. Standard breadcrumbs are dense; panko is hollow, so it absorbs less oil and stays crisp longer. The second is the three-stage breading: flour dries the surface so egg can bind, egg acts as glue, and panko adheres in a thick, even coat that crisps without cracking. The third is the frying temperature. At 340°F (170°C), the panko cooks through and turns evenly golden before the chicken overcooks; hotter oil burns the outside before the inside is done, while cooler oil makes the breading soak up grease.
The other half of the dish — the curry sauce — succeeds on the strength of two flavor-building moves: deeply browned onions for natural caramelization, and the apple-honey-chocolate trio that mimics the long-simmered depth of a commercial Japanese curry house. Most commercial roux blocks are already engineered for this profile; your job at home is to amplify it.
Choosing the Right Japanese Curry Roux
Japanese supermarkets stock dozens of curry roux brands. In the U.S. and Europe, three dominate Asian grocery shelves. Each has a slightly different profile, and the right pick depends on your spice tolerance and how rich you want the sauce.
| Roux Brand | Flavor Profile | Heat Level | Best For |
|---|---|---|---|
| S&B Golden Curry (medium-hot) | Bold, slightly spicy, balanced | Medium | Classic katsu curry, most adaptable |
| House Vermont Curry (mild) | Sweet with apple and honey notes | Mild | Kids and beginners, family meals |
| House Java Curry | Rich, deep, slightly smoky | Medium-hot | Adult palates, beef katsu |
| S&B Tasty Curry | Light, broth-forward | Mild-medium | Soup curry variations |
| Kokumaro Curry | Creamy and mellow | Mild-medium | Cheese katsu curry topping |
If you want a more authentic curry-house experience, blend two boxes from different brands — a common trick used by Japanese home cooks. A 50/50 mix of Vermont Curry and Golden Curry gives you sweetness and complexity at once.
Tips for the Best Katsu Curry
- Pound the chicken evenly. Uneven cutlets cook unevenly. Aim for 1/2 inch thick across the whole piece.
- Press the panko hard. The crumbs should be packed onto the cutlet, not loosely sprinkled. Loose panko falls off in the oil.
- Bread just before frying. If you bread too far in advance, the egg layer can soften and the crumb falls off in the oil. Five to ten minutes of rest is the sweet spot.
- Use a thermometer. Both for the oil (340°F / 170°C) and the chicken (165°F / 74°C). Eyeballing leads to dry chicken or pale breading.
- Rest on a rack, not paper towels. A rack lets steam escape from all sides; paper towels trap moisture against the bottom of the cutlet, ruining the crust within minutes.
- Slice with a sharp knife in one smooth motion. A serrated knife or sawing motion crushes the breading. A sharp chef’s knife with one clean push-cut keeps the crust intact.
- Make curry the day before. Japanese curry actually tastes better on day two. The flavors meld, the sauce thickens, and the vegetables continue to absorb seasoning. If you have time, cook the curry one day and fry the katsu the day you serve.
- Save your oil. Strained frying oil can be reused once or twice for other frying tasks, which makes deep-frying at home more economical.
Variations on Classic Chicken Katsu Curry
Tonkatsu Curry (Pork)
Substitute four boneless pork loin chops (about 6 oz / 170 g each) for the chicken. Trim excess fat, snip the connective tissue around the edge in three or four places to prevent curling, and pound to 1/2 inch. The breading and frying method is identical. Cook to an internal temperature of 145°F (63°C) with a 3-minute rest. This is the original katsu curry — chicken katsu curry came later as a lighter option.
Beef Katsu Curry (Gyukatsu)
Use 1-inch-thick sirloin or rib-eye steaks, seasoned and breaded the same way. Fry for only 2 minutes per side at a higher temperature (375°F / 190°C) so the center stays rare to medium-rare. This Kyoto-style version is best paired with Java Curry for a more intense match.
Vegetarian Katsu Curry
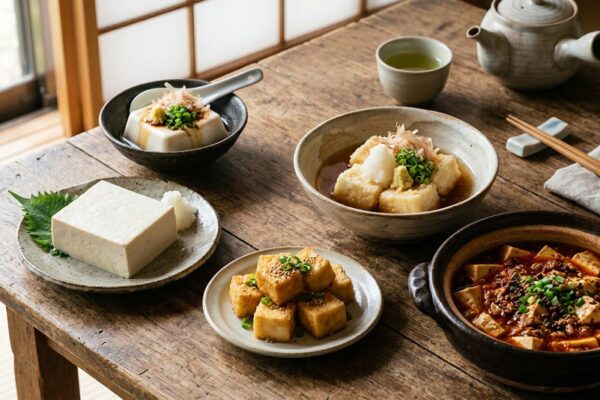
Use 1-inch-thick slabs of extra-firm tofu, pressed for 30 minutes, or large portobello mushrooms with stems removed. For tofu, season with salt and a teaspoon of soy sauce before breading. Fry slightly cooler — 325°F (165°C) — to give the inside time to heat through without burning the panko. Replace chicken stock with vegetable stock and skip the Worcestershire sauce (or use a vegan version) to keep the entire dish plant-based.
Cheese Katsu Curry
A modern favorite at Japanese chain restaurants. Just before plating, top the curry with a handful of shredded mozzarella or melting cheese blend, then run the plate briefly under the broiler. The cheese melts into the curry as you eat, adding creamy richness that pairs beautifully with the crisp cutlet.
Shrimp Katsu Curry (Ebi Furai Curry)
Use large shrimp (16/20 count), peeled and deveined with tails left on. Make a small cut along the underside to straighten them, season with salt, and bread the same way. Fry for 90 seconds per side at 350°F (175°C). Arrange six to eight pieces around the plate.
Nutritional Information
Approximate values per serving (one plate with about 6 oz of katsu, 1 cup of rice, and 1 cup of curry sauce). Values vary depending on the brand of curry roux and the trim of the chicken.
| Nutrient | Amount per Serving | % Daily Value* |
|---|---|---|
| Calories | 820 kcal | 41% |
| Total Fat | 34 g | 44% |
| Saturated Fat | 11 g | 55% |
| Cholesterol | 185 mg | 62% |
| Sodium | 1,650 mg | 72% |
| Total Carbohydrates | 92 g | 33% |
| Dietary Fiber | 6 g | 21% |
| Sugars | 14 g | — |
| Protein | 38 g | 76% |
| Iron | 3.4 mg | 19% |
| Vitamin A | 5,200 IU | 104% |
| Potassium | 980 mg | 21% |
*Percent daily values based on a 2,000-calorie diet.
Storage and Reheating
Katsu curry presents a storage puzzle: the curry sauce keeps and improves with time, while the breaded cutlet does the opposite. The solution is to store them separately and refresh the katsu when reheating.
- Curry sauce: Cool fully, then store in an airtight container in the refrigerator for up to 4 days, or freeze for up to 2 months. Reheat gently on the stovetop with a splash of water or stock to loosen.
- Fried katsu: Store cooled cutlets, unsliced, in an airtight container with a paper towel underneath. Refrigerate for up to 2 days. To reheat, place on a wire rack in a 375°F (190°C) oven for 8 to 10 minutes, or use an air fryer at 380°F (193°C) for 5 to 6 minutes. The dry heat re-crisps the panko while the inside warms through. Avoid microwaving — it turns the breading limp and rubbery.
- Cooked rice: Refrigerate for up to 3 days. Reheat with a splash of water in the microwave under a damp paper towel, or steam over simmering water for 5 minutes.
- Freezing breaded but unfried cutlets: Bread cutlets, freeze on a tray until solid, then transfer to a zip-top bag. Fry directly from frozen at 325°F (165°C) for 5 to 6 minutes per side. This is a great make-ahead trick for busy weeks.
What to Serve with Katsu Curry
Katsu curry is rich and filling, so the supporting cast should be light and palate-cleansing. The traditional accompaniments serve a purpose — they cut through the richness and reset the palate between bites.
- Fukujinzuke: Sweet-savory pickled vegetables (typically daikon, lotus root, cucumber, eggplant) dyed bright red. The crunch and acidity cut the fattiness of the cutlet.
- Rakkyo: Crisp, sweet-pickled Japanese scallions. A more adult alternative to fukujinzuke.
- Shredded raw cabbage: A small mound dressed lightly with rice vinegar and salt. Cool, crunchy, and traditional for tonkatsu meals.
- Miso soup: A simple bowl of dashi-based soup with tofu and wakame brings warmth and umami.
- Cold barley tea (mugicha): The classic non-alcoholic pairing. Toasty and refreshing.
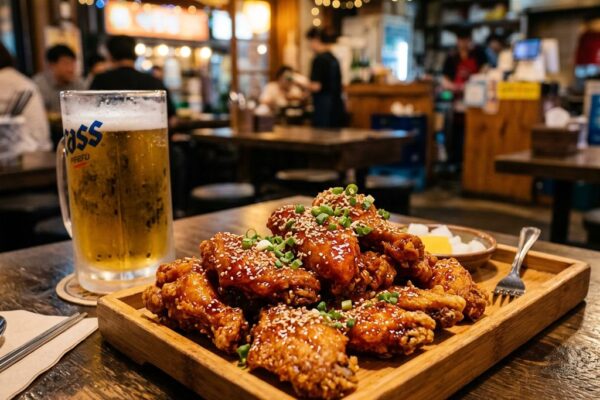
- Japanese beer: A crisp lager such as Sapporo, Asahi, or Yebisu cleans the palate beautifully.
Common Mistakes to Avoid
- Pouring curry over the entire plate. Plating with curry on one side and rice on the other lets the diner control sauce-to-rice ratio bite by bite, and it keeps the bottom of the katsu from going soggy on the plate.
- Skipping the apple and honey. These provide the natural sweetness Japanese curry is famous for. Without them the sauce tastes flat and overly savory.
- Adding curry roux to actively boiling liquid. The starch in the roux can scorch and clump. Always turn off the heat first, then dissolve the roux slowly.
- Frying at the wrong temperature. Oil that is too cool soaks into the breading; oil that is too hot burns the panko before the inside cooks. 340°F (170°C) is the sweet spot.
- Slicing too early. Cutting straight out of the fryer releases all the juice and softens the crust. A 2-minute rest is enough.
- Crowding the pan. One cutlet at a time. Multiple cutlets drop the oil temperature and create soggy crusts.
Frequently Asked Questions
Can I bake or air-fry the katsu instead of deep-frying?
Yes. For an air fryer, spray the breaded cutlets generously with oil, then cook at 380°F (193°C) for 11 to 13 minutes, flipping halfway. For oven-baking, toast the panko in 2 tablespoons of oil over medium heat until golden brown before breading (this step makes a big difference for oven katsu), then bake the cutlets on a wire rack at 425°F (218°C) for 18 to 20 minutes. The texture is not identical to deep-fried, but both methods get close.
What can I substitute if I cannot find Japanese curry roux?
You can make a from-scratch roux by cooking 4 tablespoons of butter with 4 tablespoons of flour for 10 minutes until deep golden, then stirring in 2 tablespoons of curry powder, 1 teaspoon of garam masala, and 1/2 teaspoon of cayenne. Add this paste to the simmering vegetables in place of the boxed roux. Finish with a tablespoon of ketchup, a tablespoon of Worcestershire, and a teaspoon of honey to mimic the boxed flavor.
Why is my curry too thin?
Either you used too much liquid for the roux quantity (check the back of your roux box for the exact ratio) or you did not simmer long enough after adding the roux. Continue simmering uncovered for another 5 minutes, or whisk in a slurry of 1 tablespoon cornstarch dissolved in 2 tablespoons cold water for a quick fix.
Can I make this gluten-free?
Yes, with substitutions. Use gluten-free panko (available at most Asian markets and natural food stores), rice flour in place of all-purpose flour, gluten-free Worcestershire sauce, tamari in place of soy sauce, and a gluten-free Japanese curry roux such as S&B Tasty Curry Flakes Gluten-Free. The flavor and texture come out remarkably close to the original.
How spicy is katsu curry?
Most Japanese curries are mild compared to Indian or Thai curries. Even the "hot" level of most commercial roux brands lands somewhere around mild salsa heat in U.S. terms. If you like more spice, add cayenne or a dab of chili paste at the end. For children, use the mild version of Vermont Curry.
Can I cook the curry in a slow cooker or pressure cooker?
Yes. For a slow cooker, sauté the onions on the stove first (they will not caramelize in a slow cooker), then add everything except the roux and cook on low for 6 hours. Stir in broken roux pieces during the last 20 minutes. For a pressure cooker, sauté onions, add stock and vegetables, pressure cook on high for 5 minutes, release pressure, then dissolve the roux.
What kind of rice should I use?
Short-grain Japanese rice (Koshihikari, Akitakomachi, or U.S.-grown calrose) is traditional and ideal. Its slight stickiness holds the curry well. Long-grain rice such as basmati is too separate and dry for the dish.
Is katsu curry the same as chicken katsu?
No. Chicken katsu is just the breaded fried cutlet, often served with tonkatsu sauce, shredded cabbage, and rice. Katsu curry adds Japanese curry sauce to the equation, transforming it into a one-plate meal.
Why use chicken thighs instead of breasts?
Thighs have more fat and connective tissue, which keeps them juicy through the high heat of deep-frying. Breasts are leaner and dry out more easily. If you prefer breasts, butterfly them open and brine them for 30 minutes in salted water before breading to help retain moisture.
Can the curry sauce be made in advance?
Absolutely. Japanese home cooks often make a large batch on Sunday and serve it for two or three meals during the week. The sauce thickens further in the fridge — thin with stock when reheating. Many Japanese cooks insist the flavor is best on day two.
Bringing It All Together
Katsu curry rewards thoughtful timing and attention to small details: deeply browned onions, well-pressed panko, an oil thermometer, and a sharp knife. None of these are advanced techniques. They are simply the difference between a good plate and a great one. Once you have made it once, you will understand why it is one of Japan’s most beloved comfort foods — and why it has quietly become a global favorite served everywhere from London office cafeterias to São Paulo food halls to your own kitchen table. Make a big batch of curry, freeze half, and you have a week of fast weeknight dinners waiting in the freezer. Slice the cutlet into thick strips, fan them across the rice, ladle the curry alongside, top with a bright spoonful of fukujinzuke, and dig in. There is a reason this dish became a national obsession in Japan: it earns the obsession every time you make it.

Mei Lin Chen
Mei Lin Chen is an Asian food writer and recipe developer. Melbourne-raised and London-based, she has spent over a decade exploring the rice paddies, hawker stalls, and home kitchens of South-East and East Asia. Her recipes balance traditional technique with everyday practicality.