Last updated: March 24, 2026
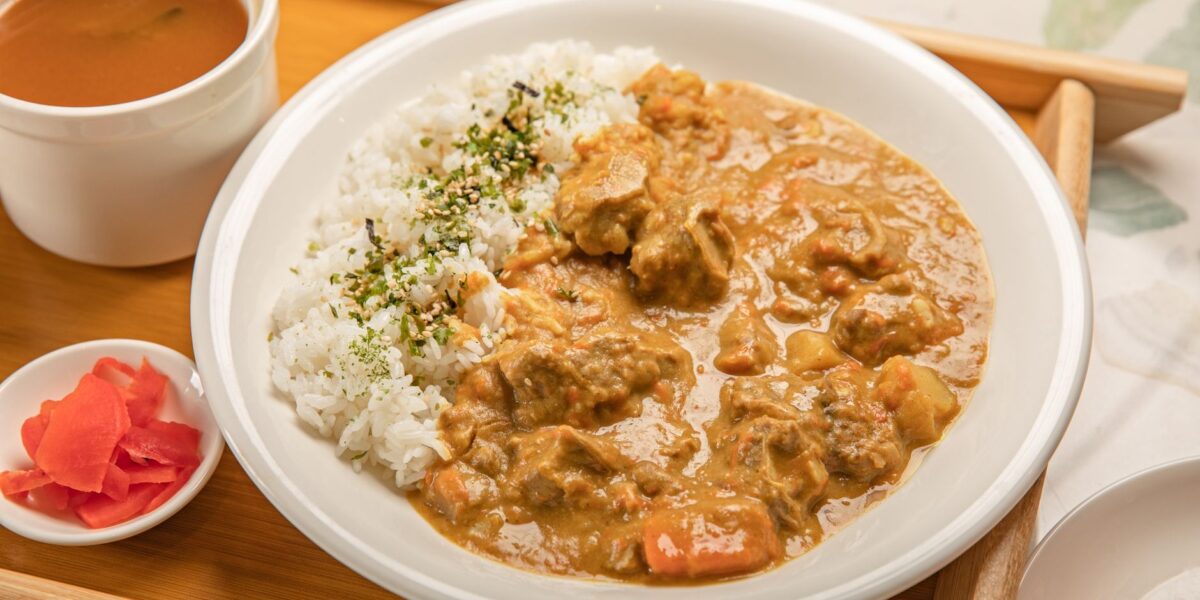
Japanese curry rice, known in Japan as kare raisu (カレーライス), is the comfort food that quietly conquered a nation. It does not look or taste like the curries of India, Thailand, or Malaysia. It is thick, glossy, mild, and softly sweet, with a deep brown gravy clinging to chunks of carrot, potato, onion, and tender protein, all spooned over a heaping pile of short-grain Japanese rice. Ask any Japanese person to name a dish they grew up eating at home, and curry rice will almost always be on the list, right alongside miso soup and grilled fish. Today it is served everywhere from elementary school cafeterias to specialty kare shops in Tokyo’s neon back alleys, and even the Japanese Maritime Self-Defense Force eats it every Friday to keep track of the days at sea.
This recipe will walk you through making restaurant-quality Japanese curry from scratch at home, using either store-bought curry roux blocks for convenience or a homemade roux for full control over the flavor. We will cover the cuts of meat to use, the order in which to build the sauce, the optional kakushi-aji (hidden flavor) ingredients that elevate the dish from ordinary to addictive, and how to serve and store it. Expect to spend about ninety minutes from cutting board to bowl, and to end up with leftovers that taste even better the next day.
What Is Japanese Curry Rice
Curry arrived in Japan during the Meiji era of the late nineteenth century, brought in by the British Royal Navy, who had picked up their version of curry from colonial India and adapted it for shipboard cooking with flour-thickened gravy. The Imperial Japanese Navy embraced the dish because the gravy stuck to the plate even when the ship rolled, and the high-energy, easy-to-batch-cook meal kept sailors fed and helped prevent beriberi when paired with white rice and vegetables. From there, curry slid into civilian kitchens, school lunches, train station cafeterias, and the corner yoshoku (Western-style) diners that defined modern Japanese home cooking.
What sets Japanese curry apart is the roux. Instead of building a sauce from individual spices, Japanese cooks toast flour and butter together until deeply brown, then stir in mild curry powder, garam masala, and stock to create a thick, sliceable block of fat-bound spice paste. Major Japanese brands like S&B Golden Curry, House Vermont Curry, and Java Curry sell these roux blocks in convenient bricks that look like chocolate bars and dissolve into hot stock to produce instant, foolproof gravy. The result is creamy, well-rounded, and just spicy enough to interest adults without scaring children. Levels range from sweet (amakuchi) through medium-hot (chukara) to hot (karakuchi) and extra hot (gekikara).
Why You Will Love This Recipe
- Genuinely weeknight-friendly. Once the vegetables are cut, the pot simmers itself. Active cooking is under thirty minutes.
- Better the next day. Curry rice belongs to the family of dishes that ripen overnight. The flavors marry, the gravy thickens, and the second-day bowl is the one you crave.
- Endlessly adaptable. Use beef, pork, chicken, seafood, or keep it fully vegetarian. Add mushrooms, eggplant, kabocha squash, or even cheese.
- Kid-approved and adult-loved. The sweetness from caramelized onions and apple, balanced with a gentle savory heat, plays to nearly every palate.
- Pantry-stable. The roux block keeps for months in a cupboard, so a comforting dinner is always within reach.
Ingredient List with Quantities
This recipe serves four to six people generously, depending on appetite, and produces roughly two liters of finished curry. Use the metric and US-customary measurements together. Quantities scale linearly if you want to double the batch.
For the curry
- 500 g (about 1.1 lb) boneless beef chuck, pork shoulder, or boneless chicken thigh, cut into 2.5 cm (1-inch) cubes
- 2 large yellow onions (about 500 g total), halved and sliced thin
- 2 medium carrots (about 250 g), peeled and cut into rolling chunks (rangiri)
- 3 medium starchy potatoes such as Yukon Gold or russet (about 500 g), peeled and cut into 3 cm chunks
- 4 cloves garlic, finely grated
- 1 thumb (about 20 g) fresh ginger, peeled and finely grated
- 2 tablespoons (30 ml) neutral oil such as canola or rice bran
- 30 g (2 tablespoons) unsalted butter
- 1 liter (4 cups plus 2 tablespoons) low-sodium beef, chicken, or vegetable stock, or water with 2 stock cubes
- 1 box Japanese curry roux (about 220 g / 7.8 oz), medium-hot is standard for adults; sweet for children
- Salt and freshly ground black pepper, to season the protein
Kakushi-aji (the ”hidden flavor” boosters, optional but recommended)
- 1 small tart apple (such as Granny Smith or Fuji), grated on the large holes of a box grater
- 2 tablespoons tomato paste, or 60 ml ketchup
- 1 tablespoon Worcestershire sauce
- 1 tablespoon soy sauce
- 1 tablespoon honey or 1 square (about 5 g) dark chocolate (yes, really; it adds body and a wisp of bitterness)
- 1 teaspoon instant coffee granules dissolved in 1 tablespoon hot water
- 1 bay leaf
For serving
- 4 to 6 cups freshly cooked Japanese short-grain rice (about 2 rice-cooker cups uncooked)
- Fukujinzuke (sweet pickled vegetable relish) or rakkyo (pickled scallion bulbs), to garnish
- Optional: a soft-boiled egg, shredded cheese, or a panko-crusted cutlet for katsu-kare
Equipment You Will Need
- A heavy-bottomed pot or Dutch oven of at least 4 to 5 liter capacity. Enameled cast iron is ideal for slow, even simmering.
- A sharp chef’s knife. If you want a single tool for the whole prep, a Chinese cleaver works beautifully for chopping vegetables and slicing onions.
- A box grater or microplane for the garlic, ginger, and apple.
- A wooden spoon or silicone spatula for stirring without scratching your pot.
- A rice cooker or 2-quart saucepan with a tight lid for cooking the rice.
- A fine-mesh skimmer for removing foam during the simmer.
Choosing Your Protein
Each protein gives a slightly different character to the finished curry. Pick the one that fits your time budget and craving.
| Protein | Best Cut | Simmer Time | Flavor Profile |
|---|---|---|---|
| Beef | Chuck, brisket, or short rib | 1.5 to 2 hours | Deep, rich, classic biifu kare |
| Pork | Shoulder (Boston butt) | 1 to 1.5 hours | Sweet, mellow, perfect for autumn |
| Chicken | Boneless thighs | 25 to 35 minutes | Quick weeknight version |
| Seafood | Shrimp, scallops, or white fish | 5 to 8 minutes (added last) | Coastal, lighter, shifudo kare |
| Vegetarian | Firm tofu, chickpeas, mushrooms, kabocha | 20 to 30 minutes | Earthy, satisfying, plant-based |
If you are going vegetarian, mushrooms do the heaviest lifting for umami. Use a mix of fresh shimeji or button with a few rehydrated dried shiitake; the soaking liquid can also replace part of the stock. For the meat versions, do not trim every scrap of fat: a little marbling melts into the gravy and is precisely what gives long-simmered Japanese curry its luxurious texture.
Step-by-Step Cooking Instructions
Step 1: Prep the vegetables and protein
Peel and slice the onions thin. Don’t worry about making them pretty; they will collapse into the gravy. Peel the carrots and cut them into rangiri: hold the carrot at a forty-five-degree angle to the knife, slice once, rotate the carrot ninety degrees, and slice again. This rolling cut creates irregular wedge-shaped pieces with more surface area, so they soak up sauce and cook evenly. Peel and chunk the potatoes, then submerge them in cold water to prevent browning and to wash away surface starch (which would otherwise muddy the curry).
Pat the meat dry with paper towels, then season it on all sides with a light sprinkle of salt and a generous twist of pepper. Drying the surface and seasoning at least ten minutes before searing helps build a deep brown crust, which is the foundation of the curry’s color and flavor.
Step 2: Brown the meat
Heat the neutral oil in your heavy pot over medium-high heat until it shimmers. Working in two batches so you do not crowd the pan and steam the meat, brown the cubes on at least two sides, about three minutes per batch. You are looking for a deep mahogany color on the surface; the inside can stay rare. Transfer the seared meat to a bowl. Leave the fat and the brown bits (the fond) in the pot. If you have ever made Japanese kakuni braised pork belly, the principle is the same: the crust on the meat and the fond on the pot are the engine of flavor.
Step 3: Caramelize the onions
Drop the butter into the same pot. When it foams, add all of the sliced onions and a generous pinch of salt. Cook over medium heat, stirring every few minutes, scraping up the brown bits as the onions release their moisture and deglaze the pan naturally. After about twenty to twenty-five minutes, the onions will collapse into a glossy, golden-brown jam. This is the second pillar of flavor. If you skip this step or rush it, your curry will taste flat. If you don’t have the time, even a shorter ten-minute saute until soft and lightly golden is far better than nothing.
Step 4: Add aromatics and bloom the flavors
Stir in the grated garlic and ginger and cook for one to two minutes, until fragrant but not browned. Add the tomato paste and stir constantly for another minute to caramelize it, which removes its raw, tinny edge and adds a savory depth.
Step 5: Build the broth
Return the seared meat and any accumulated juices to the pot. Pour in the stock. Add the carrots, bay leaf, Worcestershire sauce, soy sauce, and the grated apple. Bring the pot to a gentle simmer, then immediately lower the heat so the liquid barely trembles. Skim the gray foam that rises to the surface in the first ten minutes; this scum is denatured protein and removing it gives you a cleaner-tasting gravy.
Step 6: Slow simmer
Cover the pot loosely, leaving a small gap for steam to escape, and simmer at this whisper-low temperature for the time appropriate to your protein (see the table above). For beef, this is the long stretch where collagen breaks down into gelatin and the meat turns silky. Do not boil hard; aggressive bubbling toughens the meat and clouds the broth. Check halfway through; if the liquid has reduced below the level of the solids, top up with a splash of hot water or stock.
Step 7: Add the potatoes
Drain the potatoes and add them to the pot in the final twenty to twenty-five minutes of cooking. Cooking them with the meat from the start will turn them to mush. Adding them late gives you potatoes that hold their cube shape on the outside but are creamy and starch-soft on the inside. The released starch will also thicken your gravy a touch, which is exactly what you want.
Step 8: Melt in the roux
This is the moment of transformation. Remove the pot from the heat and let it sit off the burner for five minutes; the curry roux dissolves more cleanly into hot but not boiling liquid. Break the roux block into individual cubes. Place a few cubes onto a ladle, dip the ladle into the simmering broth, and stir gently with a spoon until each cube dissolves. Repeat with the remaining cubes. Stir the dissolved roux into the pot in stages, giving it time to incorporate before adding more. This prevents lumps. Return the pot to low heat and simmer, uncovered, for ten more minutes, stirring often. The gravy will thicken visibly and turn rich brown.
Step 9: Finish with the secret flavor boosters
Stir in the honey or dark chocolate, the dissolved instant coffee, and a final crack of black pepper. Taste critically. If the curry feels flat, add another teaspoon of soy sauce. If it tastes a touch sharp, add a pinch of sugar or another splash of grated apple. If it feels too thick, thin with hot water a tablespoon at a time. The finished curry should coat the back of a spoon thickly but still flow freely when ladled.
Step 10: Serve over rice
Mound freshly cooked Japanese short-grain rice on one half of a wide shallow plate or bowl. Ladle a generous portion of curry over the other half so that the rice border remains visible. The visual contrast of white rice and dark curry is part of the experience. Garnish with a small pile of fukujinzuke pickles in the corner. The tart, crunchy pickles are not optional in Japan; they cut through the richness in a way that, once you try it, you will not want to skip again. For more on Japanese pickle traditions, our guide to tsukemono pickling covers everything from quick-pickled cucumbers to traditional rice-bran pickles.
Master Tips for Better Japanese Curry
- Choose the right rice. This dish lives or dies on the rice underneath it. Use Japanese short-grain rice such as Koshihikari or Tamanishiki. Rinse it in cold water until the water runs nearly clear, then cook with a 1:1.1 rice-to-water ratio. Our guide to choosing rice for Asian cooking goes deeper if you want to nerd out.
- Use two roux varieties. Many Japanese home cooks mix two different brands or heat levels of roux for a more complex finish. Try one box of medium-hot S&B Golden Curry with half a box of House Java Curry for an extra dimension.
- Cut potatoes into uniform sizes. The biggest culprit in unevenly cooked curry is wildly different potato sizes. Use a ruler the first time if you have to; 3 cm cubes are perfect.
- Make it ahead. Curry made today, refrigerated overnight, and reheated gently tomorrow is unambiguously better. The starches in the gravy fully hydrate and the spices melt into one another.
- Do not boil hard after adding roux. The fat in the roux can break and look greasy if you boil aggressively. A bare simmer is enough.
- Resist the urge to over-stir while simmering. Frequent stirring breaks up the potato and meat. A gentle stir every few minutes is plenty.
Variations and Popular Add-Ons
Once you have mastered the base recipe, Japanese curry becomes a canvas. Some of the most popular adaptations in Japan include:
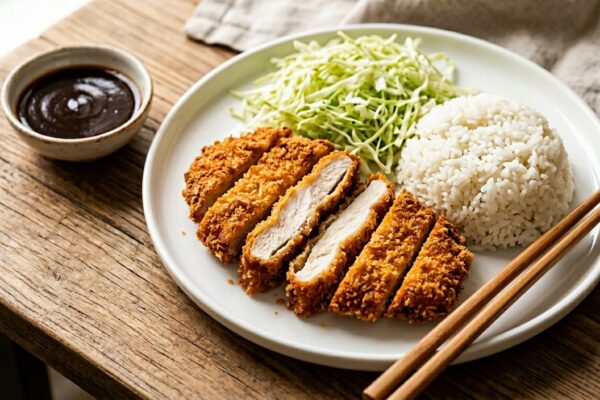
- Katsu-kare (カツカレー): Spoon the curry next to (not over) a panko-breaded, deep-fried pork or chicken cutlet. The crispy crust softens at the edges where it meets the sauce, while the center stays crunchy. Our tonkatsu recipe is a perfect pairing.
- Karaage curry: Top the rice with several pieces of Japanese-style fried chicken. The double protein hit is a young person’s favorite. See our chicken karaage recipe.
- Cheese curry: Sprinkle shredded melting cheese (mozzarella, mild cheddar, or even Japanese sliced cheese) over the curry just before serving and pop it under the broiler for a minute. The richness of the cheese against the spice is irresistible.
- Yaki-curry (baked curry): Pour curry over rice in an oven-safe dish, top with cheese and a raw egg, and bake at 200°C / 400°F until bubbling and golden, about ten minutes.
- Curry udon: Thin leftover curry with a splash of dashi stock and a teaspoon of soy sauce, then pour over thick udon noodles. A second-life dinner that feels brand new.
- Soup curry: A Hokkaido specialty in which the curry is thinned to a brothy consistency and served separately from the rice, often loaded with roasted vegetables and a chicken leg.
- Dry curry (doraikare): Ground meat sautéed with onions, carrot, and curry powder until almost no liquid remains, then mounded over rice and topped with a fried egg.
- Vegan curry: Many Japanese brands (S&B Tasty Curry Vegetarian, Kenko Vegetarian Curry) sell roux blocks made without animal fats. Pair with vegetable stock and a mix of tofu, chickpeas, and root vegetables.
Building a Homemade Curry Roux from Scratch
If you want a project, or if curry roux blocks are hard to find, you can make your own. Homemade roux gives you control over salt, oil, and spice level, and it freezes beautifully.
- 60 g (4 tablespoons) unsalted butter
- 60 g (about 1/2 cup) all-purpose flour
- 3 tablespoons mild Japanese-style curry powder (S&B Oriental Curry Powder is the gold standard)
- 1 tablespoon garam masala
- 1 teaspoon ground cumin
- 1 teaspoon ground coriander
- 1/2 teaspoon cayenne (more or less to taste)
- 1 teaspoon fine sea salt
- 1 teaspoon sugar
Melt the butter in a small heavy saucepan over medium-low heat. Whisk in the flour to form a smooth paste and cook, stirring almost constantly, for fifteen to twenty minutes, until the roux is the color of milk chocolate. The slow toasting builds nutty, deeply savory flavors. Remove from heat and whisk in the spices, salt, and sugar. Pour onto a parchment-lined baking sheet or into a small loaf pan, smooth into a slab, and refrigerate until firm. Cut into cubes to use exactly like a store-bought block. This recipe replaces about 220 g of commercial roux.
Nutritional Information
The values below are approximate, based on a serving with beef chuck, 1 cup of cooked rice, and a standard medium-hot roux. They are rounded to the nearest whole number per serving (recipe yields six portions).
| Nutrient | Per Serving (with beef and rice) | % Daily Value* |
|---|---|---|
| Calories | 620 kcal | 31% |
| Total Fat | 22 g | 28% |
| Saturated Fat | 10 g | 50% |
| Cholesterol | 75 mg | 25% |
| Sodium | 1,250 mg | 54% |
| Total Carbohydrate | 78 g | 28% |
| Dietary Fiber | 5 g | 18% |
| Sugars | 10 g | — |
| Protein | 28 g | 56% |
| Iron | 4 mg | 22% |
| Potassium | 900 mg | 19% |
If sodium is a concern, choose a lower-sodium roux brand, dilute the recipe with extra unsalted stock and water, or use only half a roux block while supplementing with homemade curry powder and a pinch of salt. The dish can also be made notably lighter by using chicken breast, increasing the vegetable ratio, and serving smaller portions of rice.
Storage and Reheating
- Refrigerator: Cool the curry quickly by transferring it to a shallow container, then refrigerate within two hours of cooking. It will keep for up to four days, and most home cooks agree day-two curry is the peak. Stir well before reheating.
- Freezer: Curry freezes well, but the texture of potatoes degrades on thawing (they can turn mealy or watery). If you plan to freeze, leave the potatoes out or fish them out before freezing, and add freshly cooked potatoes when reheating. Otherwise, freeze in portion-sized airtight containers or freezer bags for up to two months.
- Reheating on the stove: Pour the curry into a saucepan with a splash of water or stock to loosen it, and warm over low heat, stirring gently, until heated through. Do not boil hard.
- Reheating in the microwave: Transfer one portion to a microwave-safe bowl, add a tablespoon of water, cover loosely, and heat in 90-second intervals, stirring between each, until piping hot.
- Reheating from frozen: Thaw overnight in the fridge for best results, or place the frozen block straight into a covered saucepan with a few tablespoons of water and warm over very low heat, stirring as it melts.
What to Serve With Japanese Curry Rice
Curry rice is filling enough to stand alone, but a classic Japanese curry dinner often includes a few cooling, crunchy, or palate-cleansing sides.
- Fukujinzuke: The signature dark-red, sweet-savory pickled vegetable relish (daikon, lotus root, eggplant). It comes in a jar in most Japanese groceries.
- Rakkyo: Small Japanese pickled scallion bulbs, sweet and faintly crunchy.
- Cabbage salad: Finely shredded raw green cabbage tossed with a sesame-soy or yuzu dressing.
- Miso soup: A simple bowl of miso soup with tofu and wakame seaweed.
- Onsen tamago: A slow-poached egg cracked over the curry just before eating, the runny yolk weaving into the gravy.
- Pickled ginger (gari) or pickled daikon (takuan): Bright, sharp counterpoints to the rich gravy.
Common Mistakes to Avoid
| Mistake | What Happens | How to Fix It |
|---|---|---|
| Adding roux to boiling liquid | Lumps and broken gravy | Remove pot from heat, dissolve cubes in a ladle of broth first |
| Crowding the pan when searing meat | Steamed, gray meat with no fond | Sear in two or three batches with room between pieces |
| Skipping the onion caramelization | Flat, one-dimensional flavor | Take at least 15 minutes to soften and brown the onions |
| Boiling potatoes from the start | Disintegrated potato cubes | Add potatoes in the last 20–25 minutes |
| Using long-grain rice | Loose, grainy bowl that won’t hold curry | Use Japanese short-grain rice such as Koshihikari |
| Forgetting to taste before serving | Under- or over-salted gravy | Always taste and adjust with soy, sugar, or water at the end |
| Using cold stock | Stalls the simmer and toughens the meat | Warm stock before adding, or add it gradually |
Curry Rice Across Japan
While most Japanese homes share a common style, regional kare traditions add local flair. In Hokkaido, the famous Sapporo soup curry serves thinner, brothy curry alongside roasted vegetables and a whole chicken leg. In Yokosuka, a port city near Tokyo, the navy curry tradition is celebrated; many local restaurants serve a ”Yokosuka Navy Curry” certified to match the original Imperial Navy recipe, complete with a salad and a glass of milk. In Kanazawa, on the Japan Sea coast, the Kanazawa-style curry is famously thick and dark, served on a metal plate with shredded cabbage, a fried cutlet, and a fork rather than a spoon. In Osaka, you’ll find curry served on a stainless plate piled high with rice and topped with raw egg, a casual lunchtime favorite. Each city defends its style with passion, and any of them is worth ordering if you find yourself in Japan.
The Roux Brand Showdown
Walk down the curry aisle of a Japanese grocery and you’ll see a wall of boxes in different colors. Here’s a brief field guide to the most common brands sold in the United States.
| Brand | Style | Notable For |
|---|---|---|
| S&B Golden Curry | Classic, well-balanced | Best all-purpose choice; widely available |
| House Vermont Curry | Sweeter, milder, with apple and honey | Family-friendly; loved by kids |
| House Java Curry | Deeper, more savory, slightly smoky | Adult favorite; great with beef |
| S&B Tasty Curry | Cleaner, less fat-forward | Lighter option; good for chicken |
| Glico Premium Kuchi-doke | Restaurant-style, silky | Smooth gravy; pairs beautifully with katsu |
| Kokumaro Curry | Cheesy, ultra-thick | For deeply rich preparations |
Frequently Asked Questions
Is Japanese curry spicy?
Not by Indian or Thai standards. Even the ”hot” (karakuchi) level on commercial roux boxes is mild compared to a green curry or vindaloo. Most Americans find medium-hot perfectly comfortable. If you want more heat, stir in a teaspoon of cayenne, a tablespoon of Japanese chili oil (rayu), or a few shakes of shichimi togarashi at the table.
How is Japanese curry different from Indian curry?
Indian curries are built from individually toasted whole and ground spices, often bloomed in fat, sometimes layered with cream, coconut milk, or yogurt; they tend to be brothy or sauce-y rather than gravy-thick. Japanese curry uses a pre-made flour-thickened roux laced with a relatively mild curry powder, producing a smooth, glossy, gravy-like sauce closer to a French velouté than to a North Indian korma. Both are delicious but they live in different culinary universes.
Can I make this in an Instant Pot or pressure cooker?
Yes. Use the sauté function to brown the meat and caramelize the onions, then pressure-cook the meat and carrots in stock on high for fifteen to twenty minutes (beef) or ten minutes (chicken). Quick-release, add the potatoes, and simmer (sauté function on low) for fifteen more minutes until they are tender. Then turn off the heat, melt in the roux, and finish.
Can I make this in a slow cooker?
Yes, but brown the meat and caramelize the onions on the stove first. Transfer everything except the potatoes and roux to the slow cooker with the stock, cook on low for six hours or high for three hours, then add potatoes for the final hour. Turn off the heat, let the temperature drop slightly, melt the roux in, and stir well before serving.
Why is my gravy lumpy?
This almost always happens because the roux was added to liquid that was either too hot (boiling) or that was not stirred enough as the roux dissolved. Take the pot off the heat, fish out any lumps you see, then use a whisk or immersion blender briefly to smooth the gravy. Prevention next time: dissolve the roux cubes in a ladle of broth before stirring them into the pot.
Can I make Japanese curry gluten-free?
Standard roux blocks contain wheat flour, so they are not gluten-free. Look for brands labeled gluten-free (S&B and a few smaller brands offer them) or make a homemade roux using rice flour or sweet rice flour instead of all-purpose flour. Also check your Worcestershire sauce and soy sauce; use tamari or a certified gluten-free soy sauce.
Can I freeze Japanese curry?
Yes, but the potatoes are the weak link. Either remove the potatoes before freezing or accept that they will be a little mealy when thawed. Otherwise, the curry holds beautifully for up to two months in a sealed container or freezer bag.
What rice is best?
Japanese short-grain rice, also called japonica, is the right choice. Its slight stickiness and gentle chew hold up to the heavy gravy without disintegrating. Koshihikari, Tamanishiki, and Tsuyahime are the gold standards. Calrose, grown in California, is a serviceable everyday alternative. Avoid jasmine, basmati, or long-grain rice for this dish; they are great elsewhere but feel wrong here.
Do I have to add the apple, coffee, and chocolate?
No. The curry will be very good without them. They are kakushi-aji, the hidden-flavor tradition that Japanese cooks use to give their curry a personal signature. The apple adds gentle sweetness and pectin for body, the coffee adds bitter depth and color, and the chocolate adds richness and an undertone of cocoa. Try them once and see if you can taste the difference; many people make them permanent additions after a single try.
How long does it take to make from scratch?
Total elapsed time is roughly 90 minutes for chicken, 2 hours for pork, and 2.5 hours for beef. Hands-on active time is about 35 to 45 minutes; the rest is simmering. You can shave time with a pressure cooker (about 45 minutes start to finish for beef) or stretch it out with a slow cooker for hands-off cooking.
Why does mine taste different from the restaurant?
Restaurant curry shops often use multiple roux brands blended together, add their own house spice mix on top of the roux, and simmer their gravy for many hours, sometimes days, in big batches. To get closer to that depth at home, blend two roux brands, add a tablespoon of curry powder and a teaspoon of garam masala at the end, and let your curry rest overnight before serving.
Final Notes
Japanese curry rice rewards patience and a generous hand. The recipe is forgiving enough for a weeknight cook with a busy day, and deep enough that veteran cooks still tinker with their kakushi-aji after years. Once it becomes a part of your rotation you will find it does the work of three different dinners: the first night fresh out of the pot, the second night even better from the fridge, and the third night reinvented as curry udon, baked curry, or a generous spoonful over a fried chicken cutlet. Stock a few roux boxes in the pantry the next time you visit a Japanese grocery, keep a bag of short-grain rice in the cupboard, and you will always be twenty good minutes of prep away from a complete, family-pleasing dinner. That is the quiet magic of kare raisu, and now it lives in your kitchen too.

Mei Lin Chen
Mei Lin Chen is an Asian food writer and recipe developer. Melbourne-raised and London-based, she has spent over a decade exploring the rice paddies, hawker stalls, and home kitchens of South-East and East Asia. Her recipes balance traditional technique with everyday practicality.