Last updated: March 20, 2026
Few breads in the world combine pillowy softness, blistered char, and buttery aroma the way Indian naan does. Pulled from a screaming-hot clay tandoor in the streets of Punjab, naan is the bread that defines North Indian dining: a chewy, leavened flatbread that mops up curries, cradles tandoori meats, and steals the show next to a bowl of dal. Yet most home cooks never attempt naan because they assume it requires a tandoor, a special flour, or years of experience. The truth is the opposite. Naan is one of the most forgiving Asian bread techniques you can learn, and a properly hot cast iron skillet or a flipped baking steel can produce restaurant-quality naan in under two minutes per piece.
This guide walks you through the full naan technique from yeast bloom to final brush of garlic butter. You will learn the dough chemistry that makes naan pliable, the heat physics that creates the signature leopard-spotted char, and the stovetop and oven workarounds that let any home kitchen replicate a tandoor. We cover yogurt-leavened doughs, yeast doughs, hybrid versions, and the common failures that turn naan into hard crackers or limp sheets. By the end, you will be able to roll, slap, and bake naan that puffs, blisters, and tears apart in steaming layers.
What Is Naan and Why It Deserves Its Own Technique
Naan is a leavened flatbread of Central and South Asian origin, traditionally cooked by slapping the rolled dough onto the inner wall of a vertical clay oven called a tandoor. The word ”naan” comes from the Persian word for bread, and the bread itself traveled along trade routes from Persia through Afghanistan into the Indian subcontinent, where it became inseparable from Punjabi and Mughlai cuisine. What makes naan distinct from other Indian breads is its leavening. While roti and chapati are unleavened and pressed against a dry tava, naan uses yeast, yogurt, or both to develop carbon dioxide that creates an open, tender crumb. The result is a bread with structural lift, a thin crisp surface, and a soft interior that holds heat and moisture for several minutes after baking.
The technique is what separates good naan from great naan. In a tandoor, the dough hits a vertical clay wall preheated to around 480 to 540 degrees Celsius. The bottom face seals to the clay through dehydration and gluten browning, while the top face is bombarded by radiant heat from glowing charcoal beneath. In under ninety seconds, the dough puffs from steam, the top blisters in dark leopard spots, and the bread peels off the wall with a tool resembling a long metal hook. The home cook must replicate three conditions to approximate this magic: high direct contact heat on the bottom, intense radiant heat above, and a dough hydrated enough to generate explosive steam.
Naan in the Family of Indian Breads
Before tackling technique, it helps to place naan within the wider family of Indian flatbreads. Each bread has a specific texture, leavening method, and cooking surface, and home cooks often confuse them. Understanding these distinctions sharpens your expectations of what naan should look, feel, and taste like.
| Bread | Flour | Leavening | Cooking Surface | Texture |
|---|---|---|---|---|
| Naan | Maida (white wheat) | Yeast and/or yogurt | Tandoor wall or skillet | Soft, chewy, blistered |
| Roti / Chapati | Atta (whole wheat) | Unleavened | Flat tava | Thin, pliable, light |
| Paratha | Atta | Unleavened, laminated | Tava with ghee | Flaky, layered |
| Kulcha | Maida | Baking powder, yogurt | Tandoor or oven | Denser, slightly crisp |
| Bhatura | Maida | Yeast, yogurt | Deep-fried in oil | Puffy, fried, hollow |
| Tandoori Roti | Atta | Unleavened | Tandoor wall | Crisp, smoky, rustic |
Naan sits in a sweet spot among these breads. It uses refined flour for elasticity, leavening for lift, and a hot cooking surface for char. Once you commit to this combination, the technique becomes a matter of dialing in each variable. This bread is the gateway to the wider world of Punjabi cooking, and pairs naturally with dishes featured in our Punjabi food guide.
Essential Equipment for Home Naan
You do not need a tandoor to make exceptional naan at home. What you need is high heat, dry direct contact on one side, and radiant or convective heat on the other. There are three common home setups, ranked from best to most accessible.
The Cast Iron Skillet Method
A heavy cast iron skillet preheated for at least ten minutes over a high flame is the home cook’s best friend. Cast iron stores enormous thermal mass and can hit surface temperatures of 300 to 350 degrees Celsius, which is enough to scorch the bottom of the naan within thirty seconds. Pair the skillet with a kitchen torch, broiler, or the underside of a second hot skillet held briefly above the dough to mimic top-down radiant heat. This combination produces naan with proper blistering on both sides.
The Inverted Steel or Stone in the Oven
A baking steel or pizza stone preheated under a hot broiler at maximum temperature (typically 290 to 315 degrees Celsius) provides the closest oven analog to a tandoor. The steel absorbs heat for forty to sixty minutes, and the broiler element provides the radiant top-down heat needed to blister the surface. This method is excellent for batch baking when you are feeding a crowd.
The Flame-Slap Method
Once the bottom of the naan has set in the skillet, many home cooks flip the bread directly onto an open gas flame for ten to fifteen seconds. The flame chars the top in irregular dark patches that mimic the tandoor’s leopard-spot appearance. Use tongs and keep the bread moving so it does not burn through.
Beyond your heat source, gather a digital kitchen scale for accurate flour and water measurements, a bench scraper for dividing dough, a rolling pin or your palms for shaping, a small bowl of water for surface dampening, a pastry brush for ghee or garlic butter, and a clean kitchen towel to keep cooked naan warm and soft. A digital thermometer is helpful for verifying that your skillet has reached working temperature.
The Ingredients and What Each One Does
Naan is deceptively simple. A classic recipe uses six core ingredients, each of which plays a measurable role in texture and flavor. Skip one and the bread suffers in ways that are easy to misdiagnose.
- Maida or all-purpose flour: The high gluten content in refined wheat flour gives naan its stretchy, chewy crumb. Atta (whole wheat) can be used for a healthier version but produces denser bread.
- Yogurt: Full-fat plain yogurt tenderizes the dough through its lactic acid, which weakens gluten just enough to keep the bread pliable rather than tough. It also adds tang and moisture.
- Yeast: Active dry yeast or instant yeast provides reliable, predictable rise. Traditional naan can be leavened entirely by yogurt and baking soda, but yeast produces the most consistent results.
- Milk: A small splash of warm milk enriches the dough and improves browning through milk solids and lactose.
- Sugar: One or two teaspoons feed the yeast and accelerate fermentation. Sugar also promotes Maillard browning on the cooking surface.
- Ghee or neutral oil: Fat shortens gluten strands and produces a more tender crumb. Ghee adds flavor; neutral oil keeps the dough neutral for sweeter applications.
- Salt: Fine sea salt for seasoning and gluten strengthening. Naan without salt tastes flat no matter how charred it is.
- Optional baking powder: A pinch of baking powder is a common professional trick that provides a tiny secondary lift the moment the dough hits the hot surface, contributing to the dramatic puff.
For a finishing brush, melted ghee or a garlic butter made with melted butter, minced garlic, and chopped cilantro transforms a good naan into a great one. The butter seeps into the cracks of the puffed surface and carries flavor into every bite.
Step-by-Step: The Complete Naan Technique
This master recipe yields eight to ten medium naans. Read through the entire sequence before you begin, because the technique flows quickly once the skillet is hot.
Step 1: Bloom the Yeast
Warm 80 milliliters of milk to around 38 degrees Celsius. The temperature should feel like a comfortable bath, never hot enough to sting your wrist. Stir in one teaspoon of sugar and two teaspoons of active dry yeast. Set aside for five to ten minutes until a thick foam rises on the surface. If no foam forms, the yeast is dead and the entire batch will fail. Start over with fresh yeast.
Step 2: Combine the Wet and Dry Ingredients
In a large mixing bowl, whisk together 500 grams of all-purpose flour, one and a half teaspoons of fine salt, and half a teaspoon of baking powder. In a separate bowl, whisk together the bloomed yeast mixture, 150 grams of full-fat plain yogurt, two tablespoons of melted ghee or neutral oil, and 100 milliliters of warm water. Pour the wet into the dry and stir with a wooden spoon until a shaggy mass forms.
Step 3: Knead the Dough
Turn the dough onto a lightly floured surface and knead for eight to ten minutes by hand, or six minutes in a stand mixer with the dough hook on medium-low. The finished dough should feel soft, slightly tacky to the touch, and stretch into a thin window when you pull a small piece between your fingers. If it tears immediately, knead longer. If it sticks to the work surface, dust on a tablespoon of flour at a time, but resist the temptation to over-flour. Naan dough must be wetter than bread dough to puff properly.
Step 4: First Rise
Place the dough in an oiled bowl, cover with plastic wrap or a damp cloth, and let it rise in a warm spot for ninety minutes, or until roughly doubled in volume. A slow cold rise of twelve to twenty-four hours in the refrigerator produces even more complex flavor, similar to how slow fermentation deepens flavor in our Korean kimchi technique. If you are using the cold rise, bring the dough back to room temperature for thirty minutes before shaping.
Step 5: Divide and Bench Rest
Punch down the dough gently to release the largest gas bubbles. Divide it into eight to ten equal pieces using a kitchen scale for consistency. Each ball should weigh around 90 to 100 grams. Roll each piece into a smooth ball by tucking the edges underneath. Cover with a damp towel and rest for fifteen to twenty minutes. This relaxation step is critical because it allows the gluten to ease, making the dough easy to stretch.
Step 6: Preheat the Cooking Surface
While the dough rests, place a heavy cast iron skillet over high heat and let it preheat for at least ten minutes. Test the surface by flicking a few drops of water onto it. The drops should evaporate within a second and skitter across the surface like mercury. If they sit and slowly steam, the pan is not hot enough. Do not skip preheating. The most common reason naan fails to puff at home is an underheated cooking surface.
Step 7: Shape the Naan
Lightly flour your work surface. Take one ball, press it flat, and either roll it with a pin or stretch it with your palms into a teardrop shape roughly twenty centimeters long and twelve centimeters wide. Aim for an even thickness of three to four millimeters. Thin spots will burn and tear; thick spots will not puff. Brush one side lightly with water. This is the side that goes onto the skillet, and the water creates instant steam that bonds the dough to the hot surface.
Step 8: Cook the First Side
Place the dampened side down on the dry hot skillet. Within fifteen seconds you should see large bubbles begin to inflate across the surface. Let it cook undisturbed for sixty to ninety seconds, until the bottom shows dark brown spots and the top has fully puffed.
Step 9: Char the Second Side
Using long tongs, flip the bread directly onto an open gas flame for ten to fifteen seconds, moving it constantly so the bubbles char without burning through. If you have an electric stove, flip the bread in the skillet and press it down with a spatula for thirty seconds, or use a kitchen torch to blister the top. A broiler set to high also works: slide the naan under for thirty to forty-five seconds.
Step 10: Brush, Wrap, and Repeat
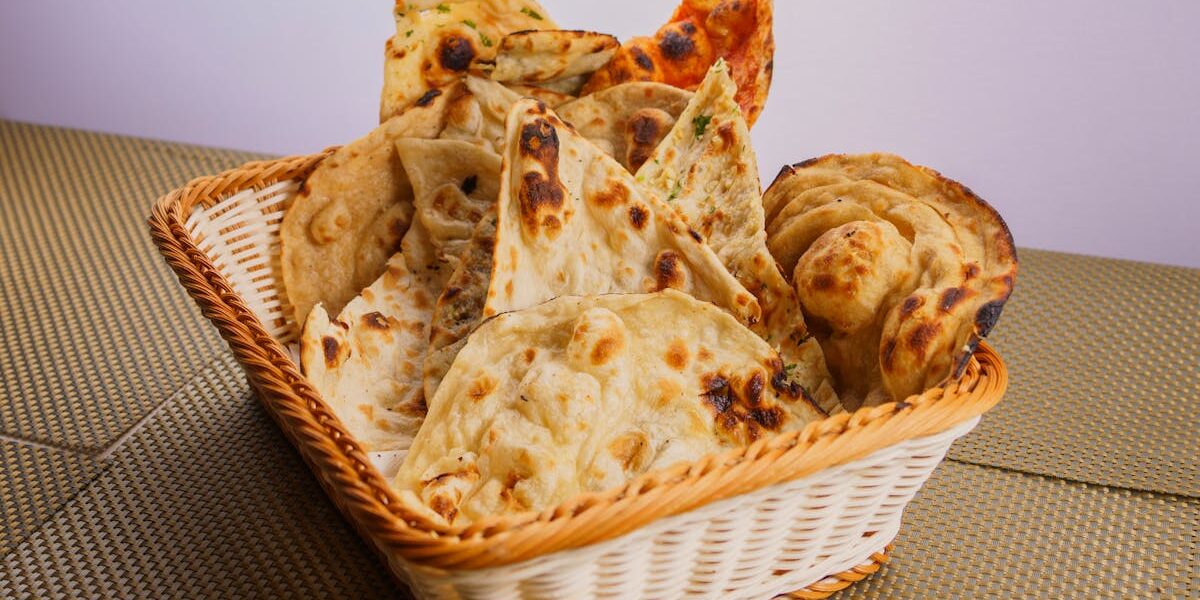
Immediately brush the hot naan with melted ghee or garlic butter and transfer to a covered basket lined with a clean kitchen towel. The towel traps steam and keeps the bread soft and pliable. Continue with the remaining dough. Serve as soon as a few are ready; naan is at its best within minutes of cooking.
Tandoor, Skillet, and Oven Compared
Choosing your cooking method depends on your equipment, the volume you need, and the texture you want. Each method has trade-offs that affect timing, char, and crumb.
| Method | Temperature | Cook Time | Best For | Trade-Offs |
|---|---|---|---|---|
| Clay Tandoor | 480 to 540 C | 60 to 90 seconds | Authentic texture, large batches | Requires dedicated equipment and outdoor space |
| Cast Iron Skillet | 300 to 350 C | 90 to 120 seconds | Home cooks, weeknight meals | Cooks one at a time; less dramatic char |
| Baking Steel Under Broiler | 290 to 315 C | 3 to 4 minutes | Batch cooking, parties | Slower per piece; uneven if oven small |
| Outdoor Grill | 320 to 400 C | 90 seconds | Smoky flavor, summer cooking | Hot spots; requires close watching |
| Pizza Oven | 400 to 450 C | 60 to 90 seconds | Closest tandoor analog | Requires owning an outdoor pizza oven |
If you have an outdoor pizza oven, you already own the best non-tandoor solution available to home cooks. The combination of high deck temperature and dome radiant heat reproduces almost exactly what happens inside a clay tandoor. For most readers, however, a cast iron skillet with a finishing flip onto an open flame is the practical winner.
Common Mistakes and How to Fix Them
Every home naan failure traces back to a small handful of recurring errors. Use this table to diagnose what went wrong on your last attempt and what to adjust on your next.
| Problem | Likely Cause | Fix |
|---|---|---|
| Naan does not puff | Skillet not hot enough or dough rolled too thick | Preheat skillet 10+ minutes; roll to 3 to 4 mm |
| Bread is tough and chewy | Over-kneaded or under-hydrated dough | Reduce kneading; add 1 to 2 tablespoons more water |
| Surface is pale, no char | Insufficient top heat or no flame finish | Use torch, broiler, or direct flame for char |
| Dough tears when stretching | Not enough resting time | Rest balls 15 to 20 minutes after dividing |
| Naan turns crisp like a cracker | Overcooked or thin spots | Reduce cook time; check thickness uniformity |
| Sticks to the skillet | Skillet too cold or dough too wet | Verify mercury-skitter water test; dust dough lightly |
| Tastes bland | Salt skipped or not enough fermentation | Use 1.5 tsp salt per 500 g flour; try cold rise |
| Hard within 10 minutes of cooking | Exposed to air, not wrapped | Wrap immediately in a kitchen towel inside a basket |
| Yeast dough did not rise | Dead yeast or water too hot | Test yeast bloom; keep water at 35 to 40 C |
| Bottom burns before top puffs | Skillet too hot, no preheated stretch | Lower heat slightly between batches |
Most beginners over-correct in one of two directions after their first failure: they either dial down the heat too far, leading to pale dry naan, or they over-flour the dough to prevent sticking, leading to tough naan. Resist both impulses. The dough must remain tacky and the surface must remain searing hot.
Practice Exercises to Build Naan Skills
The fastest way to internalize naan technique is to repeat a small set of focused drills. Each exercise isolates one variable so you can feel what changes when you adjust it. Spend a single afternoon working through these and your confidence will jump dramatically.
Drill 1: The Hydration Comparison
Make three small batches of dough with hydration levels of 60, 65, and 70 percent. Cook one naan from each batch in identical conditions. Note which batch puffed most, which was easiest to stretch, and which produced the softest crumb. Most home cooks discover their preferred hydration sits at 65 to 68 percent.
Drill 2: The Thickness Test
Roll three pieces of dough from the same batch to 2 millimeters, 4 millimeters, and 6 millimeters. Cook them under identical conditions. The 2 mm naan will likely crisp into a cracker, the 6 mm naan will stay raw inside, and the 4 mm version will puff and char correctly. This drill calibrates your eye to the proper thickness.
Drill 3: The Surface Damp Test
Cook two naans side by side. On one, brush the underside with water before placing it in the skillet. On the other, leave it dry. The dampened naan will stick more firmly to the surface and puff more aggressively, since the water flashes to steam at the moment of contact. This drill demonstrates the importance of the water layer that the tandoor mimics through its humidity.
Drill 4: The Flame Finish
Cook two naans, finishing one on the skillet alone and the other with a flip onto an open flame or under a broiler. Compare the visual char, the aroma, and the texture. The flame-finished naan should have leopard spots and a distinctly smoky aroma. This drill teaches you to chase char without burning.
Drill 5: The Cold Ferment
Make two batches of dough on the same day. Bake one after a standard ninety-minute rise. Refrigerate the other overnight for sixteen to twenty hours, then bring to room temperature and bake. Compare the flavor. The cold-fermented dough will taste deeper, slightly tangy, and more complex. This drill rewards patience.
Advanced Tips From Professional Tandoor Cooks
Once you have produced reliable naan, these advanced refinements separate weekend cooking from professional results. Each tip targets a specific failure mode that home cooks rarely diagnose on their own.
- Use whey or buttermilk in place of water. The acidity tenderizes the dough further and adds layered tang that pure water cannot provide.
- Stretch by hand rather than rolling. Hand-stretched naan has irregular thickness that produces dramatic bubbles in the thinner zones, mimicking artisan tandoor work. Rolled naan is more uniform but less visually appealing.
- Add a quarter teaspoon of baking soda. The alkalinity boosts browning and contributes to that characteristic darker char professionals achieve so quickly.
- Reserve a portion of your dough as a preferment. Mix 100 grams of flour, 100 grams of water, and a pinch of yeast the night before, then incorporate this sponge into your full dough the next day for richer flavor.
- Brush both sides with ghee, not just one. The underside develops a glossy sheen and stays softer longer when both surfaces are finished.
- Salt the top after cooking, not before. A small pinch of flaky sea salt on the buttered surface creates contrast and crunch that enhances every bite.
- Toast nigella, sesame, or poppy seeds before pressing into the dough. Pre-toasting builds deeper aroma that survives the brief cooking time.
- Mind the resting interval between balls. Naan dough is alive. The first ball you roll has rested less than the eighth. To compensate, divide and shape balls in order, then bake them in the same order with a few extra minutes of relaxation built in for the early ones.
Professional tandoorwallahs in Amritsar and Delhi develop the muscle memory to slap a stretched naan onto a vertical wall in a single fluid motion. At home, you will not need this skill, but you should still aim for that same confident, decisive contact. Hesitation leads to wrinkled, uneven naan. Commit to the placement.
Naan Variations Worth Mastering
Once you have the base technique, naan opens into a family of stuffed, brushed, and topped variations that anchor whole meals. Each version builds on the master technique with one or two small additions.
Garlic Naan
The most popular variation worldwide. Mince three to four cloves of garlic and stir into melted butter with chopped cilantro. Press a small spoonful of the mixture into the surface of the stretched dough before cooking, or brush generously after cooking. The garlic surface caramelizes quickly against the hot skillet and perfumes the entire batch.
Butter Naan
The simplest variation. Brush hot ghee or melted butter generously on both surfaces immediately after cooking. The butter soaks into every bubble. Restaurant-style butter naan often uses cultured European butter for richer flavor.
Peshawari Naan
A sweet, stuffed naan filled with a paste of ground almonds, raisins, coconut, and a touch of cardamom and sugar. Roll the dough thin, place two tablespoons of the filling in the center, pleat the edges shut, and gently roll back into a flat round. Cook as you would standard naan, but watch for the filling to bubble through any thin spots.
Keema Naan
Stuffed with spiced minced lamb or chicken. Cook a small batch of keema filling first with onions, ginger, garlic, garam masala, and chili powder. Cool fully before stuffing. The filling adds richness and turns naan into a meal in itself.
Cheese Naan
A more recent invention that has become a global favorite. Stuff a tablespoon of grated mozzarella or paneer made using our homemade paneer technique into the center of each dough ball, seal, and stretch. Cook quickly so the cheese melts without leaking. Pair with hot pickle for contrast.
Onion Kulcha
Technically a kulcha, but cooked using the same technique. Fold finely chopped onion, green chili, cilantro, and cumin seeds into the rolled dough before the final stretch. Especially good with chickpea curry.
Whole Wheat Naan
For a more wholesome bread, replace 30 to 50 percent of the maida with atta. The resulting naan is denser but still soft, with a slightly nutty flavor. Increase hydration by 5 percent to compensate for the higher water absorption of whole wheat.
Recipe Example: Classic Garlic Naan for Four
This recipe condenses everything above into a clean working format. Read it once before starting and you will have hot, blistered naan on the table in under two hours.
Ingredients
- 500 g all-purpose flour, plus more for dusting
- 2 tsp active dry yeast
- 1 tsp sugar
- 1.5 tsp fine sea salt
- 0.5 tsp baking powder
- 150 g full-fat plain yogurt
- 80 ml warm milk
- 100 ml warm water
- 2 tbsp melted ghee
- 4 garlic cloves, minced
- 4 tbsp salted butter, melted
- 2 tbsp chopped cilantro
- Flaky sea salt for finishing
Method
- Bloom the yeast in warm milk with sugar for ten minutes until foamy.
- Whisk flour, salt, and baking powder in a large bowl.
- Add the yeast mixture, yogurt, water, and ghee. Stir to combine.
- Knead for eight to ten minutes until soft and slightly tacky.
- Cover and rise in a warm spot for ninety minutes.
- Divide into eight equal pieces, ball them, and rest for fifteen minutes.
- Preheat a cast iron skillet over high heat for ten minutes.
- Mix melted butter, garlic, and cilantro in a small bowl.
- Stretch one ball into a teardrop shape, four millimeters thick.
- Brush the underside with water and place onto the dry hot skillet.
- Cook ninety seconds, then flip onto an open flame for ten seconds.
- Brush hot naan with garlic butter, sprinkle flaky salt, and wrap in a towel.
- Repeat with remaining dough and serve immediately.
This garlic naan pairs beautifully with our authentic tandoori chicken, a creamy palak paneer, or a rich dum biryani. For deeper Punjabi flavors, consider serving with a tadka dal using our guide on Indian spice tempering.
Pairing Naan With Curries and Other Dishes
Naan is built to carry flavor. Its slightly tangy crumb and buttery surface mediate between the rich gravies and bold spices of Indian cuisine. Some pairings are classic, while others reward a more adventurous palate.
- Butter chicken (murgh makhani): The original and most famous pairing. The tomato-cream sauce hugs the buttery naan.
- Dal makhani: Black urad lentils slow-simmered with cream. Tear naan and drag through the rich dal.
- Saag paneer: Mustard greens and spinach with cubes of fresh cheese. The bitter greens balance naan’s mild sweetness.
- Chana masala: Spiced chickpeas in a tomato-onion gravy. Garlic naan is the natural partner.
- Tandoori meats: Smoky chicken, lamb, or shrimp from the tandoor or grill. Tear naan into wraps with raw onion and mint chutney.
- Kashmiri rogan josh: Lamb in aromatic Kashmiri spices. Naan absorbs the deep red sauce featured in our Kashmiri food guide.
- Kebabs and seekh: Spiced minced meat skewers. Naan replaces rice as the carbohydrate base.
- Mango pickle and yogurt: A minimalist snack. Hot naan, sharp pickle, cooling yogurt.
Outside Indian cuisine, naan also makes an excellent wrap for grilled meats, a base for quick personal pizzas, and even a dessert when topped with cardamom-spiced cream and rose petals. The versatility is part of why this bread has spread well beyond its origin.
Storage, Reheating, and Make-Ahead Strategies
Naan is best the moment it comes off the heat, but it can be successfully stored if you respect a few rules. Improper storage turns naan into rubbery hockey pucks. Proper storage keeps it soft and serviceable for several days.
- Same-day storage: Wrap cooled naan in foil and hold at room temperature for up to six hours. Reheat in a dry skillet for thirty seconds per side.
- Refrigerator storage: Stack cooled naan with parchment between each piece, wrap tightly in foil, and refrigerate for up to three days. Reheat in a hot skillet, in a 200 C oven for five minutes, or briefly in a microwave wrapped in a damp paper towel.
- Freezer storage: Stack with parchment between pieces, slide into a zip-top bag, and freeze for up to two months. Reheat directly from frozen in a hot skillet or oven; do not thaw first or the bread becomes soggy.
- Make-ahead dough: After the first rise, punch down and refrigerate the dough for up to forty-eight hours. Bring to room temperature for thirty minutes before shaping.
- Par-baked naan: Cook on the first side only, until set and pale. Cool and freeze. To finish, place directly on a hot skillet, second side down, to cook through and char.
The dough storage strategies in particular are useful for weeknight cooks. Many home kitchens treat naan as a weekend project, but a refrigerator full of dough means you can have fresh, hot naan in fifteen minutes after work.
Naan in Asian Bread Culture
Naan belongs to a broader Asian tradition of cooking bread directly on hot surfaces, sometimes against clay, sometimes on iron, sometimes by direct steam. Recognizing where naan sits in this tradition deepens your appreciation of the technique and connects it to other breads you may have eaten.
In China, scallion pancakes use a lamination technique to build flakiness, a contrast to naan’s leavened lift, as detailed in our scallion pancake guide. In Korea, savory pancakes like jeon rely on a batter rather than a dough, producing a crisp lacy exterior. Tibetan and Bhutanese cuisines bake stuffed buns on hot stones. Persian and Afghan kitchens cook elongated barbari and Afghan naan against tandoor-style ovens; these breads share genetic lineage with Indian naan but differ in shape and seed toppings. Even Japanese taiyaki and Korean hotteok are distant cousins, all branches of a tradition that uses direct, high heat to develop flavor in a thin dough.
Approach naan as one node in this network. The same intuitions that help you cook naan also help you cook the others: respect the heat, watch the surface, work fast, and finish with fat.
Frequently Asked Questions
Can I make naan without yeast?
Yes. Yogurt and baking soda or baking powder can leaven a quick naan with no yeast. The texture will be slightly less open and chewy, more like a fluffy flatbread, but it is a legitimate technique used in many home kitchens. Mix yogurt, milk, flour, baking soda, baking powder, sugar, and salt; rest thirty minutes; shape and cook the same way.
Can I make naan without yogurt?
Yes, but expect a slightly different texture. Substitute the yogurt with an equal weight of buttermilk, sour cream, kefir, or even an unsweetened plant-based yogurt for a vegan option. Without any cultured dairy, the bread loses some tang and tenderness but still cooks correctly.
Is naan vegan?
Traditional naan is not vegan because it usually contains yogurt, milk, and ghee. A vegan version is easy: use plant-based yogurt, oat or soy milk, and a neutral oil instead of ghee. Brush with garlic oil instead of garlic butter for finishing.
Can I use bread flour instead of all-purpose?
Yes, but expect a chewier naan with more pull. Bread flour’s higher protein produces stronger gluten, which makes the bread bouncier. Reduce kneading time slightly to avoid toughness. Many cooks prefer a fifty-fifty blend of bread and all-purpose flour for the balance.
What temperature should the cast iron skillet be?
Around 300 to 350 degrees Celsius on the cooking surface. If you do not have an infrared thermometer, use the water-skitter test: a drop of water should evaporate within a second and skitter across the pan. Below this temperature, the naan will not puff aggressively.
Why does my naan stick to the skillet?
The skillet is most likely not hot enough. A properly preheated skillet should release the naan easily once the bottom has set. A second cause is over-wetting the underside; the water layer should be a light brush, not a soak.
Can I cook naan on an electric stove?
Yes. Use a cast iron skillet for thermal mass and finish the char with a kitchen torch, broiler, or by pressing the cooked side back into the skillet for an extra thirty seconds. Electric stoves cannot provide the direct flame finish that gas stoves can, so a torch is the best workaround.
How thin should I roll the dough?
Around three to four millimeters thick. Thinner and the bread crisps into a cracker; thicker and it stays doughy inside. A consistent thickness across the entire surface ensures even puffing.
Why are my naans flat and dense?
Three possible causes: dead yeast, insufficient rise, or an under-heated cooking surface. Verify your yeast by checking that it bloomed into a thick foam before mixing. Confirm the dough doubled before shaping. And test the skillet temperature with the water-skitter test.
Can I make the dough ahead of time?
Absolutely. A cold ferment of twelve to twenty-four hours in the refrigerator improves flavor significantly. Bring the dough to room temperature for at least thirty minutes before dividing and shaping, otherwise it will be sluggish and tear when stretched.
Is naan healthy?
Naan is a refined-flour bread enriched with dairy and fat, so it is calorie-dense compared to whole-grain alternatives. For a more nutritious version, swap part of the maida for atta, use plain yogurt rather than cream, and finish with a light brush of oil instead of generous butter. As part of a balanced meal alongside protein and vegetables, naan is a reasonable carbohydrate choice.
Can I cook naan in an air fryer?
Not ideally. Air fryers struggle to reach the high contact heat needed for proper bottom char and steam puff. They work in a pinch but produce a baked, breadier result rather than a tandoor-style blistered naan. If you must, preheat to 230 degrees Celsius and cook for three to four minutes per piece, accepting that the texture will differ.
What is the best flour for naan?
Traditional naan uses maida, a finely milled Indian refined wheat flour. In Western markets, all-purpose flour is the closest equivalent and works well. Bread flour produces a chewier naan; pastry flour is too soft and should be avoided.
How do I know when naan is done?
Look for three signs: large bubbles puffed across the surface, brown spots visible on the underside, and a fully set surface that no longer looks wet. The total cook time should be ninety seconds to two minutes per side, depending on heat.
Why does my naan get hard so quickly?
Naan loses softness when exposed to air because surface moisture evaporates and the starch staling process begins. Wrap finished naan in a clean kitchen towel inside a closed basket immediately after cooking. The trapped steam keeps the bread pliable for thirty to forty-five minutes.
Bringing It All Together
Naan is one of the most rewarding Asian breads a home cook can master. The technique demands respect for heat, hydration, and timing, but the building blocks are humble and the equipment requirements are modest. A heavy skillet, a packet of yeast, a tub of yogurt, and a bag of flour are the entirety of your kit. Practice the drills above on a single afternoon and your naan will move from amateur to confidently restaurant-style in a few hours of focused work.
The deeper reward is what naan unlocks at the table. The moment you serve hot, blistered, garlic-butter-glossed naan torn from your own kitchen alongside a curry, the meal transforms. Friends will assume you ordered in. You will know better. And the next time, you will reach for a slightly higher hydration, a slightly longer cold ferment, or a new variation with cheese, keema, or peshawari filling, because the technique invites that kind of curiosity. Welcome to a lifetime of better naan.

Mei Lin Chen
Mei Lin Chen is an Asian food writer and recipe developer. Melbourne-raised and London-based, she has spent over a decade exploring the rice paddies, hawker stalls, and home kitchens of South-East and East Asia. Her recipes balance traditional technique with everyday practicality.