Last updated: March 28, 2026
Onigiri (おにぎり) is the original Japanese fast food: a palm-sized triangle of warm, lightly salted rice tucked around a savory filling and wrapped in a sheet of crisp nori. It is the lunchbox staple millions of Japanese children grow up on, the convenience-store hero that powers a 6 a.m. commute, and one of the most forgiving introductions to Japanese rice cookery you can attempt at home. Yet most home cooks who try onigiri for the first time end up with cracked surfaces, sticky messes on their hands, fillings that leak out the bottom, or rice balls that fall apart at the first bite.
The good news: onigiri is almost entirely about technique. There is no special dough, no hard-to-find equipment, and no fermentation timeline. If you can cook short-grain rice and you have clean hands, you can make excellent onigiri tonight. This guide walks you through every step of the shaping technique, the right rice and water ratios, classic fillings, the salting trick that keeps fingers from sticking, regional variations from Tohoku to Kyushu, and the fixes for the mistakes you are most likely to make on your first attempt.
What Is Onigiri? A Quick Overview of Japan’s Iconic Rice Ball
Onigiri, also spelled o-nigiri and sometimes called omusubi, are hand-pressed rice balls made from cooked Japanese short-grain rice, usually seasoned with salt and shaped into a triangle, ball, cylinder, or disc. They are typically built around a small core of seasoned filling such as salted salmon, umeboshi (pickled plum), or katsuobushi tossed in soy sauce, and finished with a strip or full sheet of toasted nori seaweed.
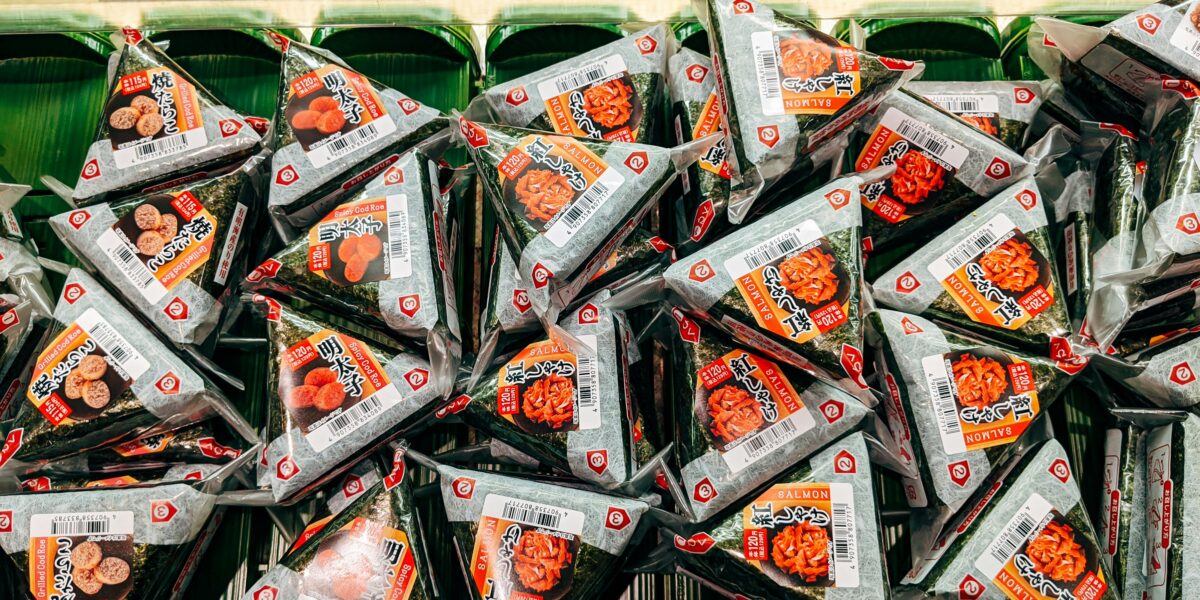
The word onigiri comes from the verb nigiru, meaning "to grasp" or "to clasp" — a direct reference to the shaping technique. Records of rice formed into portable balls appear in Japanese sources as early as the Heian period (794–1185), where they were carried by samurai and traveling laborers. By the Edo period, onigiri had become standard travel food because cooked rice keeps better when compressed and salted. Modern Japan eats more than two billion convenience-store onigiri per year, and the format has spread worldwide alongside ramen, sushi, and bento culture.
Onigiri is not sushi. The rice is not seasoned with vinegar, the fillings are usually salt-cured or cooked rather than raw, and the goal is portable, room-temperature comfort food rather than a delicate seafood platform. Once you understand that distinction, the technique becomes far easier to internalize.
Onigiri vs Sushi vs Musubi: Clearing Up the Confusion
Travelers in Tokyo are sometimes surprised to find that the rice triangle in their convenience-store cooler is not sushi. The two foods share an ingredient — Japanese short-grain rice — but they are built for different purposes and the technique diverges sharply.
| Attribute | Onigiri | Sushi | Spam Musubi (Hawaii) |
|---|---|---|---|
| Rice seasoning | Salt only | Vinegar, sugar, salt | Plain or lightly salted |
| Typical filling | Salted salmon, umeboshi, tuna mayo, kombu | Raw fish, vegetables, tamago | Grilled Spam slice with shoyu glaze |
| Shape | Triangle, ball, cylinder, disc | Roll, nigiri block, hand-cone | Rectangular brick |
| Serving temperature | Room temperature or warm | Cool to room temperature | Room temperature |
| Nori timing | Wrap right before eating | Wrapped at preparation | Single band around the brick |
| Origin | Heian-period Japan | Edo-period Japan | 20th-century Hawaii, Japanese-American |
Once you have made onigiri a few times, you can adapt the same shaping skill to musubi by using a rectangular mold. Many home cooks who already know how to make sushi rice are surprised at how forgiving onigiri is by comparison: there is no rice paddle fanning, no precise vinegar ratio, and the rice can be slightly warm when you shape it.
Equipment You Need for Making Onigiri at Home
Onigiri is intentionally low-tech. You do not need anything you would not already use to cook a normal pot of rice. The only true requirement is your hands, a small bowl of cold water, and a saltshaker. That said, a few inexpensive tools make the process more pleasant, especially if you are shaping more than four or five at a time.
- Heavy-bottomed pot or rice cooker. A 1.5- to 3-liter rice cooker is the easiest path. A heavy cast-iron or enamel pot with a tight lid works just as well. Avoid thin saucepans — they scorch the bottom layer of rice.
- Wooden or plastic rice tub (hangiri or handai). Optional, but helpful for cooling rice quickly so it stops steaming and developing a gummy surface.
- Shamoji (rice paddle). A flat wooden or plastic paddle for fluffing rice without crushing the grains. A silicone spatula works in a pinch.
- Small bowl of cold water (tezu). Used to wet hands before shaping. Wet hands prevent rice from sticking to skin and shedding mid-press.
- Salt in a small ramekin. Fine sea salt is ideal. Coarse kosher salt also works but may not adhere uniformly.
- Plastic wrap or sandwich bags. Two great alternatives if you do not want to handle rice directly. Place a scoop of rice on a square of plastic wrap, add filling, twist into a ball, then shape from the outside.
- Onigiri mold (onigirikata). A plastic press in triangle, oval, or heart shape. Especially useful for kids’ bento or for first-timers who cannot get a clean triangle by hand.
- Toasted nori sheets. Look for full-size yaki-nori or pre-cut onigiri strips. Read the complete guide to nori if you are choosing nori for the first time.
An onigiri mold can shave time off batch production, but learning to shape by hand is worth the effort. Hand-shaped onigiri have a slightly looser, more pleasant bite because you control how firmly the rice is compressed at each corner.
Choosing the Right Rice for Onigiri
The single most important decision in onigiri-making is rice. Use the wrong type and no amount of skill will save you. Onigiri requires Japanese short-grain rice (japonica). The starches in short-grain rice — especially the high amylopectin content — are what make cooked grains cling to each other when pressed. Long-grain rice, basmati, jasmine, and parboiled rice will fall apart no matter how much you compress them.
- Koshihikari. The gold-standard table rice in Japan. Slightly sweet, glossy when cooked, perfect bite-back. The first choice for serious onigiri.
- Akitakomachi. A close cousin to Koshihikari with a touch more bite. Excellent for shaping because it holds its structure when pressed.
- Tamanishiki or Nishiki. Widely available California-grown short-grain rices. Reliable, affordable, and what most home cooks in the United States will use day-to-day.
- Calrose. A medium-grain rice that lands on the longer end of acceptable. It works for onigiri but the grains are slightly less cohesive than true short-grain.
- Sushi rice (sumeshi). Avoid. The vinegar, sugar, and salt seasoning of sushi rice fights the salt and umami of onigiri fillings.
- Mochi rice (glutinous rice). Avoid for traditional onigiri. The texture is too sticky and dense. Save it for mochi or Thai sticky rice.
Buy rice in vacuum-sealed bags when possible and use it within a few months of opening. Old rice loses moisture and produces dry, crumbly onigiri that will not hold their shape. If you are unsure which bag to grab, compare options against our guide to the best rice for Asian cooking.
How to Cook Rice for Onigiri: Ratios and Resting
Onigiri rice should be slightly firmer than rice destined for a bowl with curry or stir-fry. The reason is mechanical: when you press the rice, the grains compact, and rice that started too soft will turn into paste. Aim for grains that hold their shape but yield easily to a fingertip.
Step 1: Measure. Use 2 cups (about 360 ml) of Japanese short-grain rice. This produces roughly six to eight onigiri. Use a Japanese rice cup (180 ml) if your rice cooker came with one.
Step 2: Rinse until the water runs almost clear. Place the rice in a bowl, cover with cold water, swirl quickly with your hand, and pour off the cloudy water. Repeat three to four times. Do not over-rinse — modern Japanese rice does not need the aggressive scrubbing older varieties did, and removing too much surface starch will give you grains that do not bind.
Step 3: Soak. Cover the rinsed rice with fresh cold water and soak for 30 minutes. This step matters. Skipping it gives you uneven cooking — the outside of each grain will be soft while the core stays chalky.
Step 4: Drain and add cooking water. Drain the soaked rice in a fine-mesh strainer for 10 minutes. Then add it to your rice cooker or pot with fresh water at a 1:1.1 ratio (so 2 cups rice gets 2.2 cups water). The 1:1.1 ratio is firmer than the standard 1:1.2 used for table rice — exactly what you want for shaping.
Step 5: Cook. If using a rice cooker, simply press start. On the stovetop: bring to a boil over high heat, immediately reduce to the lowest setting, cover tightly, and cook for 12 minutes. Do not lift the lid.
Step 6: Rest. Once cooking ends, leave the lid on for another 10 minutes off the heat. This is non-negotiable. Resting allows residual moisture to redistribute through each grain and is the difference between glossy, cohesive rice and grains with hard cores.
Step 7: Fluff and cool slightly. Lift the lid, fluff with a paddle using cutting motions (not stirring), and transfer to a wide bowl or rice tub. Let the rice cool until it is warm but no longer scalding — about 65 to 70 degrees Celsius (150 to 160 degrees Fahrenheit), or roughly 5 minutes uncovered. Hot rice is essential because the steam helps the grains bond when you press, but boiling-hot rice will burn your fingers and turn gummy.
Step-by-Step Onigiri Shaping Technique
This is the part that intimidates beginners. It should not. The whole motion takes about ten seconds per onigiri once you have the rhythm. Set up your station before you start: warm rice in a wide bowl, a small bowl of cold water (tezu), a small ramekin of fine sea salt, your filling pre-portioned into roughly 1-tablespoon mounds, and a plate or bento box ready to receive the finished onigiri.
- Wet your hands. Dip both palms briefly in the cold water, then shake off the excess. Hands should be damp, not dripping.
- Salt your palms. Pinch a small amount of salt — about 1/8 teaspoon — and rub it across your palms. This seasons the surface of the onigiri evenly while it forms. Skipping this step is the most common reason home onigiri tastes flat.
- Scoop the rice. Take roughly 1/2 cup (about 100 grams) of warm rice into one palm. Spread it out into a rough oval using your thumb.
- Add the filling. Press a shallow well into the center of the rice with your thumb and drop in 1 tablespoon of filling. Do not overfill — overfilling is the number-one cause of onigiri that crack open.
- Close the rice over the filling. Fold the edges of the rice up and over the filling. Add a tablespoon more rice on top to fully seal it inside. The filling should not be visible from any angle.
- Shape the triangle. Cup your dominant hand into an L-shape (thumb at one corner, index and middle finger pinching the second corner) and your non-dominant hand flat. Rotate the rice 120 degrees between three light presses, forming the three corners of a triangle. Press just firmly enough that the rice clings together — about the pressure of forming a snowball, not a baseball.
- Set down and rest 1 minute. Place the finished onigiri on a plate. The brief rest helps the residual heat relax the rice and makes wrapping easier.
- Wrap with nori. Cut a sheet of toasted nori into thirds and wrap one strip around the bottom edge, or wrap the whole sheet around the rice. See the wrapping section below for shape variations.
The key principle is light pressure. Onigiri should feel cohesive but not dense. If you can see your fingerprints pressed deeply into the surface, you have squeezed too hard. The interior should still have a slight airiness when you bite into it.
Classic Onigiri Fillings: A Filling-by-Filling Reference
Traditional onigiri fillings share two qualities: they are intensely flavored (so a small spoonful seasons the surrounding rice) and they are preserved or cooked (so they keep at room temperature). Convenience stores in Japan post their best-selling onigiri rankings every year — salted salmon, tuna mayo, and umeboshi consistently top the list. Below are the classic options every home cook should master.
| Filling | Japanese name | How to make at home | Flavor profile |
|---|---|---|---|
| Salted salmon | Sake (鮭) | Salt-cure a salmon fillet 30 min, broil 8 min, flake | Savory, salty, slightly oily |
| Pickled plum | Umeboshi (梅干し) | Use store-bought; pit and tear in half | Sour, salty, fruity, intense |
| Tuna mayo | Tsuna mayo (ツナマヨ) | Mix 1 can tuna with 2 Tbsp Kewpie mayo, dash soy sauce | Creamy, mild, slightly sweet |
| Bonito flakes in soy | Okaka (おかか) | Mix 3 Tbsp katsuobushi with 1 tsp soy sauce | Smoky, deeply umami, dry |
| Simmered kombu | Shio kombu / Kombu no tsukudani | Use store-bought tsukudani-style strips | Salty-sweet, marine, chewy |
| Cod roe | Tarako or mentaiko (たらこ・明太子) | Salted cod roe; mentaiko adds chili | Briny, slightly spicy (mentaiko) |
| Pickled mustard greens | Takana (高菜) | Stir-fry chopped takana with sesame oil 2 min | Tangy, peppery, savory |
| Grilled mackerel flake | Saba (鯖) | Salt and grill, then flake fine | Rich, oily, deeply savory |
| Spicy chicken | Tori soboro | Crumble ground chicken in soy, mirin, ginger | Sweet-savory, mild heat |
| Furikake mixed in | Furikake | Stir 2 Tbsp furikake into the rice before shaping | Varies; sesame, nori, salmon, etc. |
If you are pairing fillings with rice, follow one rule: the filling should be drier and more concentrated than you expect. Wet, watery, or overly oily fillings will leak into the surrounding rice within a few hours and turn the onigiri soggy. Drain canned tuna thoroughly. Squeeze excess liquid from pickled vegetables. Pat down salt-cured fish with paper towels. The mid-range Japanese mayo brand Kewpie is the traditional choice for tuna mayo — its egg-yolk-rich formula gives a richer mouthfeel than American mayo.
How to Wrap Onigiri with Nori (Three Methods)
Nori serves three purposes on an onigiri: it adds a roasted, oceanic flavor; it protects fingers from sticky rice; and it provides visual contrast. The trick is timing. Nori loses its crisp snap within minutes of touching warm rice, so the goal in most cases is to wrap right before eating. Convenience-store onigiri solve this with clever multi-layer plastic packaging that keeps the nori dry until pulled apart — for home onigiri, you can simply wrap the nori at the table.
Method 1: The bottom band. Cut a full sheet of toasted nori into three even strips (each about 7 by 21 cm). Place one strip flat, set the bottom of the triangle on it, and fold the strip up and around the bottom two-thirds, leaving the top point exposed. Best for picking up by the bare top point without sticky fingers.
Method 2: The full wrap. Place the triangle on a full sheet of nori positioned diagonally so one corner of the nori points up. Fold the bottom corner up and over the rice, then fold the two side corners across to meet in the back. The triangle shape of the rice mirrors the diamond fold of the nori.
Method 3: The crispy strip (eat-immediately). Lightly toast a strip of nori over an open flame for 2 seconds per side until it tightens and shrinks slightly. Wrap immediately around the still-warm rice and bite within 30 seconds. The contrast between hot crisp nori and soft warm rice is what onigiri is, at its peak, all about.
Onigiri Shapes and Regional Variations Across Japan
The triangle is iconic, but it is not the only legitimate onigiri shape. Different shapes solve different problems: the triangle is efficient for stacking, the cylinder is faster to make in volume, and the disc is preferred when grilling.
- Triangle (sankaku). The default modern shape. Easy to wrap with nori, easy to stack in a bento box, easy to bite into without losing the filling.
- Round ball (marugata). The original Heian-period shape. Common in Western Japan and in ceremonial offerings. Slightly faster to shape since you only roll between cupped hands.
- Cylindrical (tawaragata). Shaped like a small barrel. Common in Tohoku and in old-style train station bento. Convenient for slicing into rounds for kids.
- Flat disc (enban). Pressed flat between palms. Used as the base for yaki onigiri (grilled onigiri) because the larger flat surface develops more crust over flame.
Regional fillings tell the story of Japanese geography. Hokkaido onigiri lean on salted salmon, kombu, and ikura (salmon roe). Tohoku onigiri often hide grilled mackerel or pickled mountain vegetables. Kansai (around Osaka and Kyoto) favors umeboshi and shio-kombu. Kyushu onigiri reach for spicy mentaiko and takana. Okinawa, with its distinct food culture covered in our Okinawan food guide, sometimes wraps onigiri-style rice balls in pork-based fillings closer to musubi.
Common Onigiri Mistakes and How to Fix Them
Almost every onigiri problem traces back to one of three causes: rice cooked wrong, hands prepared wrong, or pressure applied wrong. Once you can identify which of those three is failing you, the fix is fast.
| Mistake | What it looks like | Why it happens | How to fix it |
|---|---|---|---|
| Onigiri falls apart | Rice crumbles when picked up | Rice too dry, or rice not warm enough when shaped | Use 1:1.1 water ratio; shape while rice is still warm (60–70°C) |
| Onigiri too dense and gummy | Rice feels like a paste, no grain definition | Pressed too hard, or rice over-rinsed | Use light snowball pressure; rinse only 3–4 times |
| Filling pokes through the surface | Visible filling, cracks at corners | Too much filling, or filling chunks too big | Use 1 Tbsp filling max; chop or flake into smaller pieces |
| Surface tastes flat or salty in patches | Inconsistent seasoning | Salt sprinkled on top instead of rubbed on palms | Rub 1/8 tsp salt across damp palms before shaping |
| Rice sticks to fingers | Cannot release the onigiri cleanly | Hands too dry | Re-dip palms in cold tezu water before each onigiri |
| Nori turns soggy and chewy | Limp, leathery seaweed wrap | Wrapped too far in advance | Wrap right before eating, or use the bottom-band method |
| Onigiri turns hard in the fridge | Stiff, chalky, retrogrades overnight | Refrigeration crystallizes rice starch | Wrap in plastic wrap and store at room temperature for up to 8 hours; or freeze, then microwave |
| Cracked corners on the triangle | Three crisp fissures along the edges | Pressed too hard at corners; rice cooled before shaping | Shape while rice steams; round each corner gently with three rotations |
Practice Exercises to Master Onigiri Shaping
Onigiri-making is a motor skill, not a recipe. The fastest way to get good is to do it repeatedly. Below are four progressive exercises designed to build your hand sensitivity for rice temperature, moisture, and pressure.
Exercise 1: Plain salt onigiri (10 minutes). Cook 1 cup of rice. Make six small unfilled onigiri. The point is to focus only on shape, salt distribution, and pressure. You will learn quickly if you are pressing too hard — a too-dense unfilled onigiri is unmistakable when you bite in.
Exercise 2: Single-filling consistency (15 minutes). Cook 2 cups of rice and prep one filling — umeboshi is ideal because each piece is pre-portioned. Make eight onigiri identical in size, shape, and filling location. Cut one in half before serving the rest. The filling should sit dead center.
Exercise 3: Multi-shape practice (20 minutes). Use the same batch of rice to produce two triangles, two cylinders, two balls, and two discs. Shape variety teaches you how rice responds to different hand pressures and rotation patterns. By the end, you will know which shape your hands default to most easily.
Exercise 4: Speed run (under 5 minutes for six onigiri). Once your shape is consistent, time yourself. Convenience-store factories shape onigiri at roughly six per minute on automated lines. Home cooks can comfortably hit one onigiri every 30 seconds with practice. Speed forces you to use the right amount of pressure on instinct.
Advanced Onigiri Techniques and Pro Tips
Once the basic triangle has become muscle memory, there is a second layer of technique that separates competent home onigiri from the kind you remember. These are the moves Tokyo specialty shops and bento masters use.
- Refresh cooled rice with steam. If rice has cooled too much, do not microwave — the heat is uneven. Instead, place the rice in a wide wooden tub and stir a tablespoon of just-boiled water through it. The steam refreshes the surface and restores tackiness.
- Let the filling come to room temperature. Cold filling cools the surrounding rice instantly and prevents proper bonding. Take umeboshi or tsuna mayo out of the fridge 15 minutes before shaping.
- Use a pinch of furikake on the surface. A light dusting of black sesame, shiso furikake, or katsuobushi-based black sesame blend on the salted rice surface adds visible appeal and one extra layer of flavor.
- Wrap only when serving cold. If you intend to refrigerate, leave the nori unwrapped — pack the strip separately in foil and let your eater wrap at the moment of eating. Onigiri shops that ship overnight rely on this trick.
- Salt-rub before each onigiri, not all at once. Salt picks up moisture from rice rapidly. If your palms have been salted from the first onigiri, by the third one the salt has dissolved into a brine. Refresh both salt and water between every two onigiri.
- For onigiri that travel, brush with a thin layer of sesame oil. A whisper of toasted sesame oil on the outside locks in moisture and discourages staling. This is a Korean-style trick that adapts beautifully.
- Mix-ins instead of fillings. Instead of a hidden core, fold flavor through the entire rice batch. Tezukuri (hand-mixed) onigiri include shiso-flavored rice, edamame and sea salt, ume-shiso, or okaka stirred into the bowl before shaping. The flavor is more uniform and the shape is easier because there is no filling to hide.
- For cleaner cuts, line your mold with plastic wrap. If using an onigiri press, drape a square of plastic wrap inside before filling. The onigiri will release perfectly and you can use the same wrap to package it.
Yaki Onigiri: Grilled Onigiri Recipe
Yaki onigiri is onigiri’s smoky, crisp-edged sibling. Grilled or pan-fried until the surface develops a golden crust and brushed with soy sauce, it is one of the great Japanese izakaya snacks. The technique is straightforward but rewards patience: rush it and the rice falls apart on the grill; do it slowly and you get a shattering crust over a soft, savory center.
- Shape the onigiri firmer than usual. Press a touch harder than for hand-eaten onigiri. Skip nori — the seaweed will burn on the grill.
- Air-dry briefly. Let shaped onigiri rest uncovered for 15 minutes. A slightly drier surface develops a better crust.
- Pre-coat with oil. Brush each side lightly with neutral oil. This prevents sticking on a grill or pan.
- Sear without moving. Place on a medium-hot grill, charcoal grate, or non-stick pan. Do not touch for 3 to 4 minutes. The surface needs to set before you flip.
- Flip and brush with shoyu. Once the first side is golden, flip carefully with a fish spatula. Brush the cooked side with a thin glaze of soy sauce mixed 3:1 with mirin.
- Repeat on the other side. Sear another 3 to 4 minutes, brush again, and rotate to crisp the third edge of the triangle if possible.
- Rest 1 minute. The crust crisps further as steam escapes. Serve hot.
Yaki onigiri pairs beautifully with a cold beer, a bowl of miso soup, or a plate of grilled vegetables. For a more savory variation, mix a teaspoon of miso paste into the soy glaze.
Onigirazu: The Sandwich-Style Onigiri
Onigirazu is the modern, social-media-friendly evolution of onigiri. Coined in the 1990s but viral in the 2010s, it is essentially a rice sandwich: two layers of rice with a generous filling between, wrapped in a single sheet of nori like a square package. Because there is no shaping pressure required, it is the easiest version of onigiri for absolute beginners.
To assemble onigirazu: Lay a full nori sheet on plastic wrap, glossy side down. Spread a 9-cm square of rice in the center of the nori. Top with a generous spoonful of filling — fried egg, slice of grilled chicken, salad greens, kimchi and tuna, or whatever you like. Add a second 9-cm square of rice on top. Fold the four corners of the nori in over the top, sealing the rice in a square package. Wrap tightly in plastic wrap and let it rest 5 minutes for the nori to soften and grip. Slice in half with a sharp wet knife to reveal the cross-section.
Because onigirazu has more filling than a traditional onigiri, it can take wetter, larger, or more complex contents — fried egg with bacon, teriyaki chicken, even leftover chicken katsu with shredded cabbage. It is the closest Japanese rice analog to a sandwich.
Storing and Packing Onigiri for Bento
Onigiri were invented as portable food. They travel beautifully if you respect a few rules.
- Cool fully before packing. Trapping steam in a closed bento box softens the rice surface and creates breeding conditions for bacteria. Let onigiri sit uncovered for 10 minutes before packing.
- Wrap individually in plastic wrap. The wrap holds shape and prevents drying. Add a small piece of perilla leaf (shiso) on top — its antimicrobial oils are part of why traditional Japanese bento includes shiso.
- Keep nori separate. Pack nori strips in a small foil packet. Wrap at lunch.
- Room temperature only for short trips. Onigiri made with cooked, salt-cured fillings (umeboshi, salted salmon, kombu) are the most stable. Avoid raw or wet fillings for unrefrigerated bento.
- Freeze for longer storage. Wrap unfilled or simply-filled onigiri in plastic wrap and freeze. Thaw at room temperature 1 hour or microwave 1 minute on medium. Yaki onigiri freeze especially well because the crust acts as moisture armor.
- Avoid the refrigerator when possible. Refrigeration causes rice retrogradation — starch crystallizes and the rice turns hard. If you must refrigerate, microwave 30 seconds before eating to soften the texture.
Pairings and Recipe Examples for an Onigiri Meal
An onigiri is rarely the entire meal. It is a building block. The Japanese lunchbox tradition, ekiben (train-station bento), and the Hawaiian plate-lunch all build around the rice ball. Here are working menus that use onigiri as the carbohydrate anchor.
- Quick weekday lunch. Two salted-salmon onigiri, a small bowl of miso soup, a few cucumber slices, a tangerine.
- Picnic plate. Three onigiri (one umeboshi, one tuna mayo, one okaka), a piece of karaage chicken, blanched broccoli, a hard-boiled egg.
- Izakaya snack tray. Two yaki onigiri brushed with miso-soy glaze, edamame, and a cold beer.
- Onigiri-and-soup dinner. Onigiri filled with shio-kombu paired with a hot bowl of oyakodon broth or a clear dashi soup with tofu.
- Hawaiian-Japanese plate. A spam musubi alongside two traditional onigiri, mac salad, and pickled radish.
If you are building a fuller Japanese meal, start with our guide to essential Japanese recipes. Onigiri is a beautiful complement to grilled fish, simmered vegetables, and a small bowl of dashi-based soup.
Frequently Asked Questions
Can I make onigiri with leftover rice?
Yes, but not straight from the fridge. Cold rice has retrograded — its starches have crystallized — and it will crumble under pressure. Reheat leftover rice gently: place in a heat-safe bowl, sprinkle with 1 teaspoon of water per cup, cover, and microwave 1 minute. Stir to redistribute heat, then let rest 1 minute before shaping. Best-day-of-cooking rice always shapes more cleanly than reheated rice.
How long do onigiri last at room temperature?
Plain salted onigiri or onigiri with cooked, preserved fillings (umeboshi, salted salmon, kombu, okaka) safely keep at room temperature for about 6 to 8 hours — long enough for a school lunch or a picnic. Onigiri with mayo-based fillings (tuna mayo, egg salad), raw fish, or fresh vegetables should not sit unrefrigerated longer than 3 hours, especially in warm weather.
Why are my onigiri falling apart?
Three common reasons. First, you are using the wrong rice — long-grain or basmati will not bond. Second, your rice is too cold; rice needs to be warm so its starches stay tacky. Third, you are pressing too lightly. Apply firm but gentle snowball pressure, rotating three times to round each corner. If all three are right and you still see crumbling, increase your cooking water by 1 tablespoon next time.
Can I make onigiri without nori?
Absolutely. Many traditional onigiri are served bare, dusted with furikake or rolled in toasted sesame seeds. Yaki onigiri (grilled) is always made without nori because the seaweed would burn. Bare onigiri are also more practical for travel since you do not have to manage nori timing.
Is onigiri the same as a rice ball?
Roughly, yes. Onigiri translates loosely to "rice ball," and the term covers all hand-pressed shaped rice in Japanese cuisine — triangles, balls, cylinders, and discs alike. The English phrase "rice ball" sometimes refers to fried Italian arancini or Filipino arroz caldo balls, so "onigiri" is the more specific term when you mean the Japanese version.
What is the difference between onigiri and omusubi?
The two words are largely interchangeable. Some Japanese sources argue that omusubi specifically refers to triangular shapes (linked to mountain spirits in Shinto belief, since mountains are triangles), while onigiri can be any shape. Others claim omusubi is more common in Eastern Japan and onigiri in Western Japan. In practice, modern speakers use them as synonyms.
Can I freeze onigiri?
Yes, with caveats. Plain or simply filled (umeboshi, kombu) onigiri freeze well. Wrap each in plastic wrap, then place inside a freezer bag. They keep for up to 1 month. Thaw at room temperature for 1 hour or microwave from frozen on medium for about 1 minute 30 seconds. Avoid freezing onigiri with mayo or fresh ingredients, which separate when thawed.
Do I need a special onigiri mold?
No. Hand-shaping is the traditional method and is more forgiving than a mold once you have practiced. Molds shine when you need consistent shapes — kids’ bento, photo styling, batch production for parties. They also allow heart, star, and animal shapes that are nearly impossible by hand. Wet the mold before each press to release cleanly.
Why does my nori turn rubbery?
Nori is hygroscopic — it absorbs moisture from the air and from warm rice within minutes. The fix is timing. Wrap nori either right before serving (best texture) or use convenience-store-style separated packaging where the nori sits on the outside of plastic film, isolated from the rice until pulled apart at the moment of eating.
Can I use brown rice for onigiri?
Short-grain brown rice (genmai) does work, but with adjustments. Increase soaking time to 1 hour and water to a 1:1.4 ratio. The bran layer reduces stickiness, so press a little firmer than for white rice and expect a slightly looser, more fragile result. Brown-rice onigiri are nutty and chewy, popular in macrobiotic and health-focused Japanese cooking.
What salt should I use for onigiri?
Fine sea salt is ideal — it dissolves quickly and adheres uniformly when you rub damp palms. Japanese sea salts like Okinawan shio or Setouchi salt are traditional choices. Avoid iodized table salt, which has a slightly metallic edge, and avoid coarse kosher salt, which leaves visible grains on the surface. Use about 1/8 teaspoon per onigiri.
Can vegetarians and vegans make onigiri?
Yes. Vegan-friendly fillings include umeboshi, kombu tsukudani, simmered shiitake (using dried shiitake), pickled vegetables, sesame-seasoned spinach, and salt-roasted edamame. Mix-in versions like shiso-and-sesame rice or pickled-plum-and-shiso furikake produce flavorful vegan onigiri without any need for fillings.
Final Thoughts: Onigiri as a Lifelong Skill
The first onigiri you make will not be perfect. The corners may crack, the salt may be uneven, your filling may slip out the bottom. By the tenth one, your hands will already understand the right pressure. By the fiftieth, you will be making them faster than you can write the word. There is a reason Japanese parents and grandparents teach onigiri to children before any other cooking skill: it is one of the great practice grounds for hand sensitivity, food temperature, and proportion.
Once you can shape a good triangle around a salted-salmon core, you have unlocked an entire vocabulary of Japanese home cooking. The same dampened-and-salted hands shape musubi, the same rice-temperature instinct guides sushi rolling, and the same patience for resting cooked rice translates to cooking rice for any Asian meal. Pack one into your bag for tomorrow’s lunch, and you will understand exactly why Japan eats two billion of them a year.

Mei Lin Chen
Mei Lin Chen is an Asian food writer and recipe developer. Melbourne-raised and London-based, she has spent over a decade exploring the rice paddies, hawker stalls, and home kitchens of South-East and East Asia. Her recipes balance traditional technique with everyday practicality.