Last updated: March 02, 2026
Making sushi rolls at home is one of the most rewarding kitchen projects you can tackle. Once you learn the basics of seasoning rice, preparing fillings, and rolling with a bamboo mat, you can create restaurant-quality maki in your own kitchen for a fraction of the price. This complete sushi roll recipe guide walks you through every step, from cooking perfect sushi rice to mastering five popular roll styles, including the classic California roll, spicy tuna roll, salmon avocado roll, vegetable roll, and shrimp tempura roll.
Whether you are a complete beginner or an experienced home cook looking to refine your technique, this guide covers everything: the essential equipment, how to select and season sushi rice, step-by-step rolling instructions, tips for beautiful presentation, and answers to every common question about homemade sushi. By the end, you will be hosting your own sushi nights with confidence.
What Are Sushi Rolls (Maki)?
Sushi rolls, known as maki (巻き寿司, makizushi) in Japanese, are cylindrical pieces of vinegared rice and fillings wrapped in nori (roasted seaweed). The word ”maki” literally means ”rolled,” and this style of sushi originated during Japan’s Edo period (1603–1868) as a convenient, portable meal. Today, maki is the most popular form of sushi consumed worldwide, accounting for the majority of sushi orders in the United States.
There are several types of sushi rolls:
- Hosomaki — Thin rolls with a single filling, wrapped in nori on the outside. Examples include tuna rolls (tekka maki) and cucumber rolls (kappa maki).
- Futomaki — Thick rolls with multiple fillings, also wrapped in nori on the outside.
- Uramaki — Inside-out rolls where rice is on the outside and nori on the inside. The California roll is the most famous example.
- Temaki — Hand rolls shaped into a cone, meant to be eaten immediately.
In this recipe, we focus on both traditional maki and uramaki styles, giving you the versatility to make any roll you like.
Essential Equipment for Making Sushi Rolls
You do not need specialized sushi training or expensive tools to make great sushi rolls at home. Here is what you need:
- Bamboo rolling mat (makisu) — The most important tool. Wrap it in plastic wrap to prevent sticking, especially for inside-out rolls.
- Sharp knife — A wet, sharp knife is essential for clean cuts. Wipe the blade with a damp cloth between slices.
- Rice paddle (shamoji) — For folding vinegar into the rice without crushing the grains.
- Large flat-bottomed bowl or hangiri — A wooden sushi tub (hangiri) is traditional, but any wide, shallow bowl works for seasoning the rice.
- Small bowl of water — For wetting your hands to prevent rice from sticking.
- Plastic wrap — For wrapping the bamboo mat and for inside-out rolls.
If you are serious about sushi-making, a quality sushi rice makes all the difference. Check our guide to the best rice for sushi for brand recommendations.
Sushi Rice Recipe (The Foundation of Every Roll)
Great sushi starts with perfectly seasoned rice. This is non-negotiable. The rice should be glossy, slightly sticky, and seasoned with a balance of rice vinegar, sugar, and salt. Here is how to make it.
Sushi Rice Ingredients
| Ingredient | Amount | Notes |
|---|---|---|
| Short-grain Japanese rice (sushi rice) | 2 cups (400 g) | Koshihikari or Calrose recommended |
| Water | 2 cups (480 ml) | For cooking the rice |
| Rice vinegar | ¼ cup (60 ml) | Unseasoned preferred; adjust if using seasoned vinegar |
| Granulated sugar | 2 tablespoons | Dissolve fully before adding to rice |
| Fine sea salt | 1 teaspoon | Table salt works too |
How to Cook Sushi Rice
- Rinse the rice. Place 2 cups of sushi rice in a fine-mesh strainer or bowl. Rinse under cold running water, gently swirling with your hand, until the water runs mostly clear (about 4–5 rinses). This removes excess starch and prevents gummy rice.
- Soak the rice. Transfer the rinsed rice to your rice cooker or pot. Add 2 cups of water and let it soak for 30 minutes. This step ensures even cooking and a fluffy texture.
- Cook the rice. If using a rice cooker, press start. If cooking on the stove, bring the water to a boil over high heat, then reduce to the lowest setting, cover, and cook for 15 minutes. Do not lift the lid. Turn off the heat and let the rice steam for 10 more minutes with the lid on.
- Make the sushi vinegar (sushi-zu). While the rice cooks, combine the rice vinegar, sugar, and salt in a small saucepan over low heat. Stir until the sugar and salt dissolve completely. Remove from heat and let it cool to room temperature. You can also microwave the mixture for 30 seconds and stir.
- Season the rice. Transfer the hot cooked rice to a large, wide bowl (ideally a hangiri). Drizzle the sushi vinegar over the rice. Using a rice paddle or spatula, gently fold and cut through the rice using slicing motions — do not stir or mash. Fan the rice as you fold to help it cool and achieve a glossy sheen.
- Cover and use. Cover the seasoned rice with a damp towel to prevent drying. Use at room temperature within 2 hours for the best texture. Never refrigerate sushi rice before rolling — cold rice becomes hard and difficult to work with.
This amount of rice makes approximately 4–6 rolls, depending on how thickly you spread the rice. For a detailed breakdown of how to cook rice perfectly, see our dedicated guide.
Sushi Roll Ingredients and Fillings
The beauty of homemade sushi rolls is that you can customize fillings to your taste. Below are the ingredients for five popular roll styles, plus a master list of fillings you can mix and match.
Nori Sheets
You will need full-size nori sheets (approximately 7 × 8 inches / 18 × 20 cm). For thin rolls (hosomaki), cut each sheet in half. For thick rolls and inside-out rolls, use full sheets. Look for high-quality, dark green, crisp nori. Store opened nori in an airtight container to prevent it from becoming chewy.
Five Popular Sushi Roll Recipes
1. California Roll (Uramaki)
- Imitation crab (surimi sticks), shredded — 6 oz (170 g)
- Ripe avocado — 1 large, sliced into thin strips
- English cucumber — ½, seeded and cut into thin matchsticks
- Toasted sesame seeds — 2 tablespoons
- Tobiko (flying fish roe) — optional, for garnish
2. Spicy Tuna Roll
- Sushi-grade tuna — 8 oz (225 g), diced into small cubes
- Sriracha or Japanese mayo (Kewpie) — 1–2 tablespoons
- Sesame oil — ½ teaspoon
- Scallions — 2, thinly sliced
3. Salmon Avocado Roll
- Sushi-grade salmon — 8 oz (225 g), cut into long strips
- Ripe avocado — 1, sliced
- Cream cheese — 2 oz (55 g), cut into thin strips (optional)
4. Vegetable Roll (Vegan)
- English cucumber — ½, cut into matchsticks
- Ripe avocado — 1, sliced
- Carrot — 1 medium, julienned
- Red bell pepper — ½, thinly sliced
- Pickled daikon radish (takuan) — 4 strips
5. Shrimp Tempura Roll
- Cooked shrimp tempura — 6 pieces (use our tempura batter recipe)
- Ripe avocado — 1, sliced
- English cucumber — ½, cut into matchsticks
- Tempura flakes (tenkasu) — 2 tablespoons, for crunch
- Eel sauce (unagi tare) — for drizzling
Condiments and Serving Accompaniments
- Soy sauce — Use a high-quality Japanese soy sauce for dipping. Low-sodium is fine if you prefer.
- Pickled ginger (gari) — A palate cleanser between different rolls.
- Wasabi — A small dab adds heat. Mix into soy sauce or place directly on the roll.
How to Roll Sushi: Step-by-Step Instructions
Follow these detailed instructions for both traditional maki (nori on outside) and inside-out rolls (uramaki, rice on outside). Once you master these two techniques, you can make any sushi roll.
Traditional Maki Roll (Nori on Outside)
- Prepare your station. Place the bamboo mat on a clean surface with the slats running horizontally. Set out a small bowl of water for your hands, your fillings, and the seasoned sushi rice.
- Position the nori. Place one full nori sheet (or half sheet for hosomaki) on the bamboo mat, shiny side down. The rough side faces up — rice sticks better to the rough side.
- Spread the rice. Wet your hands in the water bowl. Take about ¾ cup of sushi rice and spread it evenly across the nori, leaving a ½-inch (1.5 cm) strip of bare nori at the top edge. This bare strip acts as a seal. Press the rice gently — do not compact it. The rice layer should be about ¼ inch (6 mm) thick.
- Add the fillings. Lay your chosen fillings in a horizontal line across the center of the rice, about one-third of the way up from the bottom edge. Do not overfill — two to three ingredients is ideal for beginners.
- Roll. Using your thumbs to lift the edge of the bamboo mat closest to you, fold the bottom edge of the nori over the fillings. Tuck the nori tightly around the fillings with your fingers while pulling the mat forward. Continue rolling away from you, applying gentle, even pressure. The exposed nori strip at the top will seal the roll when it meets the damp rice.
- Shape. With the roll still inside the mat, gently squeeze along the length to form a uniform cylinder. Apply even pressure on top and both sides.
- Cut. Transfer the roll to a cutting board. Wet a sharp knife. Cut the roll in half, then cut each half into 3 pieces (6 pieces total) or 4 pieces (8 pieces total). Wipe the blade with a damp cloth between every cut for clean slices.
Inside-Out Roll (Uramaki — Rice on Outside)
- Wrap the bamboo mat. Cover the bamboo rolling mat tightly with plastic wrap. This prevents rice from sticking to the mat.
- Position the nori. Place a full nori sheet on the plastic-wrapped mat, rough side up.
- Spread the rice. Wet your hands and spread about 1 cup of sushi rice evenly over the entire nori sheet — all the way to the edges. There is no bare strip for inside-out rolls.
- Flip. Carefully flip the rice-covered nori over so that the rice is now facing down on the plastic-wrapped mat and the nori faces up.
- Add fillings. Place your fillings in a line across the center of the nori.
- Roll. Roll the same way as a traditional maki roll — lift the bottom edge with your thumbs, tuck, and roll forward with gentle pressure.
- Add toppings. While the roll is still in the mat, sprinkle sesame seeds or tobiko over the rice exterior. Press gently with the mat to adhere the toppings.
- Cut. Remove from the mat and cut into 8 pieces with a wet knife.
Pro Tips for Perfect Sushi Rolls
After making hundreds of sushi rolls, these are the tips that make the biggest difference:
- Keep your hands wet. Sushi rice is incredibly sticky. Dip your fingers in water (with a splash of rice vinegar added) every time you touch the rice.
- Do not overfill. The number one mistake beginners make is cramming too many ingredients into a single roll. Two to three fillings per roll is the sweet spot.
- Use room-temperature rice. Cold rice is hard and crumbly. Hot rice will wilt the nori and cook raw fish. Room temperature is perfect.
- Cut with a wet knife. This is the secret to clean, professional-looking slices. Wet the blade before every single cut.
- Buy sushi-grade fish. If using raw fish, always buy sushi-grade (previously frozen to kill parasites) from a reputable fishmonger or Japanese grocery store. When in doubt, use cooked ingredients like imitation crab, cooked shrimp, or vegetables.
- Press, do not squeeze. When shaping the roll in the mat, apply gentle, even pressure. Squeezing too hard will crush the rice and push fillings out the sides.
- Work quickly. Nori absorbs moisture from the rice rapidly. Once you spread the rice, add fillings and roll within a couple of minutes to keep the nori crisp.
- Slice with a pulling motion. Draw the knife toward you in one smooth motion rather than sawing back and forth. This gives the cleanest cuts.
Sushi Roll Variations and Creative Ideas
Once you have mastered the basic technique, try these variations to keep your sushi nights exciting:
Dragon Roll: Shrimp tempura and cucumber inside, with thin avocado slices draped over the top. Drizzle with eel sauce and sprinkle with sesame seeds.
Rainbow Roll: A California roll topped with alternating slices of tuna, salmon, shrimp, and avocado for a colorful presentation.
Spicy Crunchy Roll: Any filling combination with tempura flakes mixed into the rice or sprinkled on top for added texture.
Mango Roll: Fresh mango strips with shrimp or crab and avocado for a tropical twist.
Teriyaki Chicken Roll: Swap raw fish for sliced teriyaki chicken, avocado, and cucumber for a fully cooked option.
Vegan Tofu Roll: Marinated and pan-fried tofu with avocado, pickled vegetables, and a drizzle of ponzu sauce.
Cream Cheese Roll (Philadelphia Roll): Smoked salmon, cream cheese, and cucumber — a rich, indulgent combination that has become an American sushi staple.
Soy Paper Rolls: Replace nori with soy paper for a different look and a milder flavor. Soy paper comes in colors like pink, green, and yellow.
How to Serve Sushi Rolls
Presentation matters with sushi. Here is how to serve your homemade rolls like a pro:
- Arrange cut rolls on a flat plate or wooden board with the cut side facing up to show the filling pattern.
- Serve with small dishes of soy sauce, a mound of pickled ginger, and a small dab of wasabi.
- Garnish with thinly sliced scallions, sesame seeds, tobiko, or microgreens.
- For a sushi party, set up a rolling station with all the ingredients laid out so guests can make their own custom rolls.
- Pair with miso soup and an edamame appetizer for a complete Japanese meal.
- Serve sushi rolls immediately after making them. Unlike many dishes, sushi does not improve with resting — the nori becomes soggy and the rice dries out over time.
Nutritional Information
Nutritional values vary depending on the filling, but here are approximate values per roll (6–8 pieces) for the most popular varieties:
| Roll Type | Calories | Protein (g) | Carbs (g) | Fat (g) | Fiber (g) | Sodium (mg) |
|---|---|---|---|---|---|---|
| California Roll | 255 | 9 | 38 | 7 | 3 | 500 |
| Spicy Tuna Roll | 290 | 18 | 35 | 8 | 1 | 480 |
| Salmon Avocado Roll | 305 | 15 | 35 | 11 | 3 | 420 |
| Vegetable Roll | 200 | 4 | 40 | 5 | 4 | 350 |
| Shrimp Tempura Roll | 340 | 12 | 42 | 13 | 2 | 550 |
| Philadelphia Roll | 320 | 13 | 36 | 12 | 2 | 490 |
Values are estimates based on standard serving sizes. Actual nutrition depends on specific ingredients and quantities used.
How to Store Sushi Rolls
Sushi rolls are best eaten fresh, but if you have leftovers, here is how to store them properly:
- Refrigerator (up to 24 hours): Wrap each roll tightly in plastic wrap before cutting. Store in an airtight container in the refrigerator. The rice will harden slightly but is still safe to eat. Bring to room temperature for 15–20 minutes before serving.
- Do not freeze sushi rolls. Freezing ruins the texture of the rice, nori, and especially raw fish. The results after thawing are consistently poor.
- Raw fish rolls: Consume within 24 hours. Raw fish deteriorates quickly even when refrigerated.
- Cooked or vegetable rolls: These last slightly longer — up to 48 hours refrigerated — since there is no raw seafood.
- Sushi rice storage: If you have extra seasoned rice, cover it with a damp towel and keep at room temperature for up to 4 hours. For longer storage, refrigerate in an airtight container for up to 3 days and use it for onigiri (rice balls) or chirashi bowls rather than maki.
Common Mistakes to Avoid
Even experienced home sushi makers fall into these traps. Avoid these pitfalls for consistently great rolls:
- Using the wrong rice. Long-grain rice like jasmine or basmati does not have enough starch to stick together. Always use short-grain Japanese rice. See our guide to the best rice for Asian cooking to understand the differences.
- Skipping the vinegar seasoning. Unseasoned rice tastes flat and one-dimensional. The vinegar mixture is what makes sushi rice taste like sushi.
- Not rinsing the rice. Unrinsed rice has a thick layer of surface starch that results in gummy, clumpy rice.
- Overfilling the roll. More filling does not mean a better roll. It means a roll that bursts open or cannot be cut cleanly.
- Spreading rice too thick. A thick layer of rice overwhelms the fillings. Aim for a thin, even layer about ¼ inch (6 mm) thick.
- Using a dull knife. A dull knife crushes the roll instead of slicing it cleanly. Sharpen your knife before cutting, or use the sharpest knife you own.
- Rolling too loosely. A loose roll falls apart when you cut it. Apply gentle but firm pressure as you roll, tucking the nori tightly around the fillings.
- Working too slowly. Nori absorbs moisture from the rice within minutes and becomes chewy. Prep all ingredients before you start rolling, and work with purpose.
Sushi Roll Sauces and Toppings
Elevate your sushi rolls with these popular sauces and toppings:
Spicy Mayo: Mix 2 tablespoons of Kewpie mayo with 1 tablespoon of sriracha. Drizzle over spicy rolls or use as a dipping sauce. Adjust the sriracha to your heat preference.
Eel Sauce (Unagi Tare): Combine ¼ cup soy sauce, ¼ cup mirin, and 2 tablespoons sugar in a small saucepan. Simmer over medium heat until reduced by half and syrupy, about 10 minutes. Perfect for shrimp tempura and eel rolls.
Ponzu Drizzle: Use store-bought ponzu sauce drizzled over salmon or vegetable rolls for a bright, citrusy finish.
Crispy Toppings: Tempura flakes (tenkasu), toasted panko breadcrumbs, or crushed rice crackers add crunch to inside-out rolls. Press them into the rice exterior with the bamboo mat.
Tobiko and Masago: Flying fish roe (tobiko) and capelin roe (masago) add color, a mild briny flavor, and a satisfying pop of texture. Roll the outside of uramaki in tobiko for an impressive presentation.
Frequently Asked Questions
Can I make sushi rolls without a bamboo mat?
Yes. You can use a clean kitchen towel, a silicone baking mat, or even a sheet of parchment paper as a substitute. The bamboo mat gives the most control and uniform shape, but any flat, flexible surface works in a pinch. Some people also use plastic wrap alone, pulling it taut to shape the roll.
What is sushi-grade fish and where do I buy it?
Sushi-grade (or sashimi-grade) fish has been flash-frozen to kill parasites, making it safe to eat raw. Buy it from Japanese grocery stores, specialty fishmongers, or reputable online seafood delivery services. If you are unsure about the quality, ask the fishmonger directly whether the fish is safe to eat raw. When in doubt, stick with cooked fillings like imitation crab, cooked shrimp, or vegetables.
How far in advance can I make sushi rolls?
Sushi rolls are best eaten within 30 minutes of making them. You can prepare all the fillings and sushi rice in advance (up to 2 hours for rice, up to a day for sliced vegetables stored in cold water). But do not roll until you are ready to eat. If you must prep ahead for a party, roll and keep whole (uncut) rolls wrapped tightly in plastic wrap at room temperature for up to 1 hour, then cut just before serving.
Can I use brown rice for sushi rolls?
You can, but the texture and flavor will be different. Brown rice is chewier and less sticky than white sushi rice. Use short-grain brown rice and increase the cooking water by about 25 percent. Add the same sushi vinegar seasoning. The rolls will be nuttier in flavor and slightly harder to shape, but they work well for health-conscious eaters.
Why is my nori chewy instead of crispy?
Nori absorbs moisture from the rice very quickly. If your nori is chewy, you are either working too slowly or your rice is too wet. Speed up your rolling process, make sure your rice is properly drained and cooled, and serve the rolls immediately after cutting. For inside-out rolls, this is less of an issue since the nori is on the inside.
Is it safe to make sushi at home?
Absolutely. Millions of people make sushi at home safely. The key safety considerations are: use sushi-grade fish if including raw seafood, keep raw fish refrigerated until the moment you roll, work on clean surfaces with clean hands, and consume raw fish rolls within 24 hours. If you are pregnant, immunocompromised, or serving young children, stick with cooked fillings.
How many sushi rolls does this recipe make?
With 2 cups of uncooked rice, you will get enough sushi rice for 4–6 full rolls (32–48 pieces). For a sushi dinner for two, 4 rolls is plenty as a main course. For a sushi party of 4–6 people, double the rice recipe and plan 2–3 rolls per person.
What is the difference between maki and hand rolls?
Maki rolls are cylindrical and cut into bite-sized pieces. Hand rolls (temaki) are cone-shaped, made by wrapping a sheet of nori around rice and fillings by hand, and eaten whole immediately. Hand rolls are quicker and more casual — perfect for a DIY sushi night where everyone makes their own.
Can I make sushi rolls without raw fish?
Of course. Many of the most popular sushi rolls use cooked or non-fish ingredients: California rolls (imitation crab), shrimp tempura rolls (cooked shrimp), vegetable rolls, teriyaki chicken rolls, and cream cheese rolls. You do not need raw fish to make delicious sushi at home.
The History of Sushi Rolls
Understanding the history of sushi adds depth to your appreciation of this iconic dish. Sushi itself dates back over a thousand years. The earliest form, narezushi, was fermented fish preserved in rice — the rice was discarded and only the fish was eaten. Over centuries, the fermentation period shortened, and eventually the rice became part of the dish.
Makizushi (rolled sushi) emerged during the Edo period in Japan. Nori sheets became commercially available in the 1700s, and creative sushi chefs began wrapping rice and fish in them. The bamboo rolling mat made standardized, cylindrical rolls possible.
The real revolution came in the 1960s and 1970s when Japanese sushi chefs emigrated to North America. Chef Ichiro Mashita, working in Los Angeles, is widely credited with creating the California roll — substituting avocado for toro (fatty tuna) and placing rice on the outside to hide the nori, which American diners found unfamiliar. This inside-out roll format exploded in popularity and spawned hundreds of Western-style sushi creations.
Today, sushi rolls are eaten in virtually every country on earth. Japan’s washoku cuisine, which includes sushi traditions, was designated a UNESCO Intangible Cultural Heritage in 2013. From its humble origins as a preservation method to its status as one of the world’s most beloved foods, sushi continues to evolve while honoring its roots.
For more Japanese recipes to complement your sushi night, explore our collection of essential dishes to make at home.
Sushi Rolling Technique Comparison
| Feature | Hosomaki (Thin Roll) | Futomaki (Thick Roll) | Uramaki (Inside-Out) | Temaki (Hand Roll) |
|---|---|---|---|---|
| Nori sheet size | Half sheet | Full sheet | Full sheet | Half sheet |
| Number of fillings | 1 | 3–5 | 2–3 | 2–3 |
| Rice on outside? | No | No | Yes | No |
| Bamboo mat needed? | Yes | Yes | Yes | No |
| Pieces per roll | 6 | 8–10 | 8 | 1 (eaten whole) |
| Difficulty level | Easy | Medium | Medium | Easy |
| Best for | Beginners, simple fillings | Multi-ingredient combos | California roll, party sushi | Casual meals, DIY sushi |
Making Sushi Rolls Kid-Friendly
Sushi night is a fantastic family activity. Here are tips for getting kids involved:
- Use cooked-only fillings: imitation crab, cooked shrimp, teriyaki chicken, cucumber, avocado, cream cheese, and mango.
- Let kids choose and assemble their own fillings. The hands-on rolling process is fun and builds fine motor skills.
- Start with temaki (hand rolls) since they require no bamboo mat and no cutting — just wrap and eat.
- Cut rolls into smaller pieces for little hands.
- Offer mild dipping options like a small dish of soy sauce mixed with a touch of honey.
- Make it colorful — use carrots, bell peppers, mango, and tobiko to create rolls that look as fun as they taste.
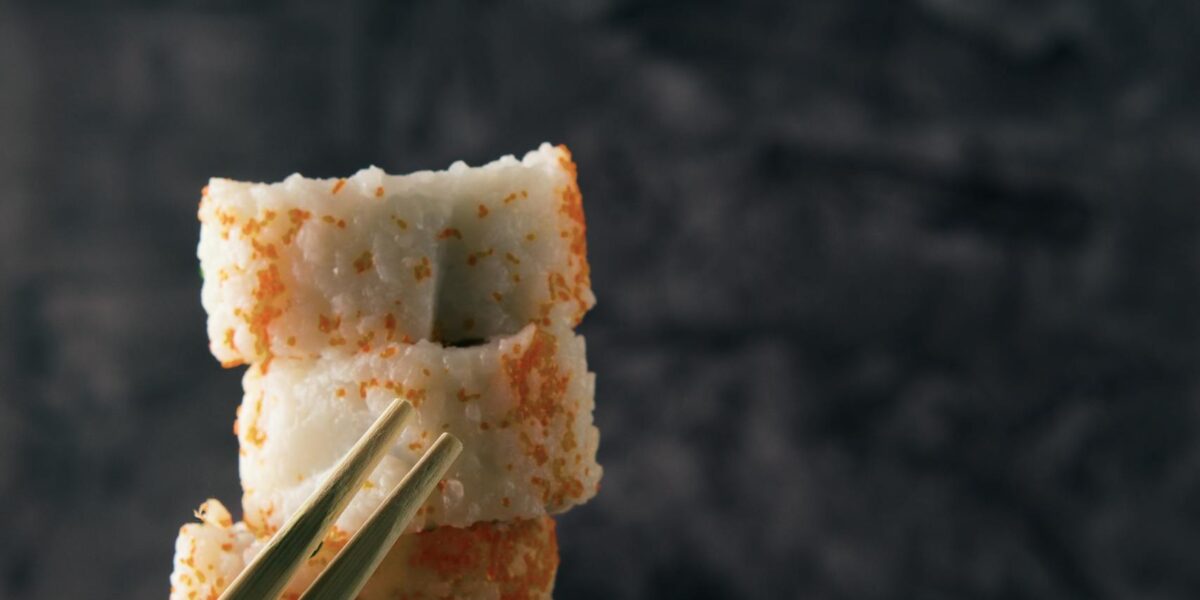
Learning to use chopsticks is part of the fun. Check our beginner guide to chopsticks if your family is just starting out.
Sourcing Ingredients for Sushi Rolls
You can find most sushi roll ingredients at a well-stocked grocery store or Asian market. Here is a quick sourcing guide:
- Sushi rice: Available at most supermarkets in the Asian foods aisle. Koshihikari and Calrose are the most widely available brands. For our top picks, check the best rice for sushi guide.
- Nori: Sold in packs of 10–50 sheets at Asian grocery stores and online. Look for dark green, crisp sheets.
- Rice vinegar: Available at any grocery store. Choose unseasoned for more control over the flavor.
- Sushi-grade fish: Japanese grocery stores, specialty fishmongers, or online seafood delivery services are your best options.
- Imitation crab (surimi): Found in the refrigerated seafood section of most grocery stores.
- Wasabi and pickled ginger: Available in the Asian foods aisle or at Asian grocery stores.
- Mirin — essential for eel sauce and many Japanese dressings.
- Sesame seeds: Both white and black sesame seeds are used for sushi roll toppings.
For a comprehensive overview of pantry staples, visit our complete guide to Asian cooking ingredients.

Mei Lin Chen
Mei Lin Chen is an Asian food writer and recipe developer. Melbourne-raised and London-based, she has spent over a decade exploring the rice paddies, hawker stalls, and home kitchens of South-East and East Asia. Her recipes balance traditional technique with everyday practicality.