Last updated: March 30, 2026
A perfect tempura batter is one of the most satisfying things you can master in your home kitchen. When it is right, you get an impossibly light, shatteringly crispy shell that clings to shrimp, vegetables, and fish without becoming greasy or heavy. When it is wrong, you end up with a dense, soggy, flour-tasting coating that slides off whatever you are trying to fry.
The Japanese art of tempura dates back to the 16th century, when Portuguese missionaries introduced deep-frying techniques to Nagasaki. Japanese cooks refined the method over centuries, stripping the batter down to its essentials and developing a technique that prioritizes cold temperature, minimal mixing, and screaming-hot oil. Today, tempura is one of the most recognized Japanese cooking techniques worldwide, and the good news is that once you understand the science behind it, you can make restaurant-quality tempura at home every single time.
This guide covers everything you need to know about making the perfect tempura batter from scratch, choosing the right oil and temperature, frying different ingredients, and troubleshooting the most common mistakes home cooks make. Whether you have been making tempura for years or this is your first attempt, you will find practical, tested advice here.
What Is Tempura Batter?
Tempura batter is a cold, lightly mixed batter made from flour, ice water, and egg. What makes it different from Western batters like beer batter or pancake batter is its deliberate underdevelopment of gluten. While Western batters are often whisked smooth, tempura batter is intentionally lumpy and barely combined. Those lumps and streaks of dry flour are not mistakes — they are what create the airy, lace-like texture that defines great tempura.
The three pillars of tempura batter are coldness, speed, and restraint. The batter must be ice-cold to prevent gluten from developing. It must be mixed quickly — no more than 10 to 15 seconds of stirring. And you must resist the urge to make it smooth. Professional tempura chefs in Japan sometimes use chopsticks instead of a whisk to ensure they cannot overmix the batter.
Japanese cooks often describe perfect tempura as karuii — light. The coating should feel almost weightless when you bite through it, shattering into crispy fragments that give way to the perfectly cooked ingredient inside. Achieving this requires understanding both the batter itself and the frying technique.
Essential Equipment for Making Tempura
You do not need specialized Japanese equipment to make great tempura at home, but having the right tools makes a significant difference. Here is what you need and why each item matters.
A heavy-bottomed pot or deep pan. A Dutch oven, deep cast-iron skillet, or heavy stainless steel pot works perfectly. The key is thermal mass — a heavy pot holds its temperature when you add cold food and cold batter. If you own a wok, that also works beautifully for tempura since its shape uses less oil while still providing enough depth for frying. A traditional flat-bottomed wok with at least 3 inches of oil is ideal.
A deep-fry or instant-read thermometer. Oil temperature is the single most critical variable in tempura. You need your oil between 340°F and 375°F (170°C to 190°C) depending on the ingredient. Without a thermometer, you are guessing, and guessing leads to soggy tempura.
A wire rack set over a sheet pan. Never drain tempura on paper towels. Paper towels trap steam against the coating and make it soggy within minutes. A wire rack allows air to circulate on all sides, keeping the tempura crispy while excess oil drips away.
Long cooking chopsticks or tongs. Long chopsticks (saibashi) give you precise control when dipping, placing, and flipping items in hot oil. Metal tongs work too, but chopsticks let you handle delicate items like shiso leaves and thin vegetable slices without crushing them.
A fine-mesh skimmer. Called an ami in Japanese kitchens, this is used to remove the small bits of fried batter (tenkasu) that float in the oil. If left in the oil, these bits burn and make your oil taste bitter. Skim them frequently as you fry.
A large mixing bowl set over ice. You will mix your batter in a bowl nested inside a larger bowl filled with ice. This keeps the batter cold throughout the frying process. As the batter sits and warms up, it develops gluten and becomes less effective.
The Classic Tempura Batter Recipe (Step by Step)
This is the standard tempura batter that works for vegetables, shrimp, fish, and virtually any ingredient you want to fry. It makes enough batter for approximately 20 to 25 pieces of tempura.
Ingredients:
- 1 cup (120g) all-purpose flour, plus extra for dusting
- 1 large egg, cold
- 1 cup (240ml) ice water (water with ice cubes, measured after straining out the ice)
- Neutral oil for frying (vegetable, canola, or rice bran oil) — enough for 2 to 3 inches of depth in your pot
Optional additions for extra crispiness:
- 1 tablespoon cornstarch or potato starch (replace the same amount of flour)
- 1 tablespoon vodka or sake (replace the same amount of water)
- 1/4 teaspoon baking powder
Step 1: Prepare everything before making the batter. Cut all your vegetables and proteins, pat them dry with paper towels, and arrange them on a tray. Set up your frying station: pot with oil, wire rack, thermometer, skimmer. The batter degrades quickly once mixed, so everything else must be ready first.
Step 2: Heat the oil. Pour oil into your pot to a depth of 2 to 3 inches. Heat it over medium-high heat to 350°F (175°C) for vegetables or 340°F (170°C) for shrimp and fish. Use your thermometer to monitor. The oil should shimmer but not smoke.
Step 3: Make the egg water. Crack the cold egg into a measuring cup and beat it lightly with chopsticks or a fork. Add the ice water and stir briefly to combine. The mixture should be about 1 cup total.
Step 4: Add the flour to the egg water. Put the flour into a mixing bowl set over ice. Pour the egg water over the flour all at once. Using chopsticks or a fork, stir the mixture with quick, cutting motions — like drawing a figure eight — for no more than 10 to 15 seconds. The batter should be lumpy with visible streaks of dry flour. It will look undermixed. That is exactly correct.
Step 5: Dust ingredients lightly with flour. Before dipping anything into the batter, dust each piece lightly with plain flour and shake off the excess. This dry flour layer acts as glue, helping the batter adhere to the ingredient instead of sliding off in the oil.
Step 6: Dip and fry. Hold each piece by one end, dip it into the cold batter, let the excess drip off for a moment, then gently lower it into the hot oil. Do not drop it — place it in gently, sliding it away from you to prevent splashing. Fry 3 to 5 pieces at a time, depending on the size of your pot. Overcrowding drops the oil temperature and creates steam instead of crispiness.
Step 7: Fry until golden and crispy. Most vegetables take 2 to 3 minutes. Shrimp takes about 2 minutes. Thicker items like sweet potato slices take 3 to 4 minutes. The tempura is done when the bubbling around each piece slows down significantly and the batter turns a pale golden color. It will darken slightly after you remove it from the oil.
Step 8: Drain and serve immediately. Transfer fried pieces to the wire rack. Skim any floating batter bits from the oil before the next batch. Let the oil return to the target temperature before adding more items. Serve tempura within 5 to 10 minutes of frying for the best texture.
The Science Behind Crispy Tempura Batter
Understanding why tempura batter works the way it does will make you a better cook, because you will be able to troubleshoot problems on the fly instead of blindly following instructions.
Cold temperature prevents gluten development. Wheat flour contains two proteins — glutenin and gliadin — that form gluten when combined with water and agitated. Gluten gives bread its chewiness, but in a frying batter, gluten creates toughness and density. Cold water slows down the chemical reaction between these proteins, buying you time to dip and fry without the batter becoming elastic. This is why ice water is non-negotiable.
Lumps create texture. Those pockets of dry flour in undermixed batter serve two purposes. First, they create an uneven surface on the coating, which fries into a rough, lace-like texture with maximum crunch. Second, the dry flour pockets contain no water, so they crisp up faster than the surrounding batter, creating contrast between ultra-crispy spots and thin, delicate areas.
Alcohol evaporates faster than water. Adding a tablespoon of vodka or sake to the batter means some of the liquid evaporates more quickly in the hot oil. Faster evaporation means less time in the oil, which means less oil absorption and a crispier result. This is a professional trick that works remarkably well.
Starch creates a shatter. Replacing some of the flour with cornstarch or potato starch reduces the overall gluten potential of the batter while adding extra crispiness. Starches gelatinize and then dehydrate in hot oil, forming a rigid, glass-like structure that shatters when you bite into it. Many tempura restaurants in Japan use a blend of cake flour and potato starch for this reason.
Oil temperature drives the reaction. When food enters hot oil, the water in the batter instantly begins converting to steam. This rapid steam release is what pushes oil away from the food, preventing greasiness. If the oil is too cool, steam generation is slow, and oil soaks into the batter. If the oil is too hot, the outside burns before the inside cooks. The sweet spot of 340°F to 375°F balances these two forces.
Tempura Batter Variations
The classic recipe works for most situations, but these variations can help you achieve specific textures or accommodate dietary restrictions.
Extra-crispy tempura batter (3 ingredient version). For the crispiest possible tempura, skip the egg entirely. Mix 1 cup of flour with 1 cup of ice-cold sparkling water or club soda, and add 1/4 teaspoon of baking powder. The carbonation creates tiny bubbles in the batter that expand in the hot oil, creating an airy, extra-crunchy coating. This is a popular street food approach in parts of Japan.
Tempura batter with cornstarch. Replace 1/4 cup of the all-purpose flour with cornstarch. This creates a coating that stays crispy longer, making it ideal when you need to fry everything before your guests arrive rather than frying to order. The cornstarch version is slightly less lacy and more uniformly crunchy.
Gluten-free tempura batter. Replace the all-purpose flour entirely with rice flour or a mix of rice flour and cornstarch (3/4 cup rice flour plus 1/4 cup cornstarch). The texture is slightly different — more crispy-crunchy than delicate-lacy — but it fries beautifully and stays crispy even longer than wheat-based batter.
Eggless tempura batter. Simply omit the egg and increase the ice water by 2 tablespoons. Many tempura restaurants in Japan actually use egg-free batter, especially for vegetable tempura. Without the egg, the batter is even lighter, though it can be slightly harder to get it to adhere to smooth ingredients like shrimp.
Best Ingredients for Tempura
Almost anything can be tempura-fried, but some ingredients are classic for good reason. Here is what works best, organized by cooking time so you can plan your frying order.
| Ingredient | Prep | Oil Temp | Fry Time | Tips |
|---|---|---|---|---|
| Shrimp (ebi) | Peel, devein, score belly, press flat | 340°F (170°C) | 1.5–2 min | Make shallow cuts on the belly side to prevent curling |
| Sweet potato (satsumaimo) | Slice 1/4 inch thick rounds | 340°F (170°C) | 3–4 min | Start at lower temp for even cooking through thick slices |
| Kabocha squash | Slice 1/4 inch wedges, skin on | 340°F (170°C) | 3–4 min | Keep skin on for color contrast and structure |
| Eggplant (nasu) | Slice lengthwise, score skin | 350°F (175°C) | 2–3 min | Score the skin in a crosshatch pattern to help it cook evenly |
| Shiso leaves | Batter one side only | 360°F (180°C) | 30–45 sec | Dip only the top side; the bottom stays green and fragrant |
| Green beans | Trim ends, keep whole | 350°F (175°C) | 2 min | Bundle 3–4 beans together for easier handling |
| Mushrooms (shiitake, maitake) | Trim stems, leave whole or halve | 350°F (175°C) | 2–3 min | Maitake in clusters creates beautiful frilly tempura |
| Lotus root (renkon) | Peel, slice 1/4 inch rounds | 350°F (175°C) | 2–3 min | The natural holes create a stunning visual pattern |
| White fish fillet | Cut into strips, pat very dry | 340°F (170°C) | 2–3 min | Use firm white fish like cod or halibut |
| Onion rings | Slice 1/2 inch rings, separate | 350°F (175°C) | 2–3 min | Thread a toothpick to hold rings together while frying |
For best results, fry items from lowest temperature to highest. Start with the dense root vegetables and proteins at 340°F, then raise the oil temperature for quicker-cooking leaves and thin vegetables. This order also moves from items that shed the most batter bits to the least, keeping your oil cleaner throughout the process.
Common Tempura Mistakes and How to Fix Them
Even experienced cooks run into problems with tempura. Here is a troubleshooting guide for the most frequent issues.
| Problem | Cause | Solution |
|---|---|---|
| Batter is too thick and heavy | Too much flour or not enough water | The batter should be thinner than pancake batter — more like heavy cream. Add more ice water a tablespoon at a time. |
| Batter slides off the food | Food was wet, or no flour dusting | Pat all ingredients completely dry, then dust with a thin layer of flour before dipping in batter. |
| Tempura is greasy and soggy | Oil temperature too low | Make sure oil is at least 340°F before adding food. Let the oil recover between batches. Do not overcrowd. |
| Coating is tough and chewy | Batter was overmixed | Mix for no more than 15 seconds. Lumps are good. Use ice water, not room temperature water. |
| Tempura burns on the outside, raw inside | Oil temperature too high, pieces too thick | Lower the oil to 340°F for thick items. Slice sweet potatoes and root vegetables no more than 1/4 inch thick. |
| Batter falls apart in the oil | Oil temperature too low, batter too thin | Increase oil temperature. Add a bit more flour to the batter. Make sure you hold items in the batter for a full second before lowering into oil. |
| Tempura gets soggy after 5 minutes | Draining on paper towels, or steam trapped | Always drain on a wire rack. Serve immediately. If holding, keep on the rack in a 200°F oven with the door cracked. |
| Oil foams excessively | Water in the oil or old degraded oil | Make sure pot and utensils are completely dry. Use fresh oil. Skim debris frequently. |
| Uneven browning | Items not flipped, or floating against each other | Flip each piece once halfway through cooking. Leave space between pieces so oil circulates evenly. |
| Batter warms up too fast | Not keeping batter cold during frying | Nest the batter bowl inside a larger bowl filled with ice. Make a fresh batch if frying takes longer than 15 minutes. |
Choosing the Right Oil for Tempura
The oil you use affects both the flavor and crispiness of your tempura. Here is what to consider.
Sesame oil blend. Traditional high-end tempura restaurants in Japan use a blend of sesame oil and vegetable oil, typically in a 1:3 or 1:4 ratio. The sesame oil adds a subtle nutty flavor and fragrance without being overwhelming. Use refined (light) sesame oil, not toasted sesame oil, which would burn at frying temperatures and overpower the delicate flavors.
Rice bran oil. This is the preferred frying oil in many Japanese households. It has a high smoke point (450°F / 232°C), a neutral flavor, and produces exceptionally crispy results. It is also high in antioxidants, which means it degrades more slowly than other oils during extended frying sessions.
Canola or vegetable oil. The most practical option for home cooks. Both have high smoke points, neutral flavors, and are widely available and affordable. These are what most home tempura is fried in, and the results are excellent.
Avoid olive oil, coconut oil, and butter. These have low smoke points, strong flavors, or both. They will not produce good tempura. Peanut oil works but has a slightly distinct flavor that some people find distracting in tempura.
The Tempura Dipping Sauce (Tentsuyu)
Tentsuyu is the classic dipping sauce served with tempura. It is simple to make and can be prepared ahead of time, which is ideal since your hands will be busy frying.
Tentsuyu recipe:
- 3/4 cup dashi (made from kombu and bonito flakes, or instant dashi powder)
- 3 tablespoons soy sauce
- 3 tablespoons mirin
Combine the dashi, soy sauce, and mirin in a small saucepan. Bring to a gentle simmer, cook for 1 minute, then remove from heat and let it cool. Serve at room temperature or slightly warm alongside grated daikon radish and fresh grated ginger. Each person adds daikon and ginger to their own bowl of tentsuyu to taste.
If you do not have dashi, you can substitute with a light miso-based broth diluted with water, though the flavor will be different. For a quicker option, mix equal parts soy sauce and ponzu sauce with a splash of water.
Other serving options: High-quality tempura is often served with nothing more than a squeeze of lemon and a pinch of flaky sea salt. Matcha salt (mix fine sea salt with matcha powder in a 3:1 ratio) is another elegant option. Some people enjoy tempura with sambal oelek or a spicy mayo for a more casual approach.
Practice Exercises to Perfect Your Tempura
Like any technique, tempura improves with practice. Here are structured exercises to build your skills progressively.
Exercise 1: The batter texture test. Make a batch of tempura batter and examine it closely. It should be the consistency of heavy cream, with visible lumps and streaks of dry flour. Dip a chopstick into the batter and hold it up — the batter should drip off in a thin, continuous stream, not glop off in thick drops. If it is too thick, add more ice water. If it is too thin and watery, add a small amount of flour. Practice making batter until you can nail the right consistency every time.
Exercise 2: Temperature control drill. Fill your pot with oil and practice maintaining a steady 350°F using only your stove controls. Add a few pieces of bread or small scraps of batter to simulate the temperature drop that happens when you add food. Your goal is to recover to 350°F within 30 seconds of each addition. This exercise teaches you how your specific stove and pot combination respond to temperature changes.
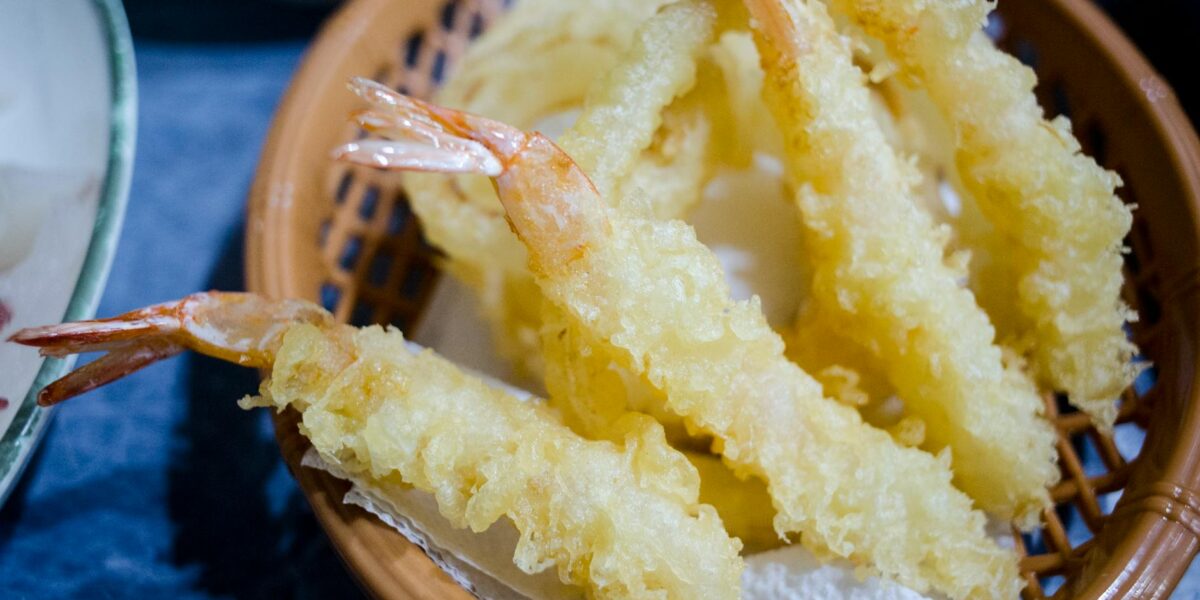
Exercise 3: Shrimp tempura masterclass. Shrimp is the most iconic tempura ingredient and one of the trickiest to get right. Buy a dozen medium or large shrimp and practice the full process: peeling, deveining, scoring the belly, pressing flat, dusting with flour, dipping in batter, and frying. Each shrimp should come out straight (not curled), with a thin, crispy coating and a juicy, just-cooked interior. If your shrimp curl up, you did not score and press them enough.
Exercise 4: The mixed vegetable platter. Choose 5 different vegetables that require different fry times and temperatures (for example: sweet potato, eggplant, green beans, shiso, and mushrooms). Practice frying them in sequence, adjusting your oil temperature for each ingredient. The challenge here is maintaining quality across different items while keeping the first ones warm and crispy as you fry the rest.
Exercise 5: Kakiage (mixed tempura fritter). This is the advanced test. Thinly slice onions, carrots, and shrimp into small pieces. Toss with a tablespoon of flour, then add just enough batter to bind everything together. Drop tablespoon-sized portions into 350°F oil and press gently with chopsticks to flatten. Kakiage requires precise batter-to-ingredient ratio and delicate handling. When done right, it creates a beautiful, lacy disc that holds together but is still light and crispy.
Advanced Tempura Tips from Professional Chefs
Once you have the basics down, these professional techniques will take your tempura to the next level.
Use cake flour instead of all-purpose flour. Cake flour has a lower protein content (7-8%) compared to all-purpose flour (10-12%), which means even less gluten development. Professional tempura chefs in Japan often use a special low-protein flour, and cake flour is the closest Western equivalent. The difference is noticeable — cake flour batter produces a lighter, more delicate coating.
Sift your flour twice. Sifting incorporates air into the flour and breaks up any clumps. Airy flour absorbs water more evenly and creates a lighter batter. This is one of those small steps that separates very good tempura from great tempura.
Add extra batter drizzles for texture. After you place an item in the oil, dip your chopsticks or fingers into the batter and flick small drops of batter onto and around the frying piece. These tiny drops fry into crispy tendrils that attach to the main piece, creating the beautiful, airy, lace-like appearance you see at professional tempura restaurants. This technique is called hana-age (flower frying).
Listen to your tempura. The sound of frying tells you everything. When you first add an item, the bubbling should be vigorous and loud — that is water converting to steam rapidly. As the item cooks, the bubbling becomes quieter and higher-pitched. When the sound transitions from a deep rumble to a light, crackling sizzle, the tempura is done. With practice, you can judge doneness by ear alone.
Season the oil. Before frying your actual tempura, fry a few pieces of vegetable scraps or a small amount of plain batter in the oil for 30 seconds and remove. This accomplishes two things: it verifies your oil temperature with a visual test, and it slightly seasons the oil, which subsequent batches benefit from.
Never reuse oil more than once for tempura. Tempura batter sheds a lot of tiny flour particles into the oil, which degrade its quality quickly. You can strain and reuse tempura oil once for less delicate frying (like making chicken katsu or Korean fried chicken), but do not use it for tempura again. The crispiness will suffer.
Chill your flour in the freezer. Put your flour in the freezer for at least 30 minutes before making tempura batter. Cold flour plus ice water means a colder overall batter temperature, giving you a wider window before gluten begins developing. Some chefs even freeze their mixing bowl.
Tempura in Other Dishes: Recipe Ideas
Tempura is not just a standalone appetizer. It appears throughout Japanese cuisine and adapts beautifully to other Asian dishes.
Tendon (tempura rice bowl). Place an assortment of freshly fried tempura over a bowl of hot steamed rice. Drizzle with a slightly thickened version of tentsuyu — reduce the dipping sauce until it thickens slightly, or add 1/2 teaspoon of cornstarch slurry. The sauce soaks into the rice while the tempura stays crispy on top. This is one of Japan’s most beloved comfort foods and a great way to use your new perfectly cooked rice.
Tempura udon or soba. Float 2 to 3 pieces of freshly fried tempura on top of a bowl of hot udon or soba noodles in broth. The tempura gradually absorbs the broth, creating a wonderful contrast between the still-crispy top and the broth-soaked bottom. Use the tentsuyu recipe above as a starting point for the noodle broth, diluting it with extra dashi. If you enjoy rice noodles, tempura works beautifully with those as well.
Tempura sushi roll. Fry shrimp or soft-shell crab tempura and use it as a sushi filling. Combine with avocado, cucumber, and a drizzle of spicy mayo for a dynamite roll. Getting the rice right is key — see our guide to the best rice for sushi for tips.
Tempura as a side dish. A plate of mixed vegetable tempura pairs perfectly with almost any Asian main course. Try it alongside Japanese curry, as a side to teriyaki chicken, or served with a simple miso soup for a light meal.
Tenkasu (tempura crumbs). Those little bits of fried batter you skim out of the oil are called tenkasu, and they are a sought-after topping in Japan. Sprinkle them over fried rice, noodle soups, or okonomiyaki (savory pancakes). Stored in an airtight container, tenkasu keeps for up to a week at room temperature.
How to Store and Reheat Tempura
Tempura is best eaten within minutes of frying, but if you have leftovers, here is how to handle them.
Storing. Let tempura cool completely on a wire rack, then store in a single layer in an airtight container in the refrigerator. It will keep for 1 to 2 days. Do not stack pieces or they will become soggy from trapped moisture.
Reheating. The best method is a toaster oven or conventional oven at 375°F (190°C) for 5 to 7 minutes, directly on the oven rack or on a wire rack set over a baking sheet. This re-crisps the coating without making it greasy. An air fryer at 375°F for 3 to 4 minutes also works well.
Never microwave tempura. The microwave heats water molecules, which creates steam inside the coating. This steam softens the crispy batter and turns it rubbery. Once microwaved, no amount of oven reheating will fully restore the texture.
Frequently Asked Questions About Tempura Batter
Can I make tempura batter ahead of time?
No. Tempura batter should be made immediately before frying and used within 10 to 15 minutes. As it warms up and the flour hydrates, gluten develops and the batter loses its light, crispy quality. If your frying session lasts longer than 15 minutes, discard the remaining batter and make a fresh batch.
What is the best flour for tempura batter?
Cake flour produces the lightest results because of its low protein content (7-8%). All-purpose flour works well and is what most home cooks use. For the crispiest coating, use a blend of 3/4 cup cake flour and 1/4 cup cornstarch or potato starch. Avoid bread flour or self-rising flour.
Why does my tempura batter not stick?
The most common reason is moisture on the surface of the ingredient. Pat everything completely dry with paper towels before dusting with flour. The flour dusting step is essential — it creates a dry surface that the wet batter grips onto. Also make sure your batter is not too thin.
Can I use sparkling water instead of regular water?
Yes, and many cooks prefer it. The carbonation creates tiny gas bubbles in the batter that expand in hot oil, resulting in an extra-crispy, airy coating. Use ice-cold sparkling water straight from the refrigerator. Once the bubbles go flat, the benefit is lost, so work quickly.
How do I keep tempura crispy while frying more batches?
Place finished tempura on a wire rack set over a sheet pan in a 200°F (93°C) oven with the door slightly cracked. The low heat keeps the coating warm and dry without cooking the food further. Alternatively, simply accept that tempura is best eaten one or two pieces at a time, straight from the fryer, which is exactly how it is served at high-end tempura restaurants in Japan.
What oil temperature is best for tempura?
340°F (170°C) for dense items like sweet potato, proteins like shrimp and fish, and anything that needs more time to cook through. 350°F to 360°F (175°C to 180°C) for most vegetables. 370°F to 375°F (188°C to 190°C) for thin, quick-cooking items like shiso leaves. Always use a thermometer.
How much oil do I need for tempura?
You need enough oil for a depth of 2 to 3 inches in your pot. For a standard Dutch oven, that is roughly 6 to 8 cups (1.5 to 2 liters). Less oil means larger temperature swings when you add food. More oil wastes money and takes longer to heat. If you are using a wok, you can get away with slightly less oil thanks to the tapered shape, but still maintain at least 2 inches of depth at the center.
Is tempura batter the same as katsu batter?
No. Katsu (used for chicken katsu, tonkatsu) uses a three-step breading process: flour, beaten egg, and panko breadcrumbs. Tempura uses a wet batter of flour, egg, and ice water with no breadcrumbs. The textures are very different — katsu is thick and crunchy, tempura is thin, light, and lacy.
Can I make tempura without egg?
Yes. Simply omit the egg and add an extra 2 tablespoons of ice water. Many Japanese restaurants use egg-free batter, particularly for vegetable tempura. The result is slightly lighter and more delicate. Vegans can use this approach with no loss in quality.
What is the difference between tempura and karaage?
Tempura uses a wet batter and produces a light, crispy, lacy coating. Karaage (Japanese fried chicken) uses a dry dredge of cornstarch or potato starch, sometimes with a soy-based marinade, producing a thicker, crunchier coating. Both are delicious, but they are fundamentally different techniques.
Your Tempura Journey Starts Now
Tempura is one of those techniques that rewards understanding over memorization. Once you grasp why the batter must be cold, why the lumps matter, and why oil temperature is everything, you can adapt to any situation and any ingredient. Start with the basic recipe and the practice exercises in this guide, and within a few sessions, you will be producing tempura that rivals your favorite Japanese restaurant.
The biggest mistake home cooks make with tempura is overthinking the batter. Keep it cold, keep it lumpy, and keep it moving. The second biggest mistake is crowding the pot. Give each piece room to fry properly, and skim the oil between batches. Master these two principles and everything else falls into place.
For more Japanese cooking techniques and recipes, explore our guides to essential Japanese dishes, gyoza, and Asian cooking techniques. And if you are building out your pantry, our complete guide to Asian cooking ingredients will help you stock everything you need for tempura and beyond.

Mei Lin Chen
Mei Lin Chen is an Asian food writer and recipe developer. Melbourne-raised and London-based, she has spent over a decade exploring the rice paddies, hawker stalls, and home kitchens of South-East and East Asia. Her recipes balance traditional technique with everyday practicality.